
We use affiliate links and may receive a small commission on purchases.
Read more about us.

When scientists wandered into the Wonderwerk Cave in South Africa located on the edge of that nation’s mysterious Kalahari Desert a few years ago, they expected to contribute to the world’s understanding of evolution. But surprises awaited. They found evidence of early man. Homo erectus to be specific.
They also found what’s been called an important milestone in the evolution of fire making. According to the “Huffington Post”, the one-million-year-old discovery proved “the earliest known evidence of controlled use of fire.”
Scientists say that this particular fire-making discovery has the potential to change everything about human evolutionary history as we know it.
Exciting? You bet.
Whether you’re a recreational camper or consider campfire making more art than science, if new discoveries about ancient aspects of fire making interest you, news that man has made fires for millions of years longer than previously thought could be pulse-elevating.
In our opinion, there’s absolutely nothing simple about making a campfire. In fact, you’ll finish reading this and wonder how you managed to look upon a campground fire as nothing more than a pleasant way to toast marshmallows on a long branch. Whether you want to learn to make a safe one or expand your fireplace-making education, we’ve got you covered on all fronts.
A Homo erectus walks into a cave…
We know from the most recent research that the timeline of fire making has officially moved from 200,000 years ago to one million years ago. In fact, members of Homo erectus societies were so dependent upon building campfires, they fractured ironstone to make tools necessary to spark fires long before previously-confirmed eras.
Archaeologist Michael Chazan’s University of Toronto team proved that temperatures of 1300 degrees F were achieved for the purpose of warming cave inhabitants, providing a cooking source and even keeping nocturnal predators away, so those primitive tools were worth their weight in gold.
The ability to build a campfire, agrees Harvard anthropologist Richard Wrangham, led to cooking meat, which triggered a major brain development explosion that science is just beginning to explore. Cooking meats over open fires not only led to accelerated brain development but mortality rates fell, too.
As calorie-hungry brains and bodies grew larger, guts shrunk. The brain you’re currently using to explore the mysteries and evolution of campfires was greatly aided by Hominids previously considered nothing more than knuckle draggers who grew extinct.
A little respect, please. Had Homo erectus not built fires to cook meat, you might not exist today.
Impressed? You should be.
Ready to build your fire?
Your how to build a campfire supply list
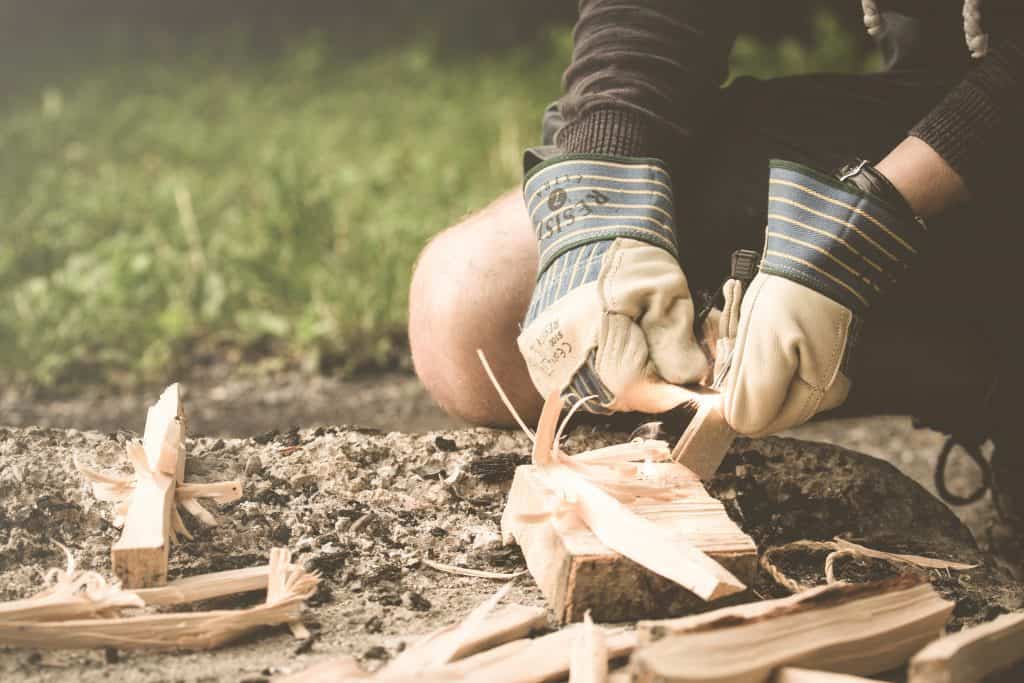
If your first instinct is to load up your car with every advertised camping gadget known to man because you’re of the belief that you need lots of bells and whistles to build a great fire, crumble up that list and use it as a fire starter.
We’ve taken the liberty of cobbling together two supply lists if items recommended by Your Camping Guidebook and Camping With Gus because they show how few tools you need to build a campfire.
- Ax to cut logs
- Campsite permission to build a fire
- Fire starter (we recommend dryer lint!)
- Firewood
- Kindling
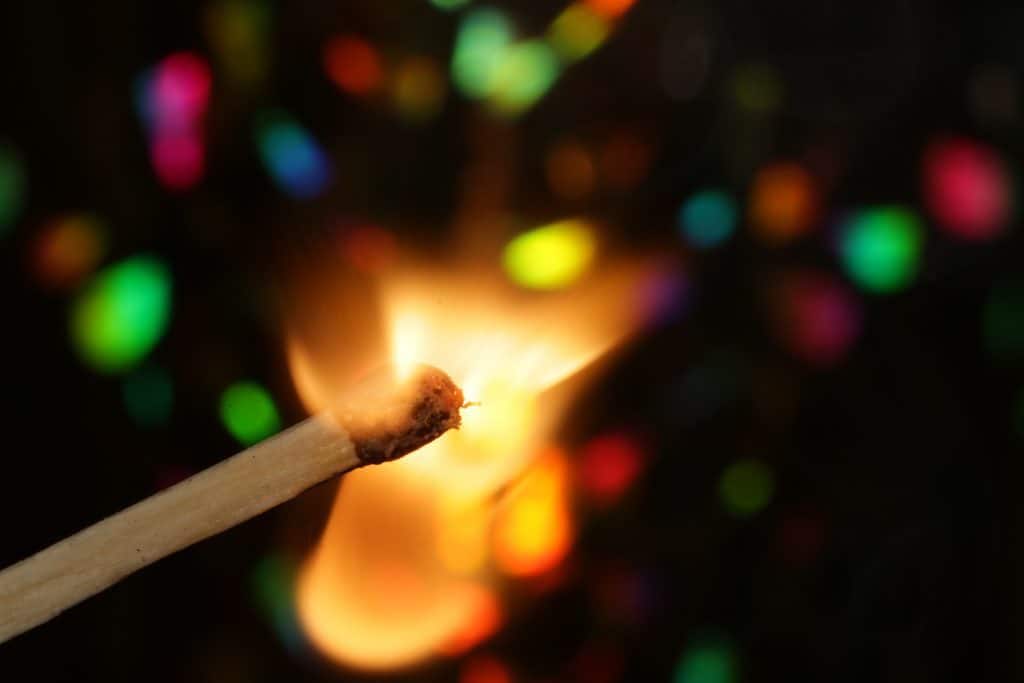
- Lighter or matches (preferably waterproof)
- Newspaper
- Tinder – Nope, not the one you are thinking of 😉
- Shovel
- Water supply
- Water container
It’s hard to see the impact but you should not move your firewood from location to location. This prevents non-native pests from infesting the forests. The pests destroy the trees and shrubs and you might even lose your favorite campground. Have a look at this poster by the California Firewood Task Force to learn how to handle your firewood the right way.
Did you hesitate when you read “dryer lint”? It’s not a prank. There are plenty of ways to use dryer lint as detailed on this 47 Curated Uses web page published by Sheri Asselin at Pinterest, but one should interest campers most for several reasons.
Stuff dryer lint into empty egg cartons, pour wax over sections and allow these pods to harden. Pop out a few and throw them into your gear bag. This fire-starter isn’t just the ultimate in recycling; these DIY pods weigh next to nothing so you can carry lots and they won’t weigh you down.
Stay safe and sane following this set-up and campfire safety rules
Lots of articles have been written about safety rules and regulations for making a campfire and since you wouldn’t want to cap your relaxing experience with a trip to the ER, think beyond the first aid kit since making a campfire should be at the top of your safety first pledges.
Sure, you’re toting a first aid kit. And you’ve got your smartphone. But not so fast know-it-all. We want you to return home relaxed, happy and with no regrets so we offer you the following 8 safety tips:
- Safety tip #1: As soon as you get to your destination, ascertain whether or not you can get a cell signal. You’re not looking for trouble, but in case it looks for you, knowing where to go to get a signal could save a life.
- Safety tip #2: Your tent should be erected a respectable distance from your fire (at least 8- to 10-feet). The Royal Society for the Prevention of Accidents reminds campers that the ability to escape a fire without tripping or climbing over anything is critical.
- Safety tip #3: At any given time there are 100 lightning strikes per second on Earth. According to the National Lightning Safety Institute’s camper and hiker safety page, even rubber tires may not protect you if you escape to your car in a lightning storm, so don’t camp in this weather. Period.
- Safety tip #4: Sealing up your tent to keep out inclement weather has led to more cases of carbon monoxide poisoning than most people realize. Blazing fires can contribute to this silent killer, triggering symptoms like headaches, dizziness, nausea, vomiting and chest pain. Always vent your tent. Yes, we meant to rhyme that.
- Safety tip #5: Never throw plastic containers into a fire. Instead, bag them up and carry them away. Lots of campgrounds now provide recycle bins for containers. Aerosol cans and pressurized containers can turn into hot projectiles so fast, your family may not have time to react before they get burned. Keep these combustibles far away from your fire.
- Safety tip #6: If you’ve built a pit to contain your camping fire, that doesn’t mean you can simply walk away and assume you’ve done your job. Camping professionals recommend a 5-foot perimeter of soil to separate the pit from your other camping territory as well as a metal ring. Read more about constructing a fire pit ahead.
- Safety tip #7: Because the focal point of your excursion is building that campfire, items contained in a standard first aid kit may not be sufficient. Beef up your kit with products made to treat burns in the interest of campfire safety.
- Safety tip #8: If a campfire safety issue arises for which you are unprepared, these unusual items can treat and soothe burns in a pinch: a dollop of honey, a paste made of oatmeal and water, pre-boiled and cooled tea bags, gauze that’s been soaked in milk and (surprisingly) toothpaste.
Don’t want to build a conventional campfire? Build a fire pit.
We won’t call you a lazy fire starter if your only objective is to prove to the family that you are as capable of roughing it as you are at negotiating a good salary deal. But some fire builders have loftier aims. Interested in building a fire pit at home or in the wild?
Some campgrounds have pre-dug fire pits that serve campers nicely, so the manual labor is done. Can’t find a ready-made crater when you reach your destination? No worries. Dig your own pit with that shovel and ax you brought to the campground.
One of the best pit tips we found is this one: tote a large metal bowl or the wok you haven’t used since Bush ‘43 was elected to your campsite. Convert it to a fire pit. Dig a shallow hole. Set the bowl into it and use your favorite materials to build a fire inside the metal vessel.
On the other hand, if you want the real experience or your goal is to build a pit in your yard, turn to HGTV.com if you’re serious about this backyard enterprise.
HGTV turned to a prestigious authority to get the skinny on fire pit engineering: the American Society of Landscape Architects. Their designs are sophisticated, efficient and diverse. Borrow ideas freely.
On the other hand, you may not want anything this sophisticated. So, follow the lead of the folks at This Old House. They’re happy to help you build a basic fire pit at home or on your camping trip.
No time to surf the internet for instruction? Follow our “Cliff’s Notes”:
10 Basics of pit building in your backyard
- Estimate two days’ worth of work and around $500 for supplies. Borrow a shovel and stone chisel.
- Check with local authorities to make sure there are no ordinances against fire pits in your neighborhood.
- Pick an area in your yard that’s ample distance from overhanging trees and flammable structures.
- Sketch out your camping fire pit by hand. If you’re 3D-program savvy, do it on the computer. An ideal pit size for beginners is between 36- and 44-inches diagonally.
- Take your sketch with you when you shop for cast concrete blocks designed for pit making. Got questions or need advice? Ask a sales associate for help.
- Purchase blocks, masonry adhesive and enough steel banding to line the pit’s interior circumference at its base.
- Dig a shallow circle in the yard that’s deep enough to start laying bricks below ground level for stability.
- Seat the steel band before filling the circle with at least 6-inches of drainage gravel and tamp it down.
- Use masonry adhesive, a level, and chisel to build a 12-inch-high circular wall.
- Allow the mortar to set thoroughly before you build your first pit fire.
Think building a campfire pit is—well, the pits?
No worries. Let’s move on to a conventional campfire because there’s plenty of variety when it comes to this seemingly no-brainer construction process. That stated, campfire aficionados know there are myriad types of configurations, so what’s acceptable to one camper may turn off another.
We’d like to make you a smarty-pants when it comes to how to build a campfire so we’ll briefly describe the most popular styles of campfires you can learn to make yourself.
Ready to rock your campfire?
Check these out!

6 Fire-starter ideas to get things going
Having figured out which of the aforementioned campfire building styles suits your skills and matches the availability of materials at your location, it’s time to explore fire starting materials guaranteed to get all of that kindling aflame.
We see you shaking your head and muttering, “Uh, Dude, what’s the matter with matches or a lighter?” But why would we state the obvious where there are so many other exotic ways to light a campfire—especially if you’re out to impress?
Flint and Steel Fire Starter

Practicing making fire from flint and steel is best done before your woodland adventure so you don’t embarrass yourself and wind up resorting to a match or lighter to get things started.
You’ll need a piece of flint large enough to grasp firmly, plus a piece of tempered high-carbon steel to do the job
It helps to use a char cloth, too. Never heard of a char cloth? Turn to Campfire Dude for your tutorial. Make one of these before you leave home, bag it and bring it out when you’re ready to start the process.
First, depress a finger into a handful of kindling at the center of your fire area. Shove the char cloth into the hole. Surround these materials with a small teepee of twigs. Hold the flint firmly and strike the steel quickly at around a 25-degree angle.
Impatient campers: suck it up.
This will take time. Keep at it and just when the urge to get out a match strikes, you’ll be rewarded with the spark you generated.
Blow it to grow it (the flame, that is) and as soon as you’ve got a respectable campfire started, pat yourself on the back. If your hands are up to it!
Hand-drilling Fire Starter

Expect to take many deep breaths when you try this fire-starting methodology because it’s equally labor-intensive. But if you find yourself marooned without a match or lighter fluid, you’ll be glad you mastered it.
Get your hands on a piece of hardwood. Make a notch using the Swiss Army knife you got for your birthday. Enlist a second stick to act as your friction producer and then test the calluses on your palms as you roll the stick back and forth (as fast as you can) to set up the friction that triggers a spark.
The moment you see a tiny ember, accelerate your pace while blowing on it to increase the fire’s capacity. Once confident that the flames aren’t going to disappear, add kindling and then slowly add firewood.
Hand lotion anyone?
Steel Wool and Battery Fire Starter

We love this method because a couple of steel wool pads retrieved from your under-sink washing supplies weigh next to nothing, so toss as many as you like into your backpack so you don’t add to the weight of your supply kit.
Your first task? Build a small mound of kindling before you get your fire-making on because you won’t have much time to do this once you’ve sparked a flame.
Remove the battery (it’s fresh, yes?) from your flashlight and use it as your energy source, rubbing the steel wool pad briskly across the battery terminals to spark the beginnings of a flame. Then get that flame to your pre-built tinder pile as quickly as possible to ignite a larger fire.
Does this method come with risks? It does. Which is why a can can come in handy if you attempt this trick.
Glass, Cans, Water and Ice Fire Starter

Remember those 8th-grade science experiments or scouting badge-worthy skills? There’s a good chance you were asked to build a fire without matches using a technique that’s been around forever. You simply place a magnifying glass over kindling, hold it there and sun rays spark the flame.
Don’t want to spend hours holding a magnifying glass over kindling? Rub the bottom of an empty soft drink can with a chocolate bar until reflected light rays spark a pile of adjacent kindling.
Using the same physics principle, transform a transparent bottle of water or chunk of crystal clear ice into a makeshift reflector lens. Suspend either over kindling, and use the sun’s rays to trigger your flame.
What are your chances of success if you try the aforementioned techniques that require the sun’s rays to start your fire in February? Excellent if you live in Houston. Not so much in Minneapolis, but that shouldn’t stop you from trying if the sun’s out!
Bow Drill Fire Starter

If the thought of rubbing your palms together quickly–and for an extended period of time to raise a spark–sounds terribly painful, try the bow drill method. You’ll need scraps of wood and string plus a flat chunk of wood into which a notch has been drilled. Insert a branch into the notch and stabilize it with a rock. Next, make a “bow” by bending a stick and tying a piece of string to either end.
Refer to this article if you need photos to guide you through the process. The action begins when you loop the string around the stick and use one hand to move it back and forth while the other hand braces the base.
Once a respectable amount of smoke starts billowing from your efforts, add kindling and keep blowing on the flame until it reaches the fire size you desire to start adding more logs to the pile.
Chemical Combustion Fire Starter

Recall the volcano you built as a kid–the one that exploded all over your mom’s kitchen table? This fire-starting method could remind you of that day, but you’ll be taking this experiment to the ground rather than a kitchen counter.
You’ll need to bring with you to your campsite two items: Potassium permanganate crystals and glycerin.
To activate these ingredients, build a small nest of tinder and top it with a large, dry leaf or piece of paper. Sprinkle a spoonful of potassium crystals on the leaf or paper and dribble a couple of drops of glycerin atop the crystals.
Your creation is going to result in a little explosion so you want to be fast on your feet when these agents meet up. It won’t take long for the kindling to start flaming, so have graduated sizes of branches and logs on standby to add to your campfire start.
How to keep your campfire going longer and stronger
No eye rolling, please, as we introduce the topic of keeping a campfire going longer and stronger.
Your response is “Pile on more wood, dude.” Obvious. But not the answer you seek if you hope to stay warm on a long, cold night.
Is it possible to build a self-feeding campfire? You bet. And one of the best ways to set up an efficient log feed system was invented by former biology teacher Bob Hansler. His log feed system is profiled in “Makezine” and it’s totally ingenious.
Begin by referring to our aforementioned steps for building a “Lean-to” campfire because this configuration is at the heart of Hansler’s concept. Now, envision a double lean-to merged at the base and you’ve got the gist of how this system works. Two long poles on either side of this V-shaped set-up act as “feed rails.” One look and you’ll agree that this configuration is sheer genius.
You stack cut lumber (cut to relatively equal lengths) and arrange them along either side of the V. Physics takes over. Each log slides down this primitive conveyor belt as bottom logs burn. According to Bob, this set-up can keep a fire burning for 14 hours.
How do those feeder poles stay stable? Courtesy of large, strategically-placed bracing branches plus rocks so logs don’t stray from their positions on that stack until it’s their turn. If you’ve been longing to camp out when the weather is cold but refused to freeze your logs off, welcome to the world of winter camping, fire builder!
9 Tips for achieving a longer, slower campfire burn
- Use a substantial amount of good, durable kindling to start the fire.
- Expand your kindling universe: Wood, paper, dryer lint, newspapers, cotton swabs, dried leaves, cattail fluff, birch bark, twigs, broken tree branches and other dry organic materials will work.
- Lace kindling into your firewood structure so it repeatedly “re-starts” and re-energizes the process.
- Double check your firewood for moisture. Avoid using branches from recently chopped trees.
- If you don’t have access to seasoned firewood, look for logs that have been drying out for months or years.
- Pair hardwoods like oak and birch (they burn hot longer) with softwoods (pines and firs) that burn faster.
- Remember that oxygen and ventilation are as important to a campfire as are kindling and wood. The ideal long-burning campfire requires ventilation on all sides so sufficient oxygen feeds the flame. A breeze helps, too.
- If the forecast calls for rain during your camping experience, fill a large container with kindling before the rain begins so it stays dry and ready to start your fire. A tarp makes a handy log protector, too.
- When in doubt about the amount of moisture in hardwoods or softwoods, split the logs down the middle to see the extent of the water’s penetration. Once split they will dry faster as well.
How to make a little magic once your campfire is up and running
Having dragged your unimpressed teenager away from his video games and the electronic trappings that command his attention 24/7, it’s incumbent upon you to use alchemy to liven up the campfire experience. We have it on good authority that he may even use his cell to post your handiwork on his Facebook page.
Here’s how to pump up your fire show so it delights and mesmerizes everyone around the campfire:
- Change your campfire flame to neon blue by tossing a handful of copper chloride onto the fire.
- Borax will turn your fire light green or toss alum onto your fire if you want to produce dark green flames.
- Strontium chloride produces awesome red flames, so if you’re telling ghost tales, you’ll have visual drama to accompany them.
- Impress the Barney crowd by turning your campfire purple by adding potassium chloride to the fire.
- Pay tribute to princesses at the campsite by turning flames pink with lithium chloride.
- Table salt is capable of producing orange flames and Epsom salts will turn your fire white.
- Toss sugar or powdered coffee creamer into your blaze to produce colorful dancing sparks.
- Iron fillings can trigger a gold show while powdered aluminum or magnesium turn flames silver.
Does it matter how much of this stuff you throw into your fire?
A little goes a long way and you’ll err on the side of caution if you start with a little and build up to something akin to Disney fireworks.
Find all of these ingredients at swimming pool supply stores, supermarkets and hardware stores or order from Internet resources. Science Fair-approved suppliers make sure chemicals have been tested and found safe. Check this site for the supplies you seek.
It goes without saying that you need to factor in the wind’s direction before you toss those chemicals into the flame, right? And cook first so you don’t wind up with blue burgers.
Can’t get enough of this topic? We refer you to an old standby, “Popular Science” magazine, for more ideas.
Dos and Don’ts: How to put out a camp fire
Taking a camping trip is a great way to ignore household tasks like laundry, loading the dishwasher and scrubbing bathrooms. But that doesn’t mean you’re invited to leave your temporary home-away-from-home looking as though you were raised by wolves.
You owe it to your conscience, the campers with whom you share this sacred space and roaming wildlife to clean up after yourself. Thus a big part of learning to make a campfire is learning how to put out a campfire, too. This list of dos and don’ts will help you learn how to put out a camp fire properly:
Dos:
- Reduce your fire to ash so efficiently, there are no coal chunks or burned wood fragments left in the area after you thoroughly turn over organic matter with a stick.
- Dump water on your coals, but step out of the line of fire because you’re going to release steam if coals are still hot.
- Continue to add water to the area until you can comfortably scoop all of the remains of your fire into a container, and then walk the remains down the trail, spreading them out as you go.
- Feel free to leave logs you won’t use anywhere else for the next camper.
- Take a creative approach to putting out your fire. We’ve heard about making grenades of water-logged sand and lobbing them at the fire until it’s out!
- Discover other methods of learning how to put out a camp fire. Toward that end, we can’t resist sharing this video with you.
If you don’t watch this a few times, you need to lighten up!
Don’ts:
- Stick your hand into the area to verify your suspicions. Instead, lower the back of your hand over the area to identify hot spots. Can’t resist poking around? Invest in a Grill Armor 932°F Extreme Heat Glove. This dude has Kevlar in the weave. ‘Nuff said?
- Wait until the last minute to extinguish your fire. Give the effort at least half an hour; more is better.
- Leave your fire in mid-burn assuming pouring rain will extinguish it. Mother Nature isn’t responsible for your neglect. Embers can burn deep.
- Hesitate to dump mud on a fire if you’ve had the misfortune to find yourself in a rainstorm.
- Leave without turning over rocks! Yes, embers can hide out there.
How important is the campfire you build?
It’s just a simple act—a get-away for you, friends and/or family that remove you physically from the pressures of daily life. But we urge you to re-think your perspective about “the simple campfire” by considering what the Smithsonian has to say about why the campfire experience is so important.
How important?
Stories told around campfires may the reason human cognition got such a great jumpstart and how campfire story time actually “got us to where we are today.”
Smithsonian writer Rachel Nuwer tackled this weighty proposition a few years ago and unearthed amazing conclusions.
Using heavily-researched documentation published in “Proceedings of the National Academy of Sciences,” Nuwer reports that our ancient ancestors (perhaps even Homo erectus cited earlier) worked during the day and socialized at night, like we do today.
Campfires were places where relationships deepened, songs were sung, stories told and man’s understanding about those we call family was shaped. Generation after generation. In many respects campfires ultimately impacted cultural patterns.
What went on that we can relate to now? Well, gossip was a big deal when campfires were lit, so while primitive man hadn’t the wherewithal to dish about the Kardashians, they were adroit at spreading rumors and innuendo, insists Anthropologist Polly Wiessner. Her research on the topic of campfire as community-builder is groundbreaking.
Wiessner notes that about 80-percent of all campfire chats thousands of years ago involved chats about other people, religion, adventures, metaphysics and the occasional woolly mammoth tale.
Remove the prehistoric creature from the equation and you are likely to conclude that nothing has changed much. Flickering flames and dim light contributed mightily to imaginations, as did the moon and stars. Even facial expressions change when people gather around a campfire.
Should you have high expectations for your campfire experience? The answer is yes. Even the most credentialed shrinks aren’t always as capable of unleashing conversations and feelings as does time around a roaring fire. Campfires trigger dreams, imagination and create an atmosphere of intimacy can’t be replicated anywhere else.
What campfire stories will your group tell?
There is no shortage of websites eager to give you advice on what to do when you sit around a campfire. One of the best resources for storytelling, an activity that’s too old to date, is American Folklore.net.
On this site, find story starts and ideas that range from funny to seriously scary. This comprehensive site sorts out campfire story starts by category: children’s stories, campfire songs, funny ghost stories, spooky campfire stories and the one that offers the best guarantees of nightmares: scary tales.
For those who are spooked enough already by the prospect of sleeping in the wild, tap the website’s folk tales, kid’s fairy tales, fables and campfire-appropriate jokes, riddles and tongue twisters.
Looking for anything other than hair-raising tales? The Camping Family website has you covered. Adopt any of the clever campfire ideas on this site or come up with your own entertainments.
What’s to eat?
Having taken care of your basic set-up and fire-starting needs and even entertained everyone around with tales appropriate for your age group and fear level, it’s time to chow down on some of the yummiest campfire-appropriate recipes on the planet.
Your campfire experience won’t be half as authentic if you don’t roast and toast so no copping out and bringing a cooler full of sandwiches! And since there are no X-Boxes around to babysit, enlist the help of the kids to prep meals.
Jessica Sanders is a pro at campfire cooking. Her Reserve America suggestions for easy-to-make dishes couldn’t be simpler. Even picky eaters and vegetarians find yummy things to eat courtesy of her campfire-friendly recipes.
We borrowed a handful to get you started and alphabetized them for fast retrieval:
- A is for apples: Make campfire-style desserts by sprinkling sliced apples with cinnamon and nutmeg and toasting them over the flame.
- B is for beans. A campfire without them? Impossible. Add canned black beans to a cooking kettle if you’re preparing a slow-simmering stew. Go big on Mexican spices to whip up a thick and hearty main dish.
- C is for corn dogs. Why go for ordinary wieners when you can pre-wrap frankfurters in biscuit dough at home and bake your savory campfire dogs to perfection. Besides, you avoid having to bring buns along.
- C is also for chicken. If you worry about salmonella, bring chicken to your campfire fully frozen and defrost as you roast on a grate. You can also slice chicken into strips, grill veggies and serve on taco shells with sauce.
- N is for nuts. Don’t bring roasted nuts along. Instead, toast your own with a little cooking oil and spices in a cast iron skillet.
- P is for peppers: Stuff peppers on the fly if you pre-mix the filling. Remove the tops and fill the peppers before roasting them over the fire.
- P is also for pineapple: Turn these into slices of heaven when shaped into thick slabs and then toast them like marshmallows, turning every few minutes, until your fruit is grilled to perfection.
- P is for potatoes, too. Bake potatoes in foil and when they’re done, pass around cheese and chopped, roasted veggies to make loaded potatoes. Save leftovers for breakfast; chop them up and sauté with eggs.
- S is for steak: Flame-grilled steak is meat Nirvana. Pre-marinate your cuts before you leave home. But don’t flip your steak, says Fine Cooking.com’s Steve Johnson! You could disrupt the carmelization process. Instead, cut into the meat to verify whether it’s done to your liking.
- S is also for s’mores! This tasty sandwich of graham crackers, marshmallows and chocolate is standard fare around campfires. Don’t leave fixings at home.
- T is for tomatoes: Cooked tomatoes release antioxidants, so get a nutritional boost by roasting tomatoes on a grate over your fire. Serve them as a side dish or mix ‘em into a stew kettle with other ingredients.
5 Games people play when sitting around a campfire
The Escape Adulthood website features a paper airplane logo and an invitation to “break free.” In keeping with that theme, we wrap up our dissertation on all-things-campfire related with five games to play that are likely to add to the memories you’ve built during your trip.
- Truth or Dare. No, it’s not Madonna’s philosophy but a game that’s been around since 1712. Follow these easy rules: Propose a question. Ask each person to tell the truth or risk a dare by making up an answer. Best played after the kids are asleep, things can get hotter than a bonfire if your questions are controversial enough.
- Telephone. You did it in study hall. You do it when you’re at the movies. Now, play telephone at your campsite by whispering a short message to the person on your right. She whispers it to the person on her right. By the time it gets to the last person in the circle, it’s anyone’s guess whether the message matches the original one.
- 20 Questions. One person spots an object within view of the campfire but keeps it a secret until 20 questions are asked by everyone on hand. The goal is figuring out the mystery object. No cheating. If everyone isn’t skilled enough to guess the correct answer, you have a perfect right to declare them losers before revealing it.
- There Once Was a Skunk: This game tests everyone’s short-term memory. This sentence starts the game: “There once was a skunk.” Player 2 adds a sentence (e.g., “There once was a skunk and he stunk”). Player 3 jumps in with something like “There once was a skunk and he stunk so we put him in the trunk.” Rhyming isn’t necessary but it makes this game more hilarious–especially for kids.
- Name that tune. Set up an MP3 player with speakers and a queue-full of short snippets of recognizable songs. Play each tune fragment. Whomever figures out the song title first wins a point. Keep going. Whomever collects the most points wins.
Will winning these games make or a break a campfire experience? Hardly. But it can add to those precious memories that stay with families forever. So if you insist on naming the biggest winner of all, you’ll have to accept that honor if you’re the person who came up with the brilliant idea to get away and light a campfire in the first place!
Wow. You’ve certainly provided comprehensive information on building a campfire. Very interesting. I’ll write a blog soon and link to your site. Thank you for finding me.
Author of Shepherd, Potter, Spy–and the Star Namer and Digging Deeper Into HIStory. PeggyConsolver.com
Thanks for your kind words Peggy. I saw that you will be talking about archaeological dig at Shiloh in your coming posts, this is going to be interesting and I can’t wait to see those articles up!