
The Ultimate List of Make Ahead Camping Meals
by Hayley Gibson
Have you ever turned up at your campsite late in the afternoon, used all your energy putting up the tent (perhaps in the drizzly rain) and finally sat down for 5 minutes before cries of “What’s for dinner?!” ring through the air?
Have you then had to prepare an entire meal from scratch to feed the hungry tummies in the camp, wishing there was an easier way?
Worry no more.
We’ve created this ultimate guide packed full of easy make ahead meals for camping, saving you the stress of whipping up a culinary delight on the camp stove.
Covering breakfast, lunch, dinner, snacks and (of course) dessert, we have a range of recipes for you to choose from that are easy to make at home and tuck into around the campfire.
🎲 Meal Randomizer 🎲
Can’t decide which recipe to try? Let our randomizer pick one for you! Just select a meal category below and we’ll instantly scroll you to a surprise recipe.
Click any button multiple times to see different suggestions!
The List
Breakfast
Lunch
Dinner
- Make Ahead Camping Skewers
- Chilli
- Make Ahead Foil Packed Dinners
- Shepherd’s Pie
- Mac N Cheese
- Make Ahead Chicken Enchiladas
- Paella
- Creamy Mashed Potato
- Make Ahead Sausage and Potato Foil Dinner
- Pulled Pork
- Make Ahead Campfire Pizza Log
- Homemade Burgers
- Make Ahead Slow Cooked Beef Stew
- Salmon and Veggies
Dessert
Breakfast
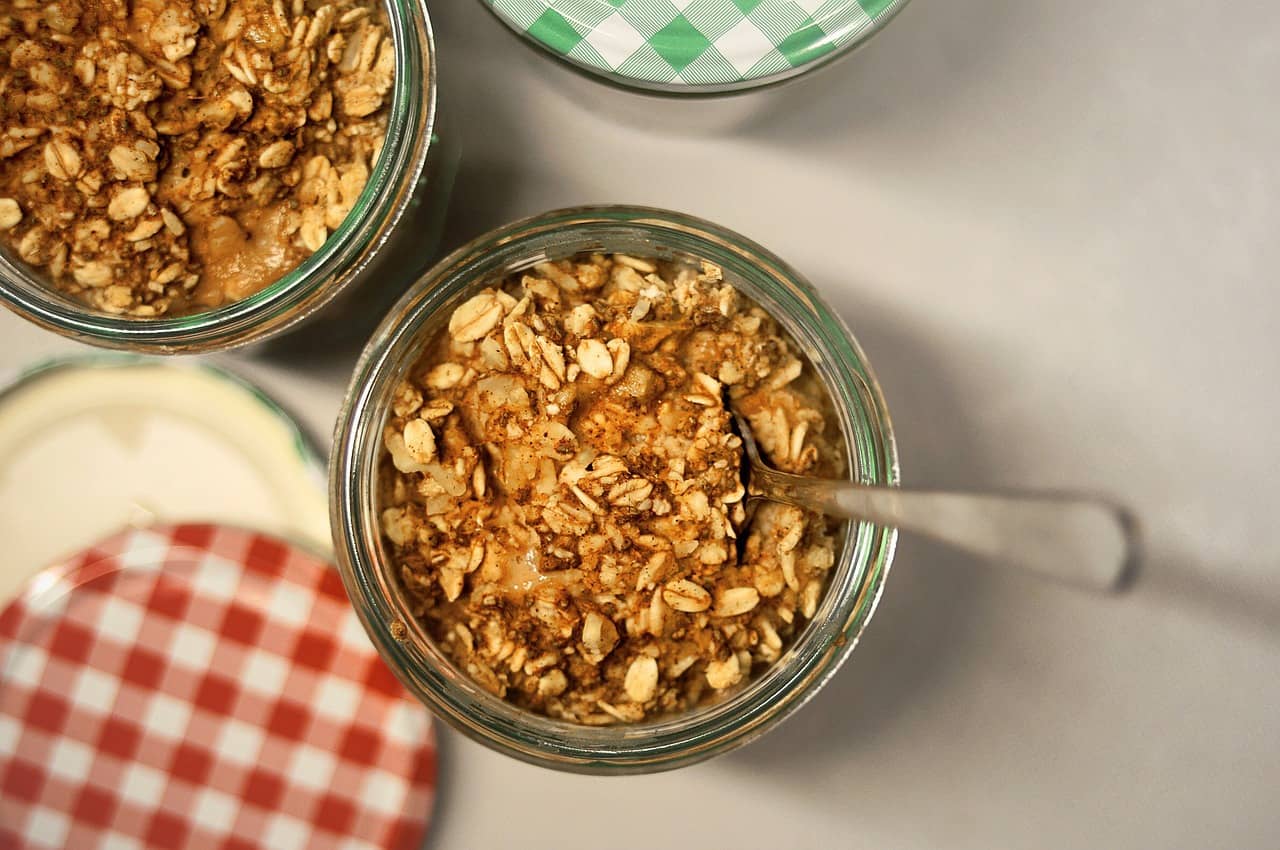
1. Overnight Oats
A classic mason jar meal, overnight oats are a great option for a make ahead camping breakfast. They are quick and easy to make at home and full of essential vitamins and nutrients. Another bonus is that they don’t require any heating up once you arrive at camp – just tuck right in! There are a plenty of optional ingredients you can add to this one to suit each person’s taste – we’ve listed a few below but let your imagination run with this one.
Great for: Early risers – a filling breakfast that will keep you going till lunch time.
Campers without a stove/fire-pit looking for breakfasts that require no re-heating.
Make-ahead prep time: 5 minutes.
Serves: 2
- 1 cup rolled oats
- 1/3 cup Greek yogurt
- 2/3 cup unsweetened milk
- 1/2 teaspoon vanilla extract
- 1-2 tablespoons maple syrup to taste (alternatively use honey)
- 1-2 tablespoons chia seeds
- Chopped walnuts
- Chopped chunks of dark chocolate
- Diced fruit (e.g. banana, strawberries, kiwi, blueberries)
- Coconut flakes
- Peanut butter
- Jam
- Mix the oats, yogurt, milk, vanilla, maple syrup and chia seeds in a bowl, then spoon into individual mason jars. Layer with any chosen individual toppings.
- Refrigerate overnight.
- Your overnight oats are ready to eat!
Use-by: Store in a cool bag and they’ll be good for up to 5 days.
Top tip: Replace glass mason jars with plastic containers for a lighter storage option.
Check out these recipes from Wholefully for 8 variations of overnight oats you can try.
2. Banana Bread
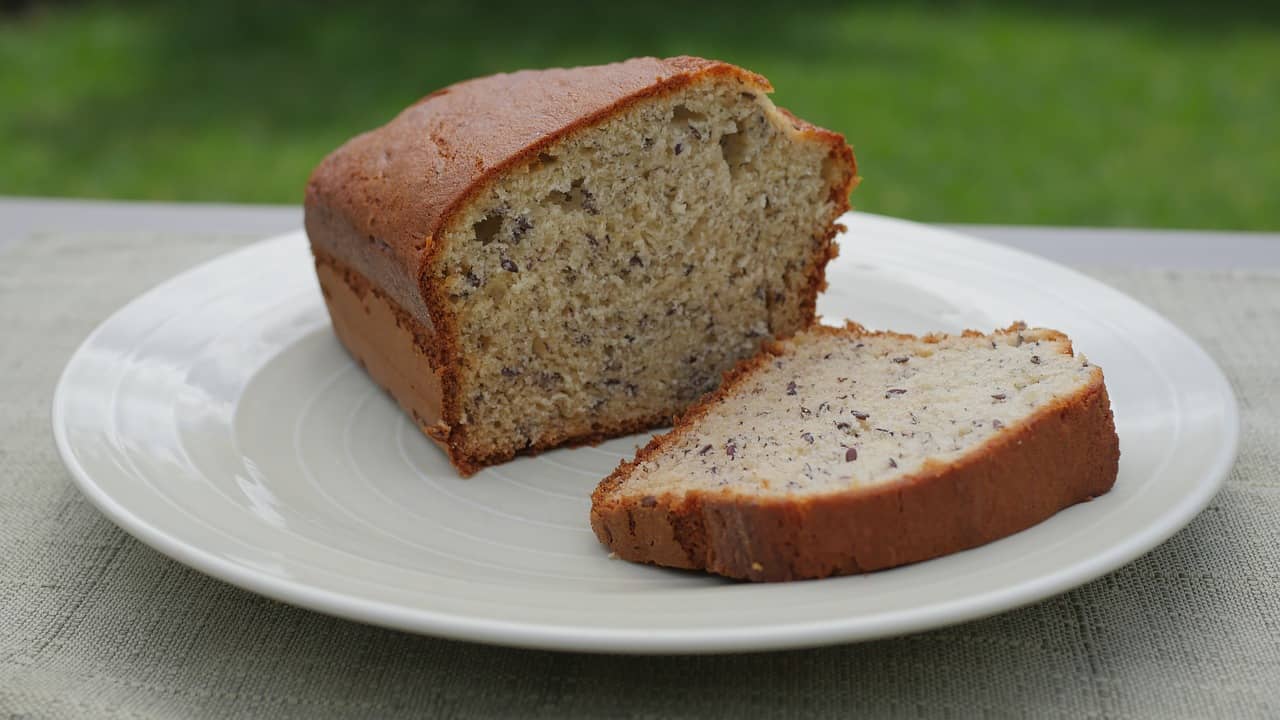 This versatile loaf is the perfect make ahead meal for camping as you can have it for a tasty breakfast, a quick snack or a delicious dessert. Personally, we love it as a breakfast option. Gather your over-ripe bananas and let’s get cooking!
Great for: Families and groups – an excellent sharer meal.
Hikers – a great breakfast/snack option and easy to carry around.
Make-ahead prep time: 1 hour 10.
Serves: Varies depending on slice sizes – this makes one loaf.
- 2-3 very ripe bananas, mashed
- 1/3 cup of margarine
- 3/4 cup sugar
- 1 large egg
- 1 1/2 cups all-purpose flour
- 1 teaspoon baking soda
- Preheat the oven to 350°F (175°C). Grease a 4×8-inch loaf pan.
- Cream together the margarine and sugar until smooth. Beat in the eggs, followed by bananas. Mix in the flour and baking soda.
- Pour the batter into greased loaf pan and bake for 50-60 minutes, inserting a tester until it comes out clean.
- Allow to cool for a few minutes then remove loaf from pan to cool completely.
- At the campsite, eat cold or throw on the campfire grill for a toasty treat.
Use-by: Lasts for 1-2 days at room temperature. Will keep for about 1 week if refrigerated.
Top tip: Banana bread doesn’t have to be stored in a cooler which can save space for other meals.
3. Pre-Made Breakfast Burrito
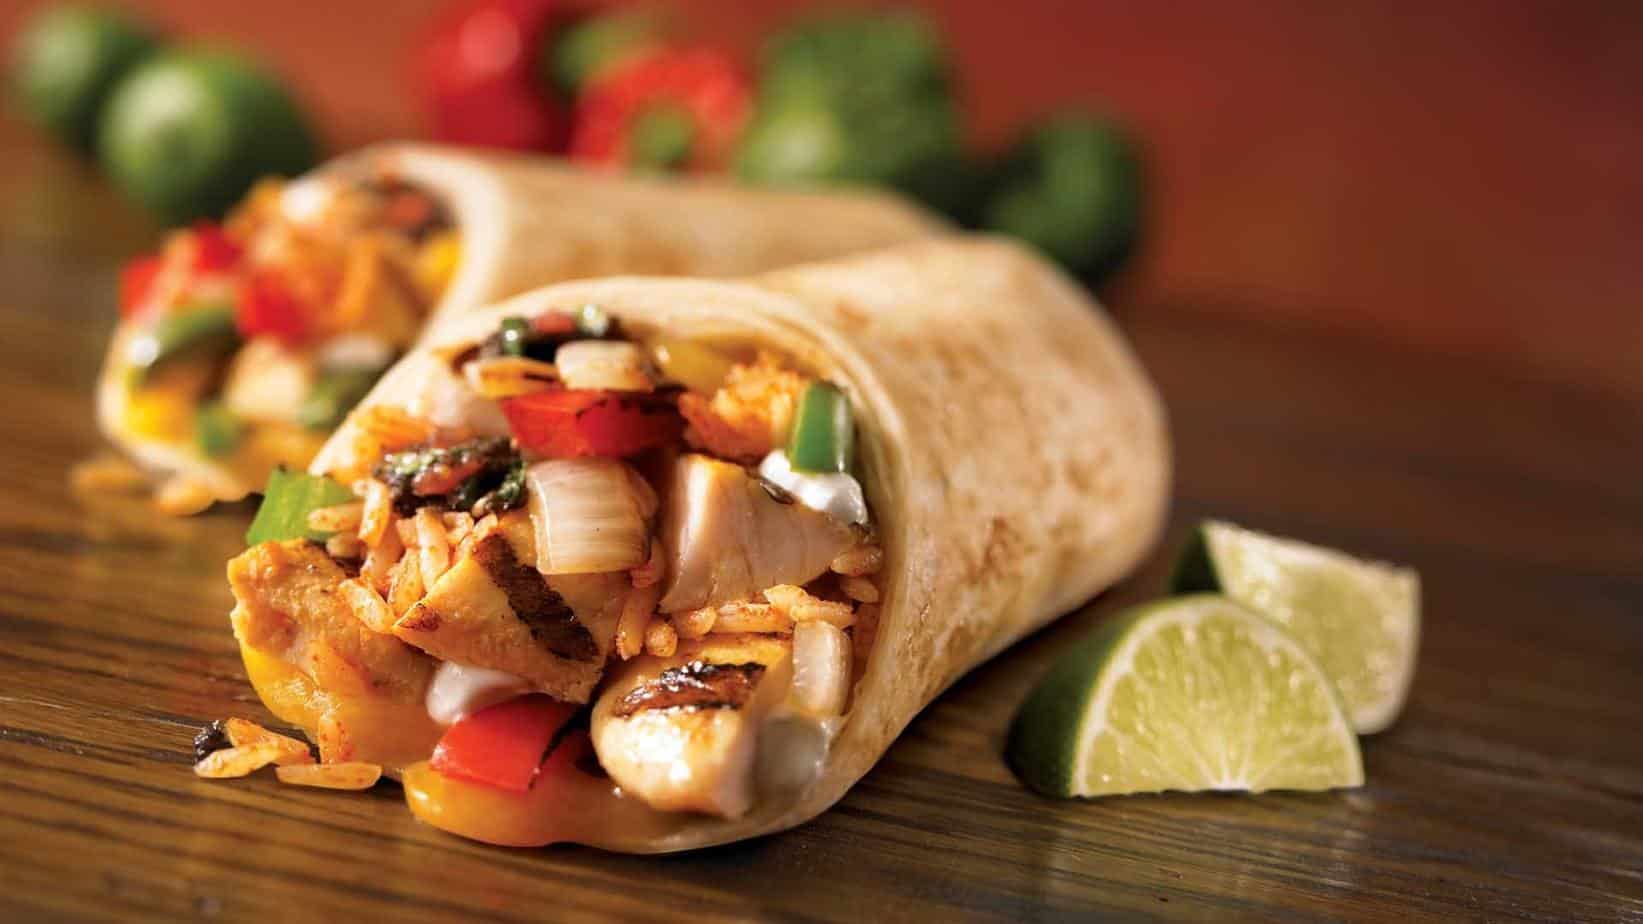 If you crave a cooked breakfast when camping, look no further than this ultimate breakfast burrito. You can choose from a variety of ingredients, adding as many or as few as you want depending on your taste.
Great for: Groups of people with different preferences – can tailor-make each burrito.
Couples – easy to prepare for two people.
Make-ahead prep time: 30 minutes.
Serves: As many as you require.
- Eggs (scrambled)
- Bacon
- Sausage
- Chicken
- Ham
- Pepper
- Onion
- Mushrooms
- Black beans
- Potato
- Tomato
- Hash brown
- Cilantro
- Cheese
- Sour cream
- Simply cook-up all the ingredients you choose from the list, roll up in flour tortilla’s and wrap them tightly in tin foil.
- They are perfectly fine to be stored in the freezer before transferring to your cooler.
- Re-heat by placing the foiled burritos on a grill over the fire or next to hot coals. Heat for 10-15 minutes, turning over once. They may need longer depending on how hot the coals are.
- Last but not least, strip back the foil and you’re good to go!
Use-by: You can freeze burritos for up to 3 months. You should then store in a cooler and consume within 2 days.
Top tip: If you have made different burritos for different people, use a marker pen to write their names on the foil. That way, you’ll be much more likely to have a bunch of happy campers!
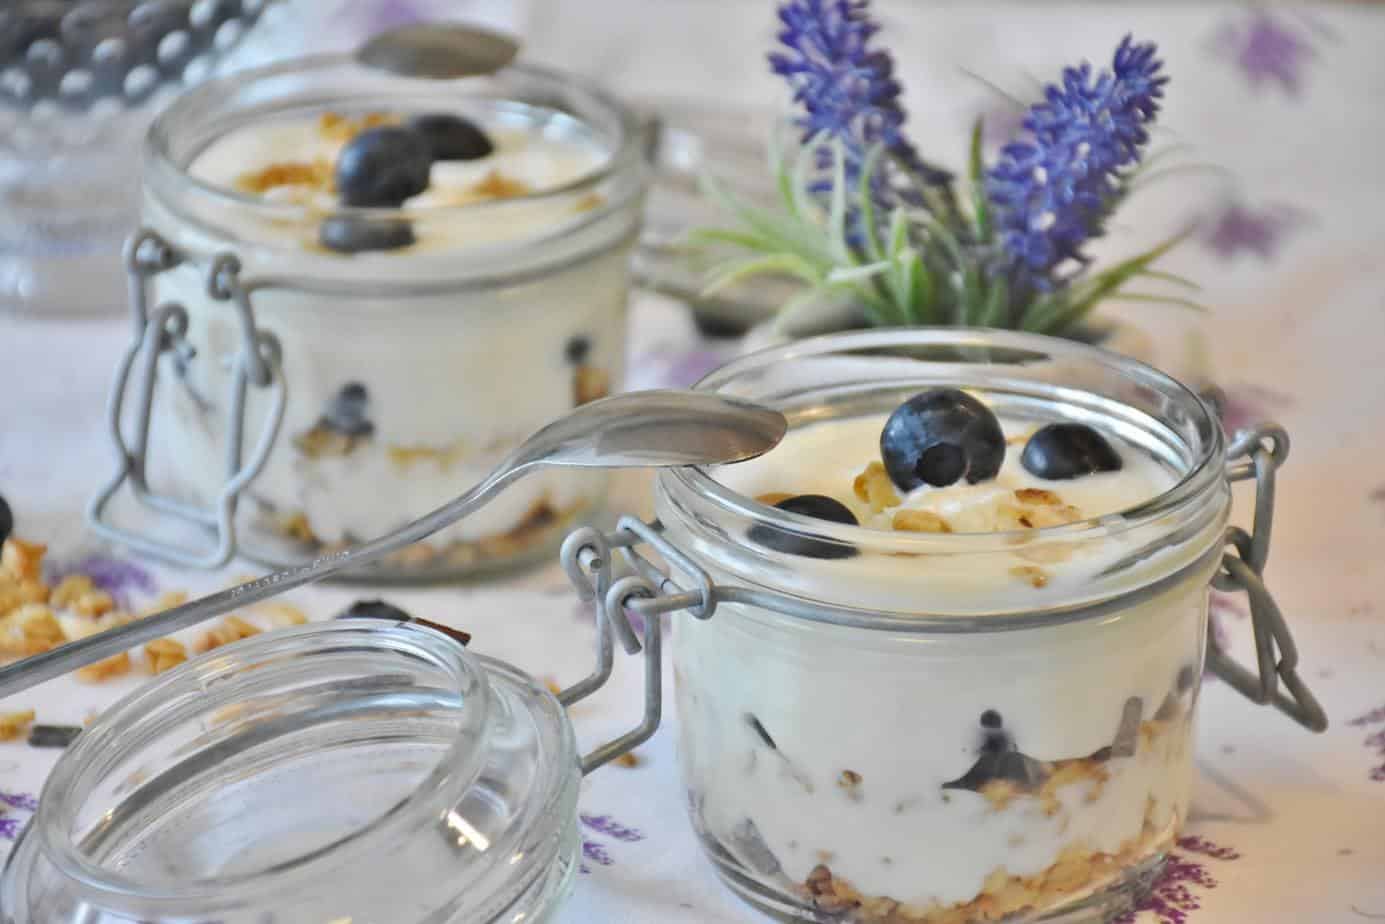
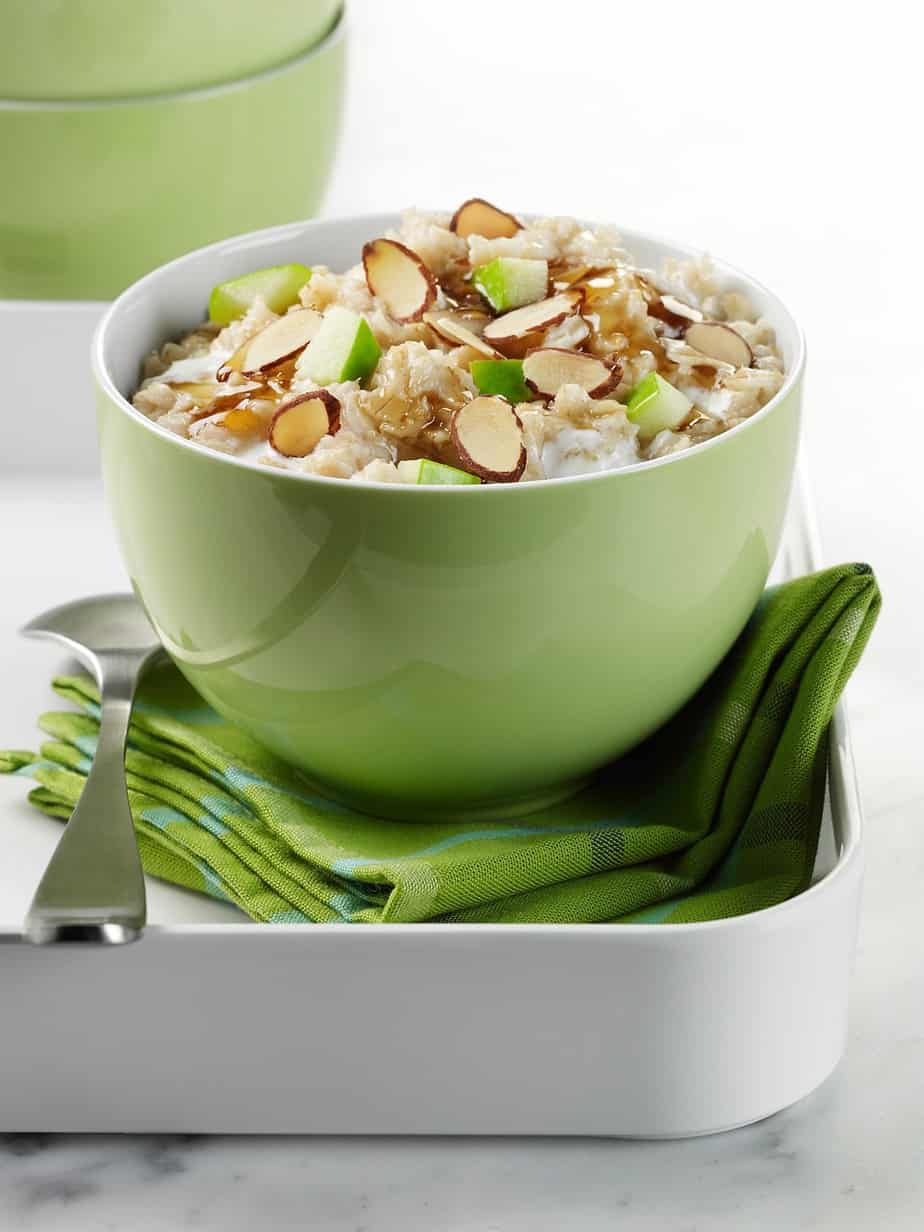
4. Make Ahead Mason Jar Parfaits
 Another excellent mason jar meal for camping. A nutritious combination of fruit, oats, granola and yogurt make it a great start to the day.
Great for: Health-conscious campers.
Groups of people where you can tailor each jar to suit their preferences.
Make-ahead prep time: 5-10 minutes.
Serves: As many as you require.
- Yogurt of your choice (Greek /flavored)
- Granola
- Oats or muesli
- Chopped fresh fruit (such as apple/grapes/berries)
- Using 8oz mason jars, mix yogurt with oats or muesli and fill the jars around half-way.
- Add your fresh fruit layer.
- Top with granola and pop in the fridge to keep cool.
Use-by: These mason jars will last 3-4 days if kept properly in a cooler.
Top tip: Adding the granola last is a good step to keep it from getting soggy. Thanks to Savory Pantry Blog for this tip!
5. French Toast Loaf
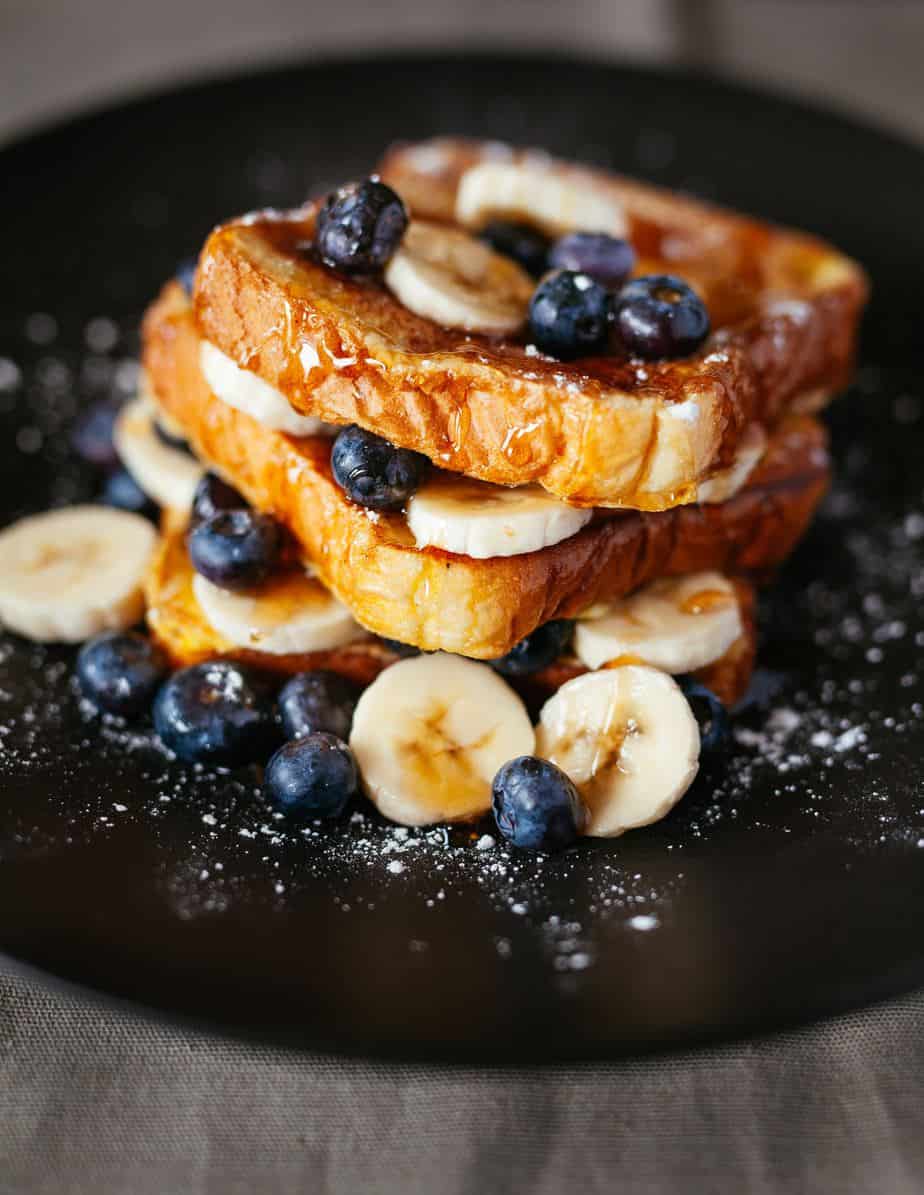 Seeing as though you’re on holiday, you are absolutely entitled to have a sweet treat for breakfast! French toast is a simple make ahead camping recipe that is really easy to heat up and can be enjoyed by the whole family. This recipe was adapted from Chatelaine’s make ahead French toast loaf. There are a few different ways to do French toast depending on how sweet you want it.
Great for: Kids – a nice camping treat.
Groups – a great sharing meal.
Make-ahead prep time: 1 hour.
Serves: 6
- 1 loaf of bread of your choice (around 600g)
- 3 eggs
- 3/4 cup 35% cream
- 1/4 cup granulated sugar
- 3/4 cup milk
- 1/2 teaspoon cinnamon
- Maple syrup
- Berries and nuts (optional)
- Preheat oven to 375°F (190°C) and line a loaf tin with baking paper.
- Whisk the eggs with milk, cream, sugar and cinnamon.
- Position the loaf in prepared tin. Separate the slices a little to allow the mixture to evenly spread. Slowly pour the egg mixture between slices and let it stand for 15 minutes. Sprinkle with sugar (optional).
- Bake in the bottom third of the oven for around 35-40 minutes until golden brown. Once cooled, double wrap with foil and store in the fridge.
- At camp, reheat loaf (still wrapped in foil) over a medium heat, turning often for between 15 and 25 minutes. Once warmed through, serve with maple syrup and add any toppings you choose.
Use-by: Refrigerate, then store in a cooler and consume within two days.
6. Scrambled Eggs
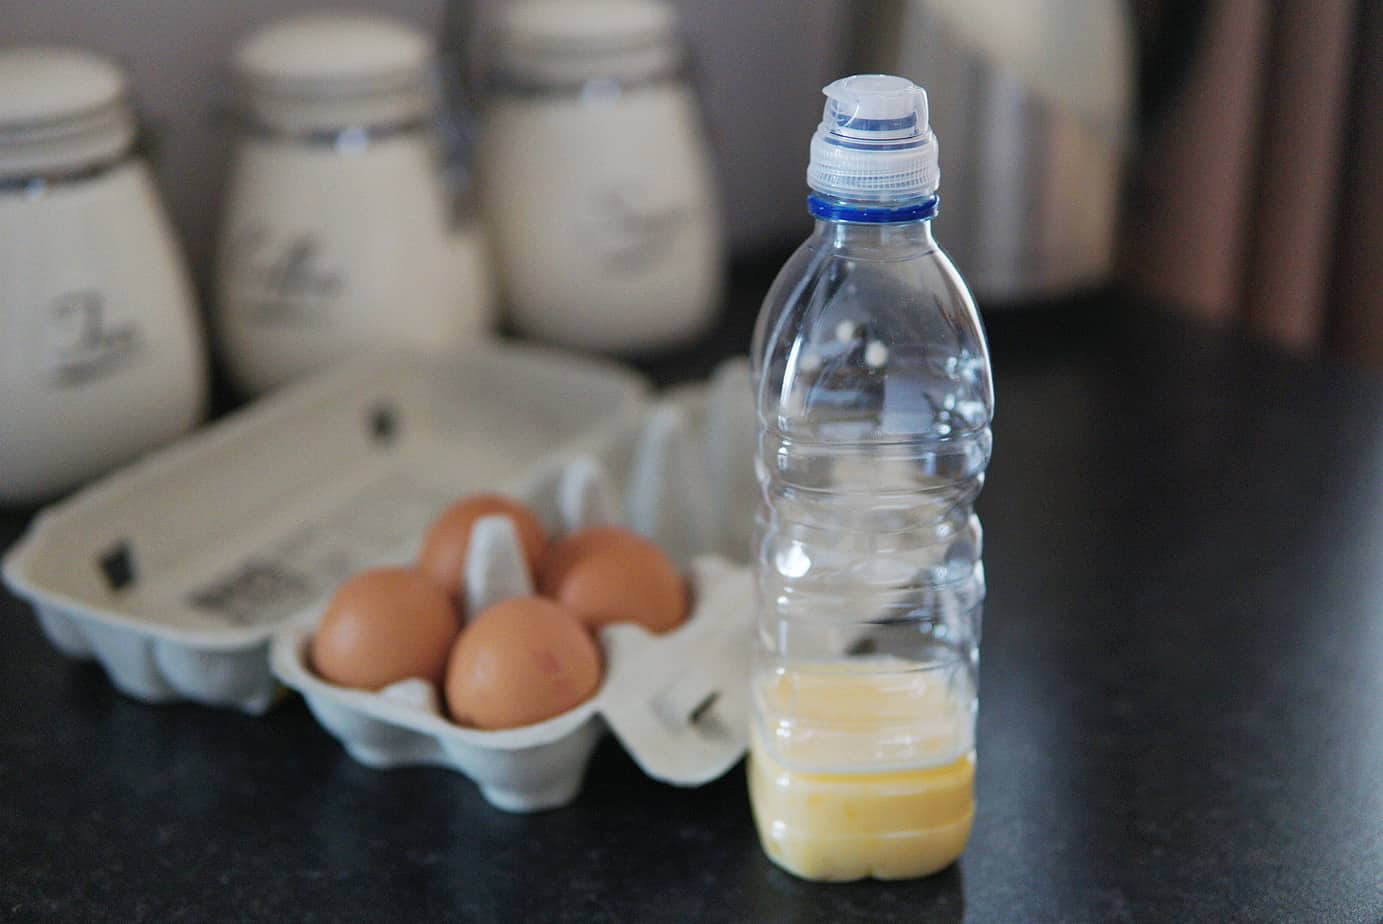
OK so this is only a partial make ahead breakfast, but it certainly saves you carrying around a bunch of eggs that could spell disaster if they cracked all over your cooler! If you love eggs around the campfire, there is a solution. Simply whisk your eggs at home and pour them in a plastic bottle. That way you can store them in your cooler until morning and pour them straight into a hot pan. Credit to The Road Map for this handy tip!
Great for: Hikers as eggs will keep you fuller for longer.
Campers looking for a fuss-free breakfast.
Make-ahead prep time: 5 minutes.
Serves: 1-2 eggs per person.
Use-by: Store in a cooler and use within 2-4 days (from when you cracked them).
7. Blueberry Muffins
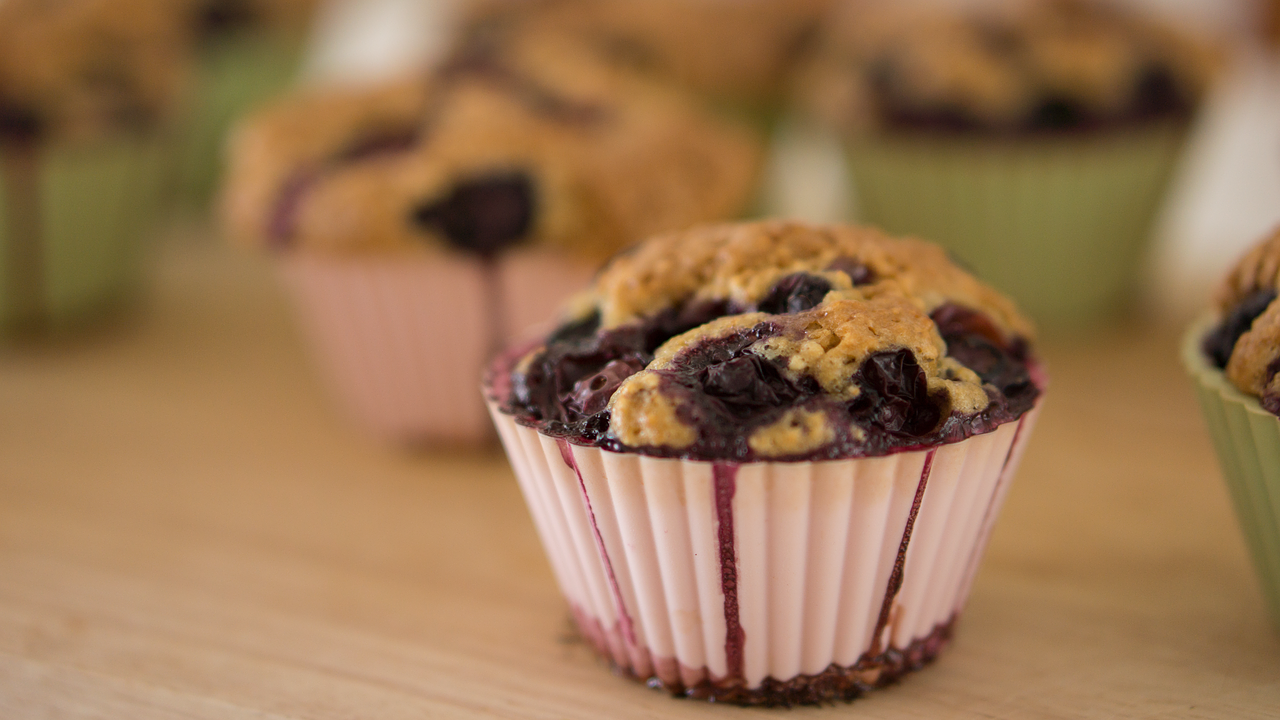 Muffins are the perfect make ahead camping breakfast and you can use a combination of flavors for a full variety. We found this recipe by Inspired Taste for quick and easy make ahead muffins.
Great for: Campers looking for breakfasts that don’t need re-heating.
Kids – a sweet camping breakfast treat.
Couples – easy to prepare and store for 2 people.
Make-ahead prep time: 30 minutes.
Makes: 10 standard muffins.
- 1 1/2 cups all-purpose flour
- 3/4 cup granulated sugar
- 2 teaspoons baking powder
- Pinch of salt
- 1/3 cup of oil (neutral flavored oils like vegetable/canola/grape seed)
- 1 large egg
- 1/3 – 1/2 cup milk
- 1 1/2 teaspoons vanilla extract
- 1 cup fresh or frozen blueberries
- Preheat oven to 400°F (200°C) and line muffin tins with 10 standard sized muffin cases.
- Whisk flour, sugar, baking powder and salt in a bowl.
- Add oil to a measuring jug that holds at least 1 cup. Next add the egg, then fill the jug to the 1-cup line with milk (about 80-120mls). Add vanilla and whisk ingredients.
- Add the wet mixture to the bowl with the dry ingredients. Use a fork to combine – don’t beat. Gently fold in the blueberries.
- Divide mixture between muffin cases. Sprinkle some sugar on the tops and bake for 15-20 minutes until a toothpick comes out clean. Allow to cool and store at room temperature.
Use-by: Muffins at room temperature will last 1-2 days before going stale. Pop in the cooler and they will last about 1 week.
Top tip: The mixture should be thick and gloopy as opposed to runny. You can adjust the consistency by adding a tablespoon of milk at a time (if batter is too thick) or a tablespoon of flour (if too runny).
If you loved these blueberry muffins, why not give these other recipes a go:
- Blueberry, Orange, Yogurt Bran Muffins by Food Network
- Banana Crunch Muffins by Food Network
- Blueberry Oatmeal Muffins by Genius Kitchen
8. Pancakes
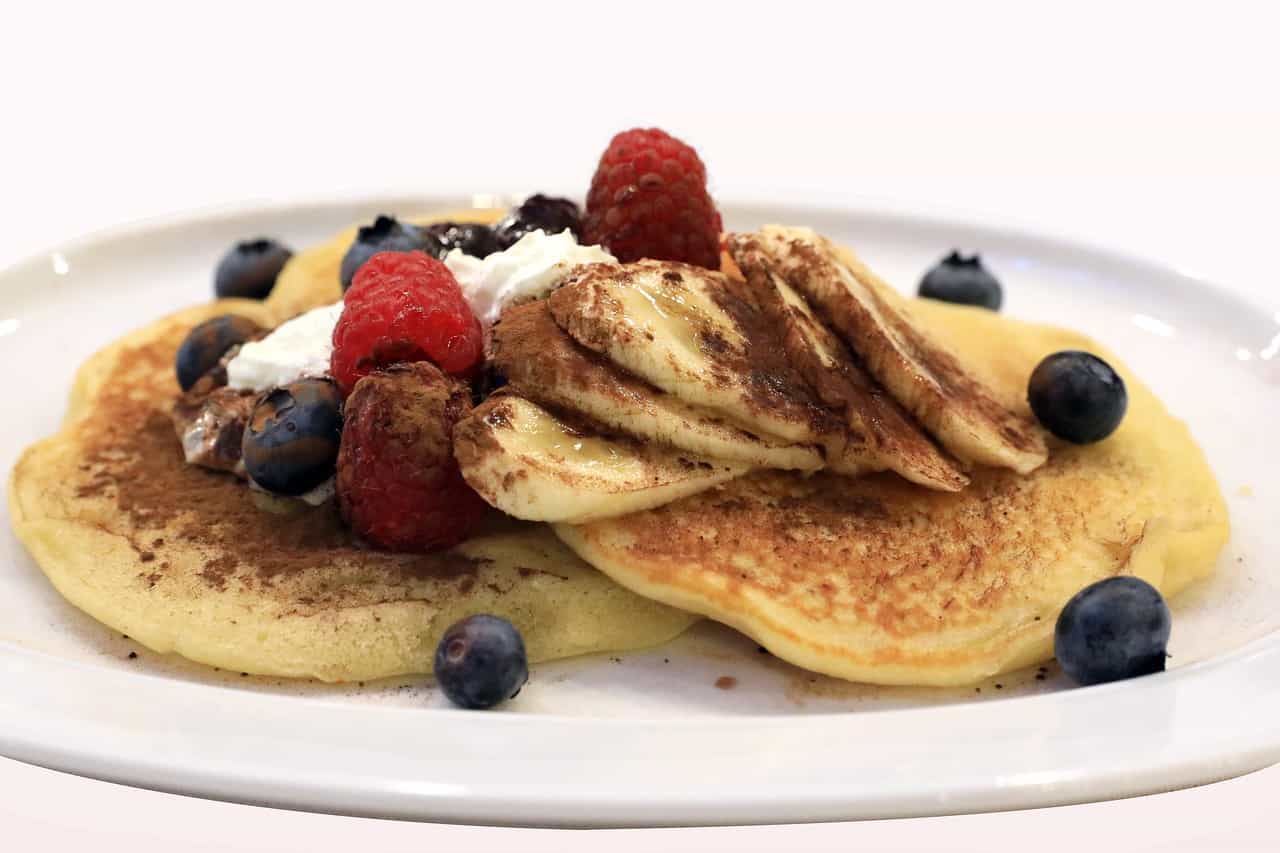 Confession – this is also a partial make ahead camping breakfast BUT it’s pancakes and everyone around the campfire loves pancakes right? You can prepare the dry ingredients and add the wet ingredients at camp.
Great for: Groups – a great sharer breakfast with plenty to go around.
Kids – can add their own toppings.
Campers on longer trips – pancake ingredients are long-lasting compared to other breakfast options.
Make-ahead prep time: 5 mins.
Serves: 12
- 1 3/4 cups milk
- 2 eggs
- 1 1/2 cups all-purpose flour
- 3 teaspoons baking powder
- 1/3 cup of sugar
- 1 teaspoon vanilla essence (optional)
- Measure out all the dry ingredients and store in a zip-lock bag or container.
- Make note of the wet ingredients to add at the campsite.
- Rather than taking a bowl and whisk with you, one tip from Practical by Default is to add your wet ingredients to the dry ones in the zip-lock bag, shaking it up to mix. You can then cut a small hole in the bag and squeeze them onto the pan.
- For toppings, you can have anything from fruit (bananas/strawberries/blueberries) to sweet ingredients (maple syrup/chocolate chips/whipped cream/sugar). Or a combination of all the above!
Use-by: If you store the pre-mix (dry ingredients) in an air-tight container it can last for up to a year. As long as you store your eggs and milk at the right temperature, your pancakes can last your whole camping trip.
9. Breakfast Quesadillas
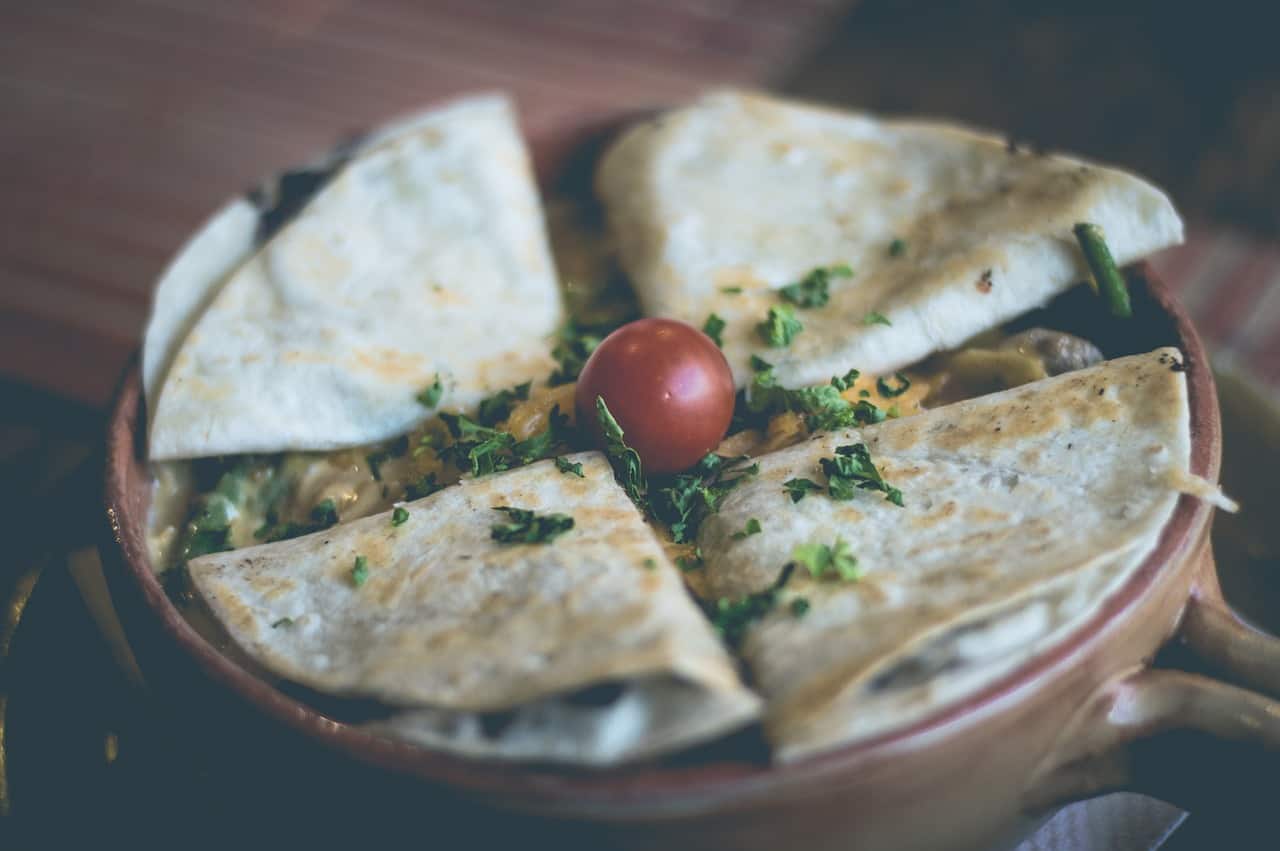 For a healthier option, try these nourishing make ahead breakfast quesadillas. They are not only satisfying but highly versatile, so you can play around with flavors and ingredients for a varied breakfast. Here’s a freezer-friendly recipe with spinach, cheese and white beans, taken from Well Plated.
Great for: Families – a simple, satisfying and nutritious breakfast option.
Hikers – protein packed and a healthy start to the day.
Vegetarians – meat free.
Make-ahead prep time: 20 minutes.
Serves: 8 (if making 1 quesadilla per person).
- 10 eggs
- 1 tablespoon milk
- Pinch of salt
- 1/2 teaspoon black pepper
- 1/2 teaspoon garlic powder
- 5 cups fresh spinach, chopped
- 1 can of white beans (or beans of your choice), rinsed and drained
- 1 1/2 cups grated cheese (any cheese that melts is good such as cheddar or mozzarella)
- 8 medium tortillas
- Whisk the eggs, milk, salt, pepper and garlic together. Set aside.
- Cook the spinach over a medium heat until it starts to wilt. Add the beans and reduce the heat before pouring in the egg mixture. Move around the pan with a rubber spatula until scrambled. Remove from heat.
- Make the quesadillas by sprinkling cheese onto the tortilla and adding an eighth of the mixture. Finish by folding the tortilla in half.
- Let the mixture cool completely before freezing. Wrap each individual quesadilla in foil and place in freezer.
- Before your trip, place the frozen quesadillas in the cooler to thaw. You can then re-heat by putting it on the campfire (still wrapped in foil) until golden and the cheese has melted. Cut into wedges and serve.
Use-by: Store in the freezer for up to 2 months then pop in the cooler to thaw. Consume the following morning to prevent tortillas getting soggy. Alternatively, you can place the egg filling in the cooler for up to 3 days and assemble the tortillas right before cooking.
This is a vegetarian example but you can add almost anything to a quesadilla, same as the breakfast burrito.
10. Pre-Made Peach Breakfast Bake
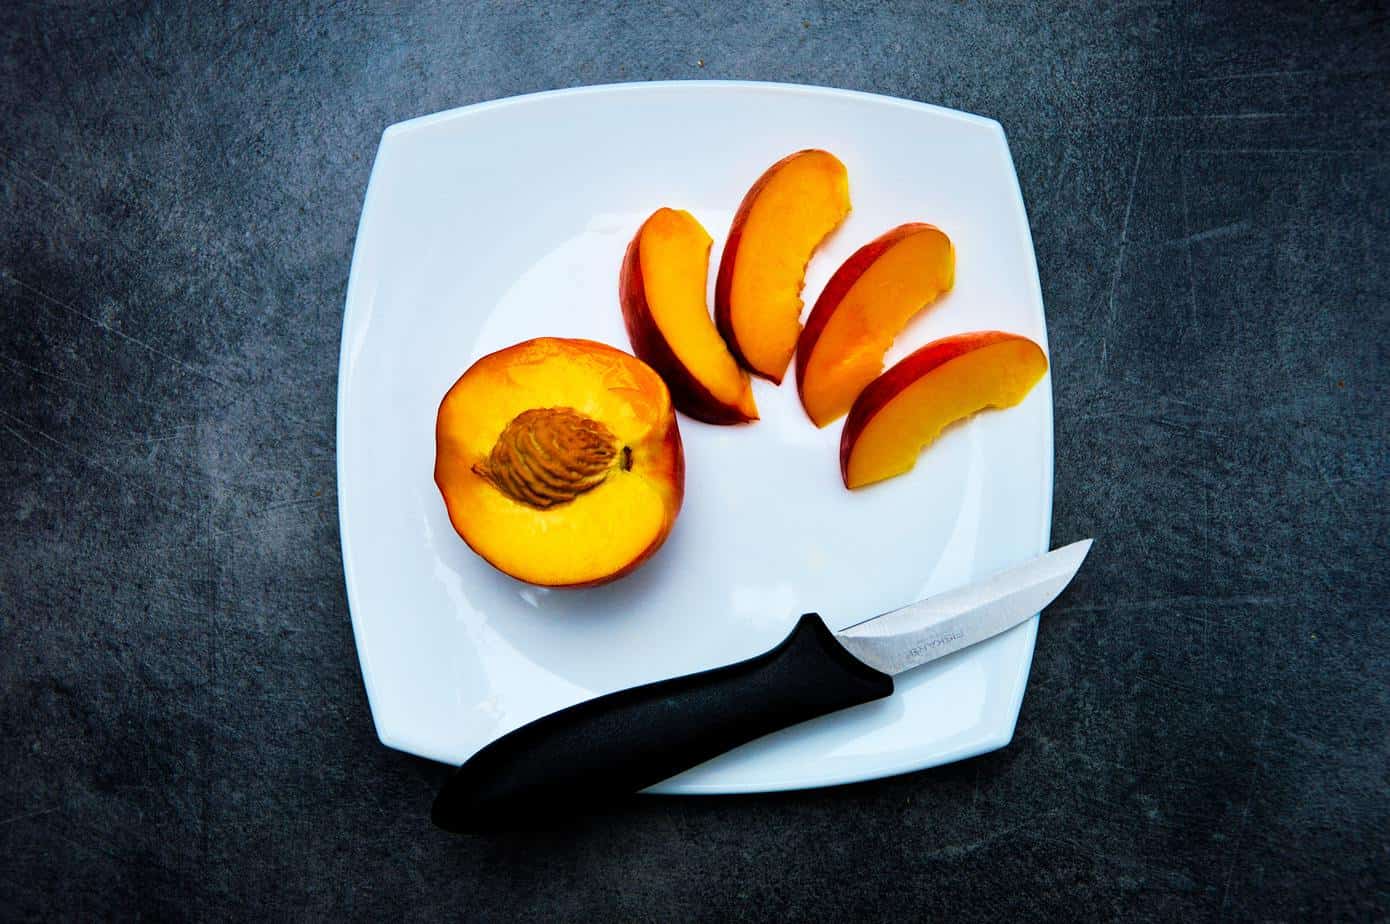 Try saying that after a few sherries. As much as this name sounds like a tongue-twister, the recipe is actually really simple to make ahead and heats up easily on the campfire. This recipe is taken from a combination of Betty Crocker and Genius Kitchen‘s make ahead recipes.
Great for: Groups of 4 – easy portions and quick to prepare.
Campers looking for a sweet tooth alternative to savory make ahead breakfasts.
Couples – portions are ideal for consuming over 2 days.
Make-ahead prep time: 35 minutes.
Serves: 4
- 1/4 cup butter
- 1/4 cup brown sugar
- 1/4 teaspoon nutmeg
- 1/4 teaspoon cinnamon
- 3 peaches, sliced (you can use apples if you prefer)
- 1/3 cup sugar
- 1/3 cup flour
- 1/3 teaspoon baking powder
- 1/3 cup milk
- 4 eggs, separated
- Pinch of salt
- Preheat the oven to 400°F (200°C).
- Melt the butter. Whilst this is melting, add brown sugar, cinnamon and nutmeg to a bowl. Pour in the butter and combine before adding the peaches.
- Arrange the peach slices on the base of a skillet (or you can use a lined 13×9 inch pan).
- Mix the sugar, flour, baking powder, salt, milk and egg yolks.
- In another bowl, beat the egg whites until fluffy peaks are formed. Fold this into the flour mixture and pour over the peaches.
- Bake for 15-20 minutes.
- You can freeze this breakfast bake (including the pan) and pop the whole thing straight on the open fire at your campsite.
- Serve with toppings of choice (maple syrup and dollop cream are great additions for a sweet tooth).
Use-by: After you remove from the freezer, store in the cooler and eat within 2 days.
11. Outdoor Apple Pie
This no-bake recipe from Beyond the Tent is a great breakfast option for campers on-the-go. It can be easily made ahead and is filled with nutrients for a balanced start to the day.
Great for: Hikers – easy to make and eat on a trail, good for energy levels.
Single campers – easy to prep for one person.
Campers on longer trips – the dry ingredients have a long shelf life.
Make-ahead prep time: 5 minutes.
Serves: 1
- 1 cup oats
- 1 tablespoon milk powder (alternatively use soy powder)
- 1 tablespoon cinnamon
- 1 finely chopped apple
- 1 tablespoon sugar
- 1 cup water
- Combine the oats, milk powder, cinnamon and sugar in a container or zip-lock bag.
- At camp, pour the mixed ingredients into a bowl, add water and apple and sit aside for at least 3 hours before tucking in.
Use-by: Fresh apples can last a week if stored in a cool environment. The remaining ingredients will last over a year.
Lunch
12. Noodle Cups
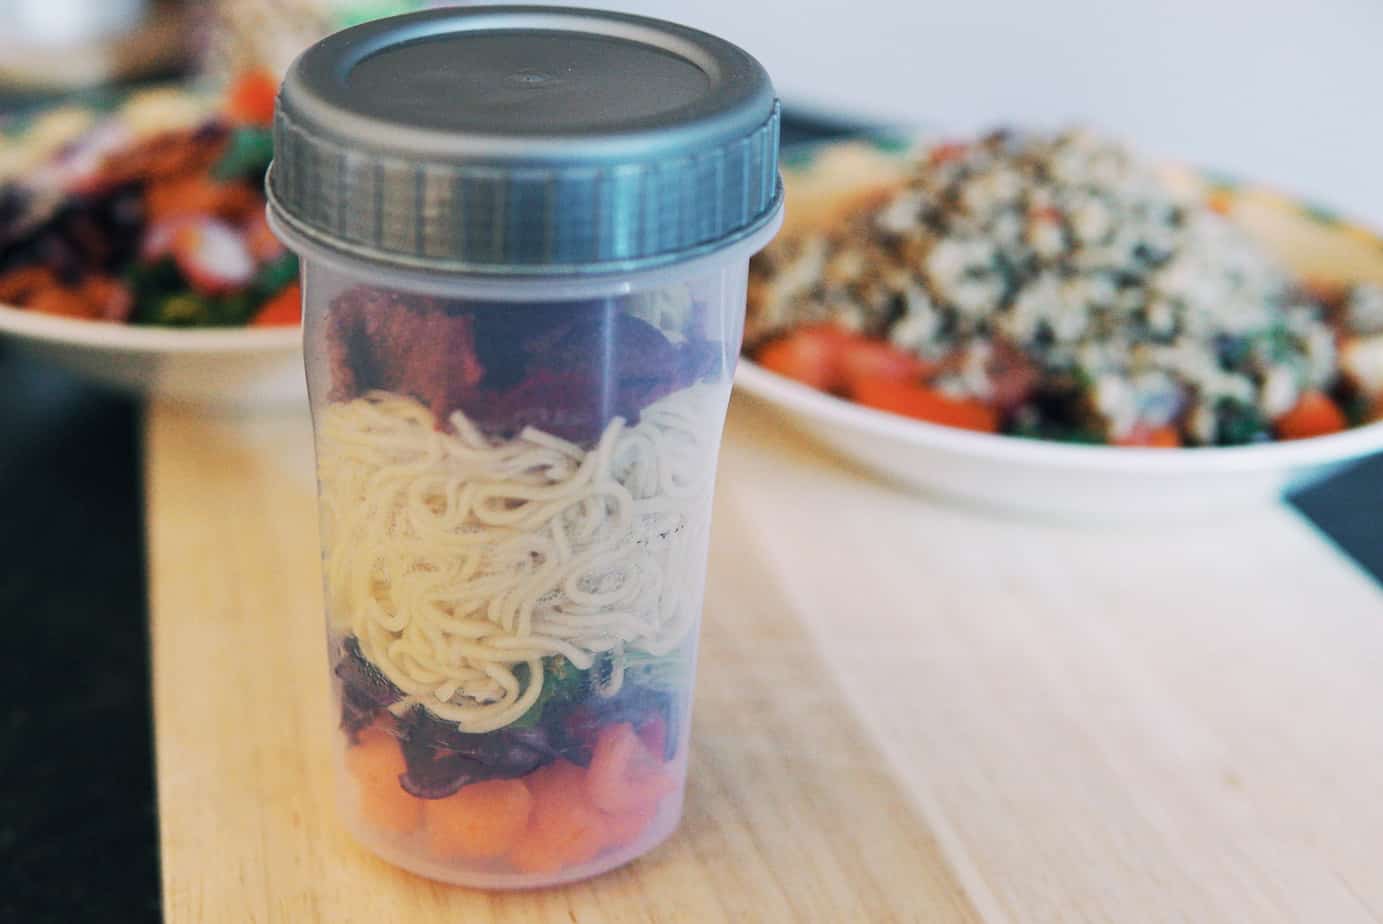 Rather than buy these in bulk from the store, why not have a go at some DIY noodle cups? Not only can you create a much healthier alternative, but you can also save those quarters. Check out this adaptable recipe by The Kitchn for super tasty noodles that only need some hot water before they are ready to eat.
Great for: Campers on longer trips – these noodle cups are a long-lasting make ahead lunch.
Campers that want a healthy alternative to store-bought instant noodles.
Make-ahead prep time: 15 minutes.
Serves: 1
- 1-3 teaspoons flavor base (e.g. curry paste/soup stock paste/miso paste)
- 1-3 teaspoons flavor extras (e.g. soy sauce/coconut milk/chili sauce)
- 1/4 to 1/2 cup filler ingredients (take your pick from any of these or add your own) – frozen carrots, frozen peas, spinach, tofu, mushrooms, egg, cooked meat etc.
- 3/4 to 1 cup cooked noodles (again the choice is yours) – spaghetti, vermicelli, udon, ramen, soba etc.
- 1/4 to 1/2 cup fresh ingredients – slice of lemon, cilantro, fresh herbs, bean sprouts etc.
- To assemble the noodle cup, add the flavor base and flavor extras to the bottom of the container.
- Next, add your filler ingredients, followed by your noodles that can be packed down.
- Finally, add your fresh ingredients before sealing and refrigerating.
- When ready to eat, simply add enough boiling water to cover the ingredients and let it stand for a few minutes. Then mix everything together and enjoy!
Use-by: These noodle cups can be stored in the cooler for up to a week.
Top tip: Separating the noodles from wet ingredients keeps them fresh and chewy as opposed to soggy and saturated.
13. Make Ahead Sandwiches
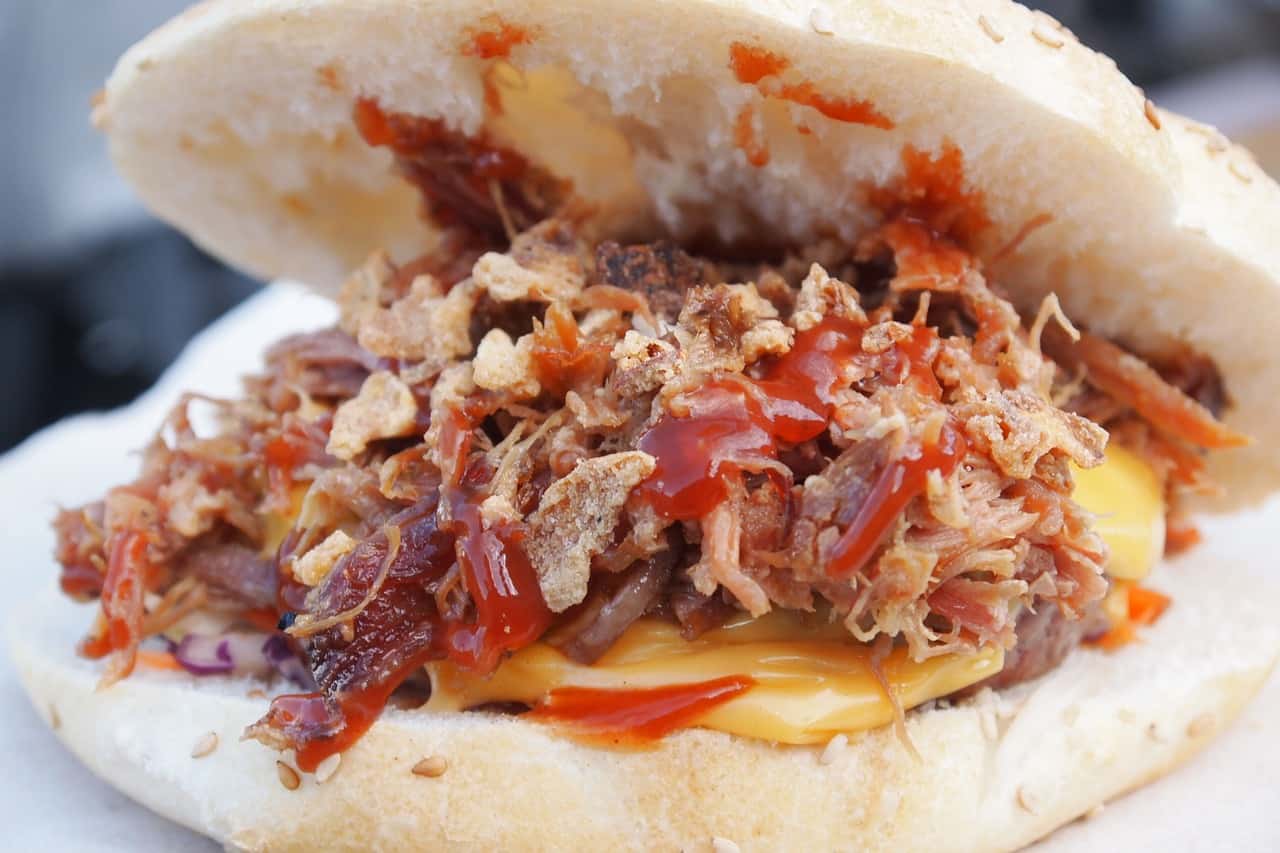 At lunch time, a sandwich is a convenient meal to satisfy those rumbling tummies. If using meat, simply prepare a few days beforehand and let the slow cooker do the rest. The best part is that you can assemble the buns and pop them in the freezer, reheating them on your campfire. Credit to Beyond The Tent for this BBQ Chicken sandwich recipe.
Great for: Families for a handy pre-made lunch.
Make-ahead prep time: 5-6 hours (slow cooking).
Serves: 6-8
- 6 chicken breasts
- 2 tablespoons Worcester Sauce
- Barbecue sauce (add as much as you need)
- 1/4 cup brown sugar
- 1/2 cup salad dressing
- Bread rolls
- Marinate the chicken breasts with the above ingredients and place in the slow cooker. Cook on high for around 5 hours.
- Pull apart the chicken using tongs and mix the sauce into it.
- Once cooled, add to the buns with any additional items (slaw, cheese etc.) and wrap in foil before storing in the freezer.
- Pop the frozen buns in your cooler and let them thaw. Re-heat them on the campfire, ensuring the meat is fully warmed through.
Use-by: Thawed and stored in the cooler, cooked chicken lasts for 3-4 days.
Top tip: You can swap the chicken for pulled pork in this one if you prefer (as pictured).
14. Make Ahead Puff Pastry Pockets
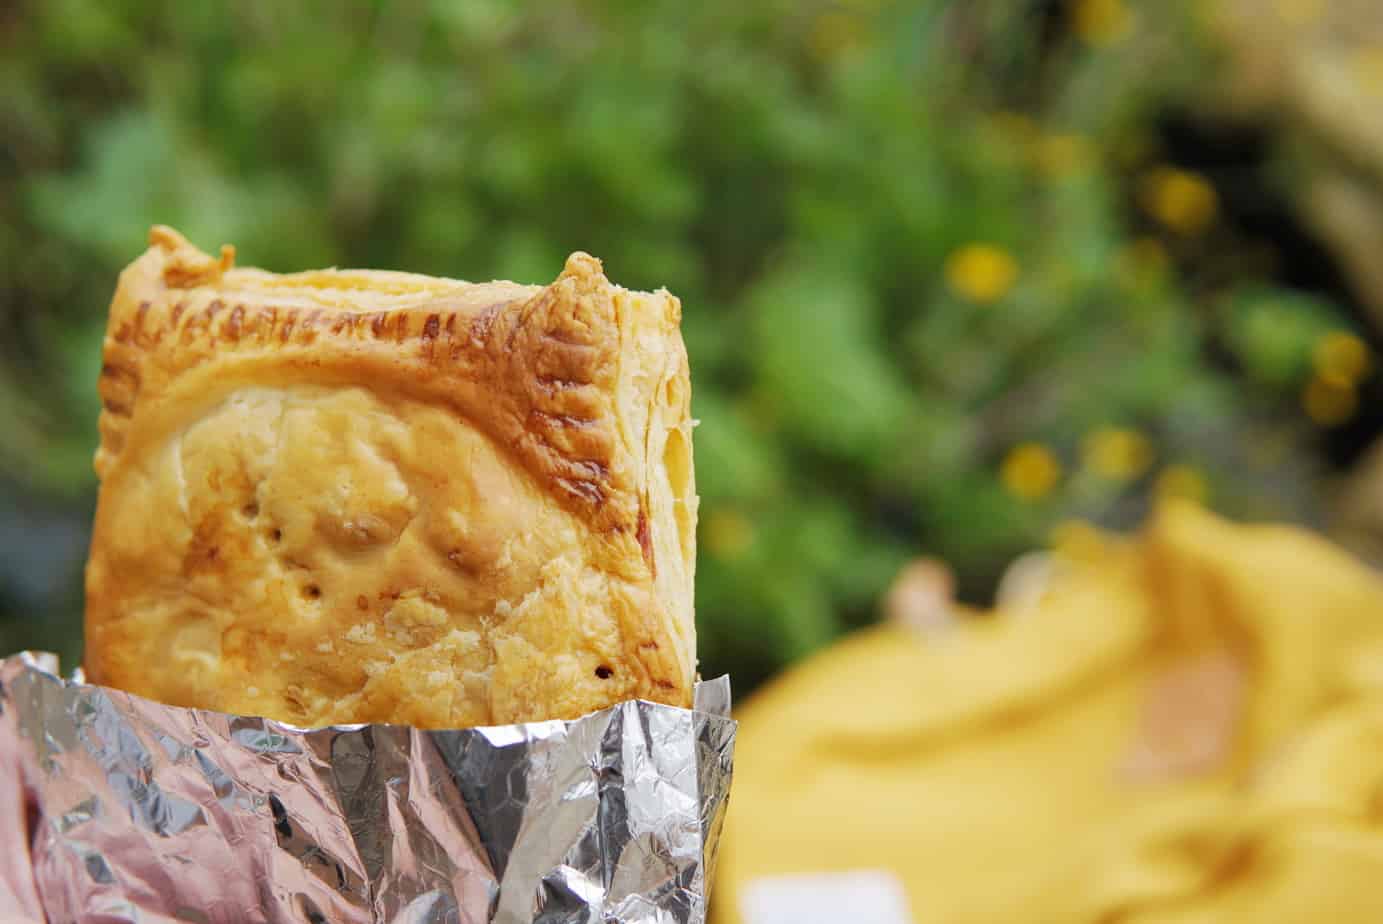
An American food-truck favorite, these lunch time delights can still be enjoyed on your camping holiday. The recipe, taken from Cooking Divine, is easy to make at home and packed full of flavor. Give it a try!
Great for: Families and kids – a simple, enjoyable lunch for the whole family.
Couples – an easy lunch time option that will last over 2 days.
Make-ahead prep time: 30 minutes.
Serves: 4
- 1 box puff pastry (14-16oz)
- 1 pepper
- 1 onion
- 1/2 pound steak (chopped)
- 1/2 cup grated cheese
- Small amount of egg wash
- Preheat the oven to 375°F (190°C).
- Heat some oil in a sauce pan on a medium heat.
- Once hot, add chopped pepper and onion and cook for 3-5 minutes until soft.
- Add the steak and cook until brown. You can add any seasoning/spices that you wish to include.
- Remove pan from the heat and set aside.
- Sprinkle some flour on a smooth surface, lay out the pastry and cut into 8 equal squares.
- Add 1/4 of the steak mix to 4 of the pastry squares, topping each with some grated cheese.
- Lay the remaining squares over the top, sealing together with a fork.
- Egg wash the outside of the pastry squares, slit the tops and sprinkle some salt on.
- Bake for 20 minutes.
- Once the pastries have cooled, you can wrap them in foil and put them in the freezer for up to 2 months.
- Re-heat over the campfire still wrapped in foil until meat is piping hot.
Use-by: Transferring the pastries from the freezer to the cooler will keep them fresh for 2-3 days.
15. Pre-Made Ham and Cheese Sandwiches
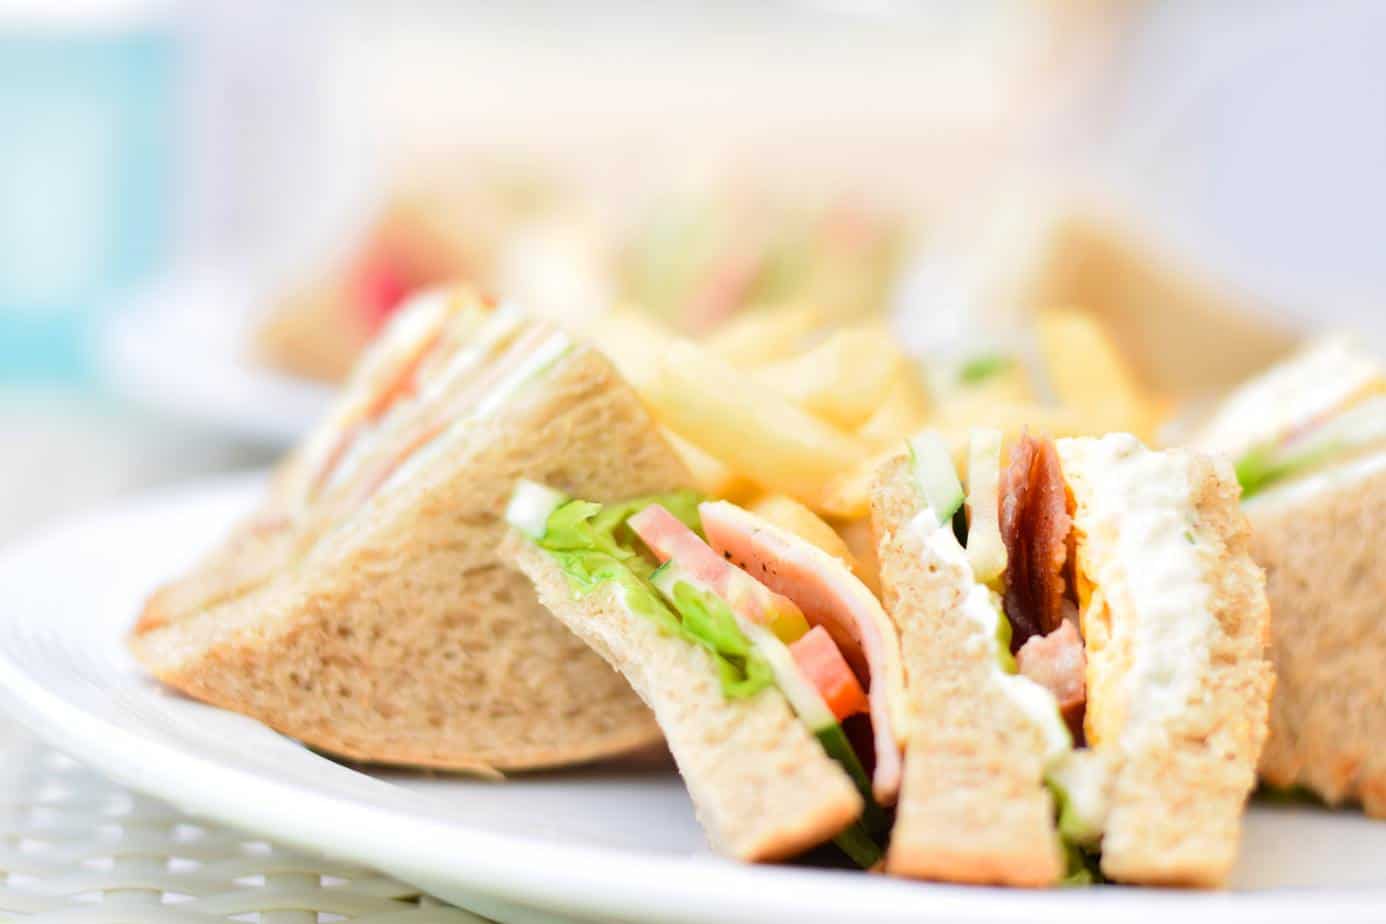 As we’ve said, sandwiches are a super easy lunch option that are satisfying and easy to make ahead. You can use any filling you like but we love this ham and cheese loaf, especially once the cheese has melted on the campfire!
Great for: Families and groups – great sharer lunch.
Make-ahead prep time: 5-10 minutes.
Serves: 6 (if you cut the bread into 12 slices).
Simply buy your favorite loaf of bread, cut into slices (though don’t cut through all the way to the bottom), spread with butter and add your slices of ham and cheese (plus any condiments). Wrap the loaf in foil and pop in your cooler. You can grill the loaf over the campfire for that melted cheesy goodness sure to go down well with the group.
Use-by: If stored in the cooler, these sandwiches should last 2-3 days.
16. Peanut Butter and Banana Wraps
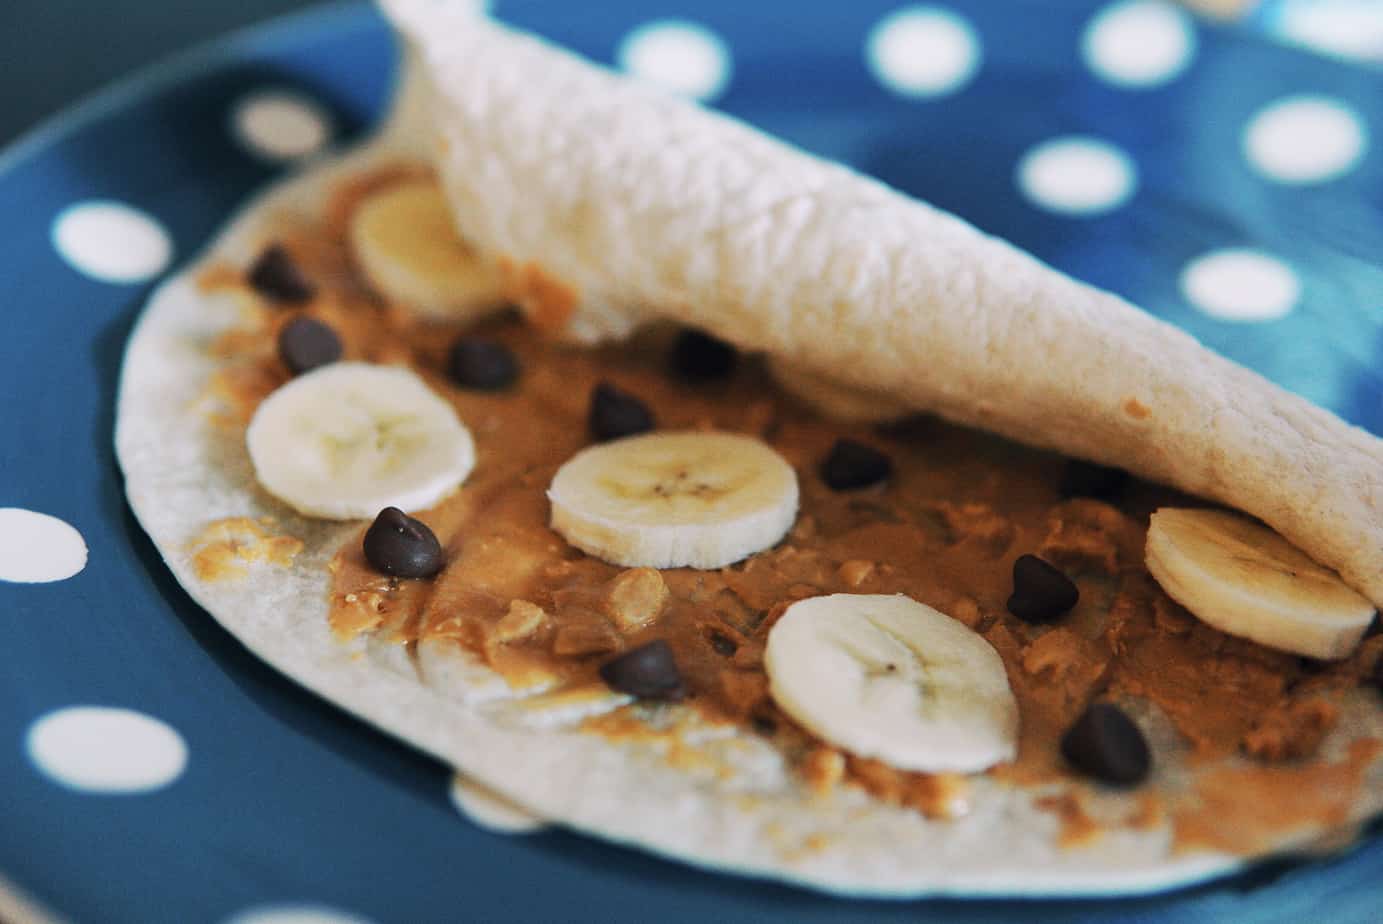 For peanut butter lovers, this simple make ahead lunch by Betty Crocker is the one for you. Not only are they super easy but they can be stored at room temperature rather than the cooler. This is how simple it is – grab a tortilla, spread some peanut butter on it, add banana slices and roll it up. You can even add chocolate chips for an extra bit of sweetness. Cover in foil and you’re all set.
Great for: Kids – what’s not to love!
People who want an easy fuss-free lunch.
Hikers – good source of energy and easy to carry.
Make-ahead prep time: 5 minutes.
Serves: As many as you need.
Here are some alternatives you can also try:
- Jam and banana (a personal recommendation).
- Peanut butter and jelly.
- Crunchy peanut butter and apple.
- Cream cheese, honey, cinnamon and banana.
Use-by: With banana, we recommend consuming these no later than a day after making.
Top tip: To make these even better, throw the tinfoiled wraps on the camp fire for gooey, delicious goodness.
17. Cold Pasta Salad
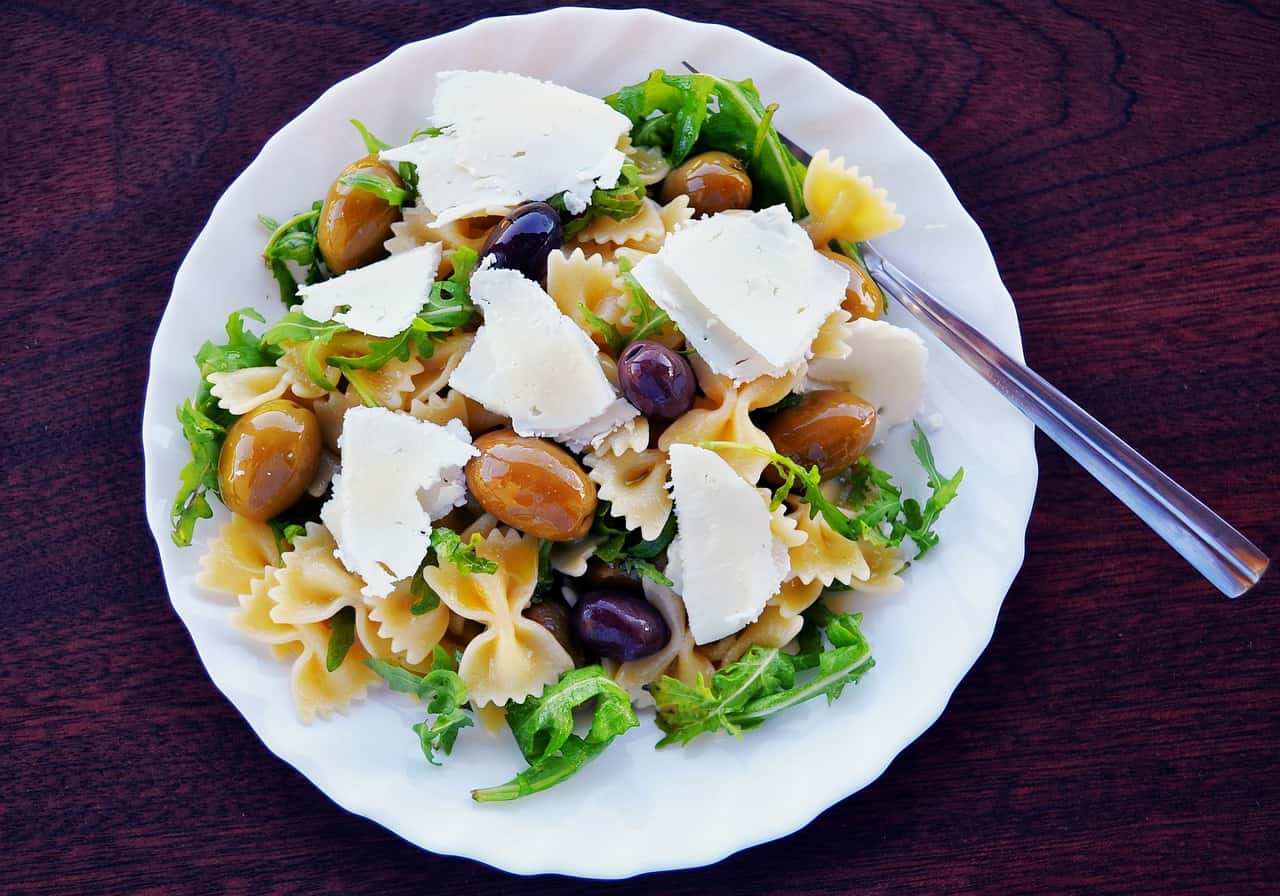 This is another classic make ahead meal that doesn’t require any further preparation once you arrive at your campsite. Simply remove from the cooler and dig in. With so many different variations, we’re sure you’ll find something you love on this list by Country Living. Here’s an Easy Summer Salad to get you started.
Great for: Campers looking for a filling lunch option.
Couples – can easily divide into containers and take to camp.
Groups – can make a large batch and let people help themselves.
Make-ahead prep time: 20 minutes.
Serves: 8-10
- 1 pound dry pasta of your choice
- 3 small bell peppers, diced
- 1 12 oz jar artichoke hearts in water, drained and chopped
- 1 cucumber, chopped
- 1 punnet cherry tomatoes, halves
- 1 cup balsamic vinegar
- 1 cup feta cheese, crumbled
- 1/3 cup basil, chopped
- Salt and pepper
- Bring a large pan of water to boil and cook the pasta according to packet instructions. Rinse with cold water and set aside to cool.
- In a large bowl, add the pasta, peppers, artichoke, cucumber and tomatoes. Stir to combine and drizzle with balsamic vinegar. Add the feta and basil and mix into the salad. Season with salt and pepper. Chill in the fridge.
Use-by: Stored in the cooler, pasta salad can last 5-7 days.
18. Quick Tomato Soup
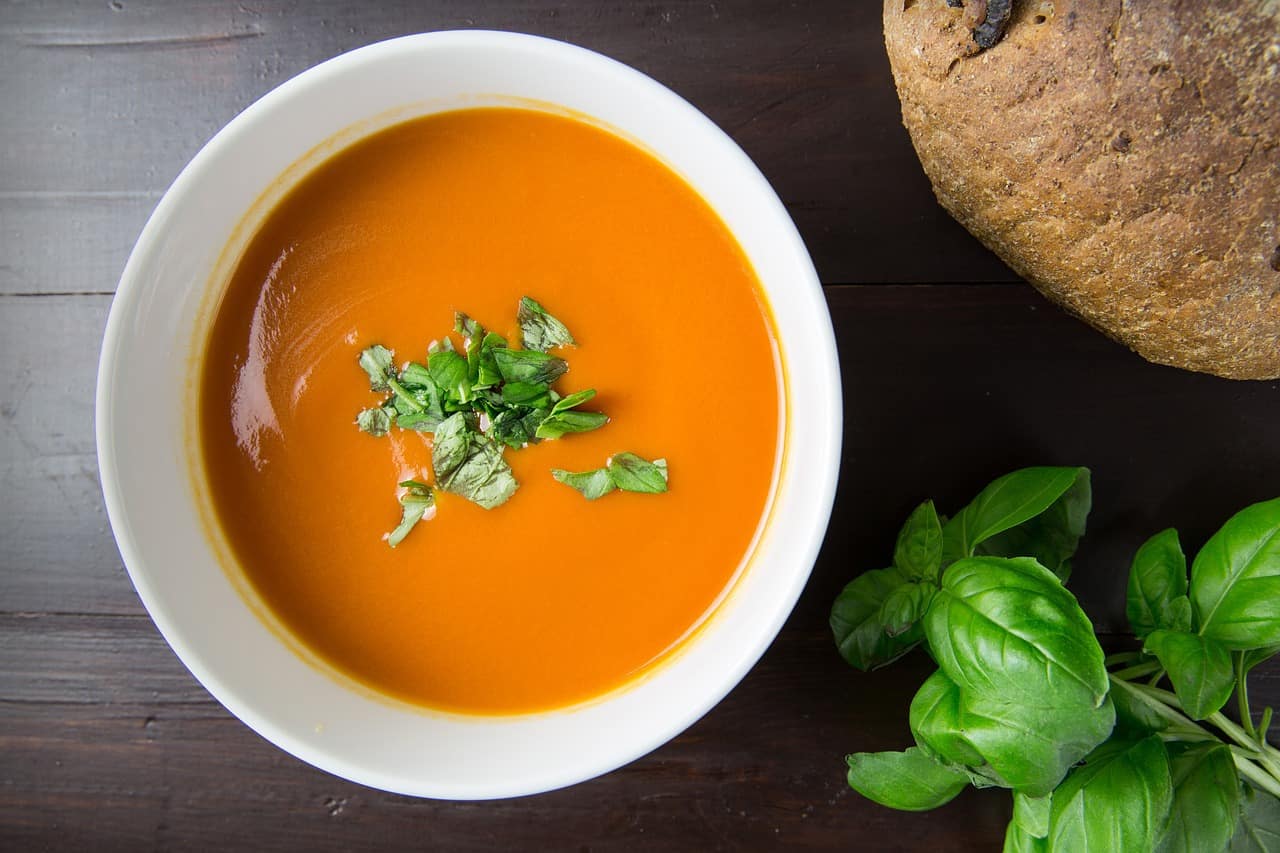 Soup is a hearty lunch option that you can make in so many different flavors to please your entire group. This recipe from Taste of Home is an easy tomato version but check out The Kitchn for a range of favorite soup recipes you can try.
Great for: Rainy day campers or those in colder destinations.
Make-ahead prep time: 15 minutes.
Serves: 6
- 1/4 cup butter
- 1/4 cup all-purpose flour
- 1/4 teaspoon onion powder
- 1/4 teaspoon curry powder
- 1/4 cup sugar
- 1 can tomato juice
- Melt the butter in a large saucepan. Add flour, onion powder and curry powder and stir until combined and smooth. Gradually add sugar and tomato juice. Leave uncovered and cook until soup thickens (about 5 minutes).
- Once cooled, store in a container or zip-lock bag and put in the freezer.
- Once you arrive at camp, heat up in a pan over the campfire. You can serve with croutons, crackers, bread or any other accompaniment.
Use-by: If frozen, allow soup to thaw in the cooler where it can be kept for 3-4 days.
19. Frittata
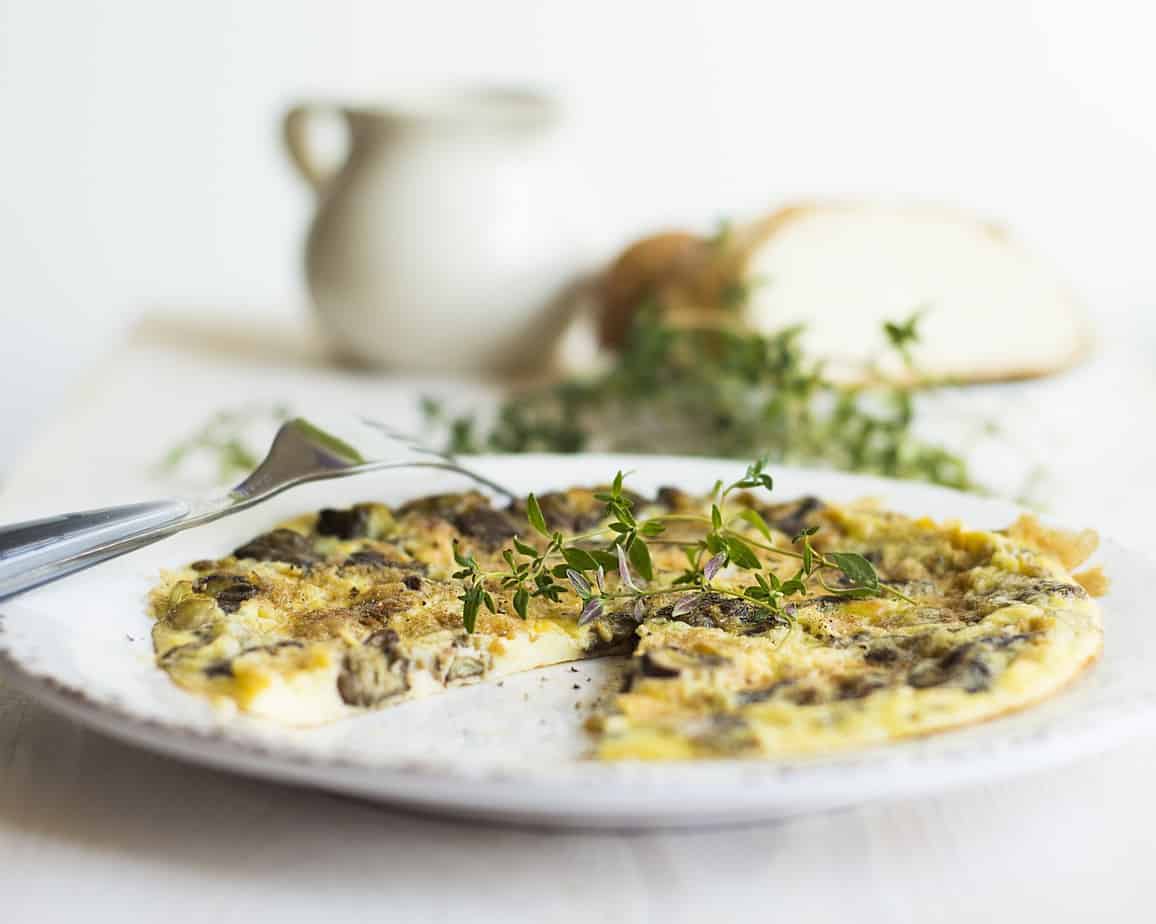 This egg-based lunch option is great for grabbing out the cooler as soon as those hunger pangs strike. You can add different ingredients to personalize your frittatas but this cheese and mushroom one goes down a treat in our eyes. Credit to Food Network for this one!
Great for: Families with kids looking for a quick lunch fix.
Vegetarians – a meat-free make ahead camping lunch.
Campers on longer trips – a longer-lasting lunch option.
Make-ahead prep time: 30 minutes.
Serves: 4
- 8 eggs
- 4 tablespoons olive oil
- 1lb mushrooms, sliced
- 2 tablespoons parsley, chopped
- 1 clove garlic, minced
- 1 1/2 cups grated cheese
- Preheat oven to 375°F (190°C).
- Whisk eggs with 2 tablespoons water and put aside.
- Add olive oil to a large pan over a medium heat. Sauté the mushrooms until tender (about 5 minutes).
- Add parsley and garlic and cook for another minute. Season with salt and pepper if desired.
- Pour the eggs over the mushrooms, stirring to combine before adding the grated cheese.
- Place pan in the oven and bake uncovered for about 15 minutes. The frittata is cooked when the eggs have set and the cheese melted.
- Cut the frittata into wedges, cover in foil and place in the fridge/cooler.
Use-by: Eat the frittata cold and it will keep in the cooler for 5-7 days if stored in an airtight container.
Top tip: Use smoked cheddar cheese to give your frittata a little kick. If the portions are too small, you can easily pair with a salad.
20. Salads-to-Go
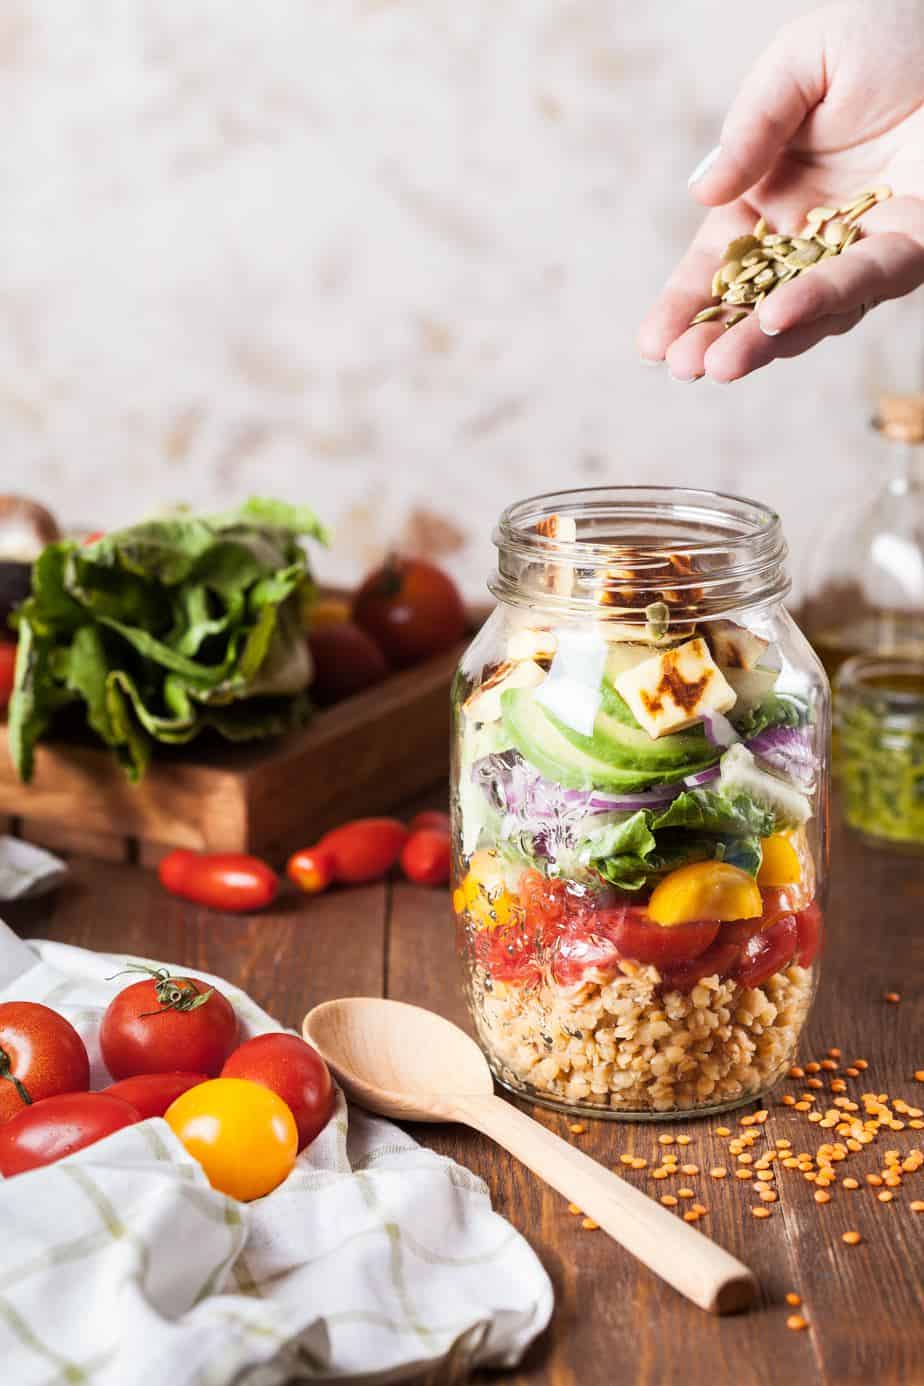
These handy little salad jars are the perfect accompaniment to a camping trip. With no preparation needed at camp, these are a winner in our eyes. Thanks to The Chic Site for bringing them to our attention.
If you are doing a longer camping trip, check out this easy Chickpea Salad recipe by Food Network for a pre-made lunch that can last up to a fortnight.
Great for: Campers on longer trips.
People looking for healthy make ahead lunches.
Make-ahead prep time: 5-10 minutes.
Serves: 4-6
- 1 can chick peas, rinsed and drained
- 1 clove garlic, minced
- 1/2 red pepper, chopped
- 1/4 cup onion, finely chopped
- 1/4 cup cilantro, chopped
- 2 tablespoons olive oil
- 3 tablespoons lemon juice
- Cayenne pepper, to taste
- Bring together all the ingredients and toss well.
- Add seasoning to taste.
- Refrigerate before transferring to cooler.
Use-by: If stored correctly in a cooler, this salad can last for 2 weeks.
Top tip: You can replace the jars with plastic containers for a lighter load.
21. Make Ahead Mini Quiches
 These handy quiches can be grabbed straight from the cooler and eaten cold for a quick lunch option. You can play around with the ingredients but we here's an easy make ahead one by Keeper of the Home.
Great for: A quick lunch for busy campers.
Make-ahead prep time: 45 minutes.
Serves: 18-20
- 6 eggs
- 2 cups broccoli, diced
- 1/2 cup onions, chopped
- 1/2 cup peppers, diced
- 1-2 tablespoons oil
- Shredded cheddar cheese
- Salt and pepper
- Preheat the oven to 400°F (200°C).
- Add oil and a dash of water to a frying pan and steam the broccoli, onions and peppers, covering until cooked.
- Distribute the veggies into individual holes in a muffin tin and top with cheese.
- Whisk the eggs in a bowl adding salt and pepper to taste and fill each muffin mold.
- Bake for 15-20 minutes until egg has set and is no longer runny.
Use-by: Store in the cooler and eat within 3-4 days.
Top tip: These pastry-free quiches can also double up as a breakfast option.
22. Mexican Coleslaw
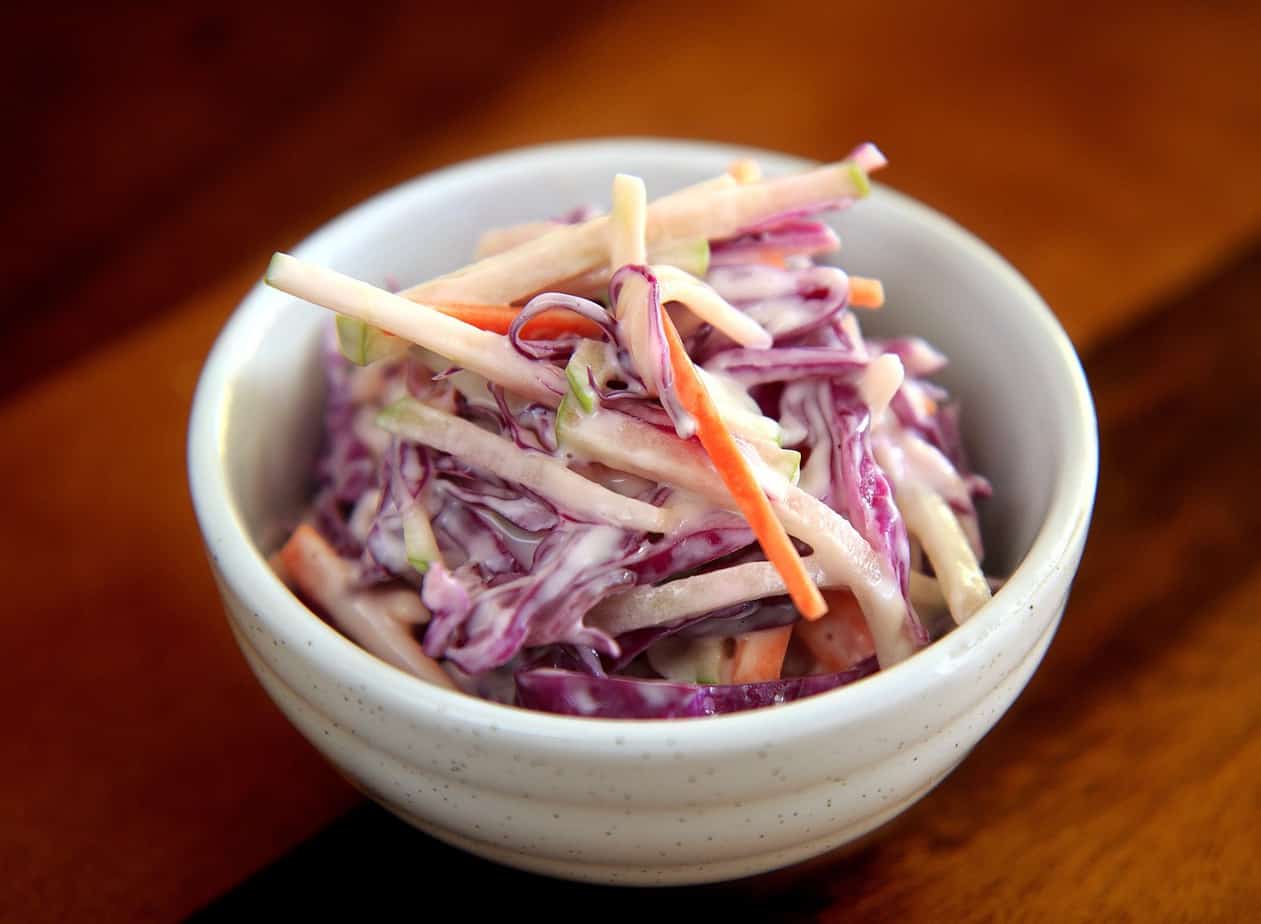
Bursting with Mexican flavors, this cabbage and mango slaw from Food Network is the perfect combination of sweet and spicy. Make this crunchy slaw ahead of time and enjoy on its own or as a side with lunch/dinner.
Great for: Vegetarians.
Campers looking for a light lunch with a hint of spice.
Make-ahead prep time: 10 minutes.
Serves: 6
- 1/4 red cabbage, sliced
- 1/4 green cabbage, sliced
- 1 red onion, sliced
- 1 mango, peeled and sliced
- 1/2 cup cilantro, chopped
- 1/4 cup apple cider vinegar
- 1/3 cup maple syrup
- 1 teaspoon hot pepper flakes (or chipotle in adobo sauce)
- Salt and pepper
- Combine the cabbages, onion, mango and cilantro in a large bowl.
- In a separate bowl, add the vinegar, maple syrup and pepper flakes, whisking together and seasoning with salt and pepper.
- Drizzle over the dry ingredients and toss to coat.
- Store in an airtight container and keep in the cooler.
Use-by: Store in the cooler and coleslaw should last 3-5 days.
Dinner
23. Make Ahead Camping Skewers
 Whether you prefer meat, vegetables or a mix of everything, the possibilities are endless when it comes to prepping your camping skewers. Simply assemble at home and wrap in foil before popping on the campfire to cook. It’s as easy as that!
Great for: Kids – they can make their own skewers and cook on the campfire.
Campers preparing a barbecue.
Make-ahead prep time: 15 minutes (not including marinating time if applicable).
Serves: As many as you need.
Here are just a few examples of food combinations for your skewers:
- Vegetables (onion, pepper, zucchini, mushrooms, corn)
- Chicken (plus pepper, onion and chipotle seasoning)
- Sausage (plus onion, pineapple and pepper)
- Lamb (plus onion, pepper and a garlic yoghurt dip)
- Meatballs (plus pepper and sweet & sour sauce)
- Shrimp
- Salmon
You can then have a number of different marinades, making this a highly versatile recipe. Here’s a tequila, lime and cilantro one from Food Network to give your skewers a kick (probably best to keep this one for adults only).
- 1/3 cup canola oil
- 1/2 cup cilantro, chopped
- 1/2 cup lime juice
- 1 tablespoon tequila
- 2 cloves garlic, chopped
- 1/2 teaspoon crushed red pepper flakes
- 2 teaspoons salt
- Pinch of ground black pepper
- To marinate your meat (for example chicken in this recipe) add the above ingredients to a large zip-lock bag followed by the chicken. Allow to marinate for 2 hours.
- Wrap your skewers in foil and refrigerate. Place on the grill over the campfire on a high heat until cooked through.
Use-by: Store raw chicken in the cooler and cook within 1-2 days. Uncooked beef, lamb and pork will keep for 3-5 days in the cooler. Vegetables can last up to a week.
Top tip: Put cherry tomatoes on the ends of your skewers as a stopper to prevent other ingredients falling off.
Take a look at this blog post by Yummy Healthy Easy for 15 skewer ideas you can try.
24. Chili
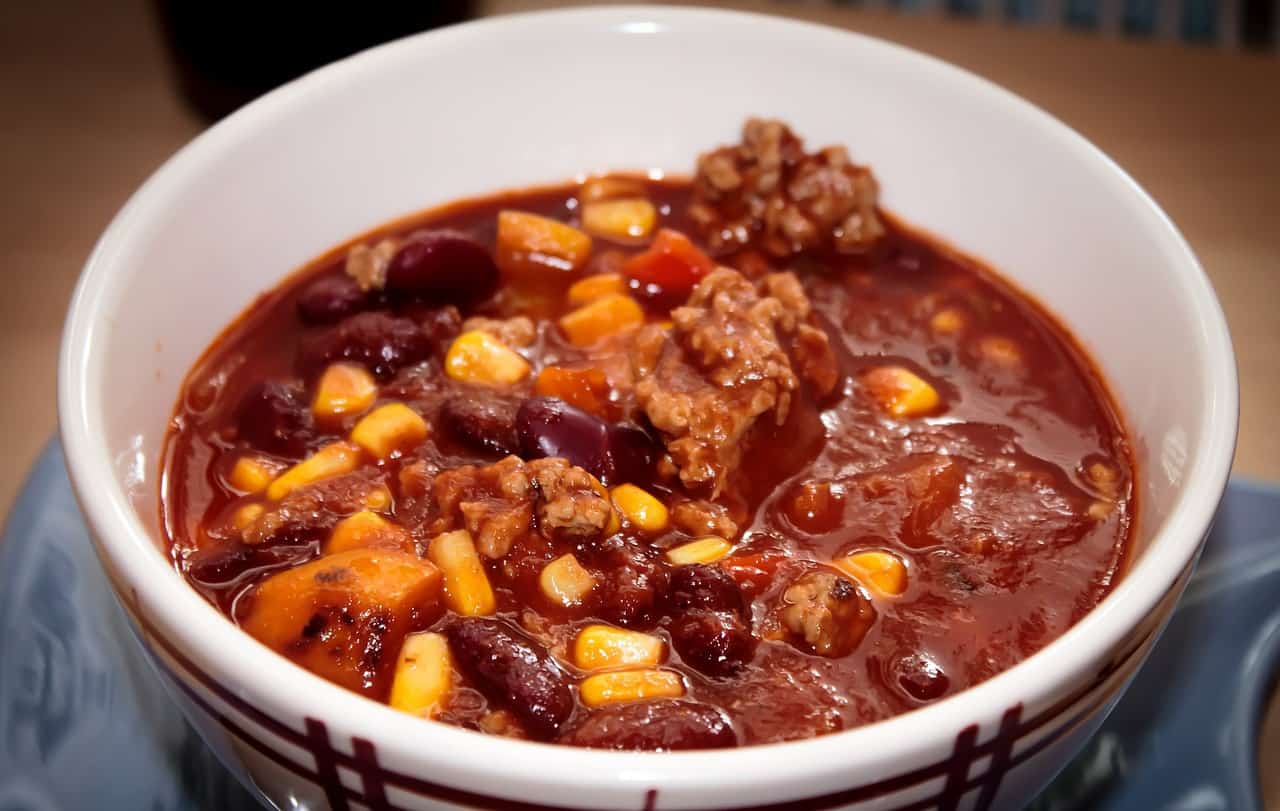 Chili is an ideal make ahead camping meal that can be enjoyed by the whole family whilst gathering around the campfire. It is easy to pre-make and can be frozen ahead of time for extra convenience. You can pair with cornbread or some tortilla chips for campfire nachos. Here is an easy chili recipe by The Spruce Eats.
Great for: Families– a great, hearty meal for a night of camping.
Groups – easy to make a large portion and share around.
Make-ahead prep time: 45 minutes.
Serves: 6
- 1 pound lean ground beef
- 1/2 cup onion, chopped
- 1 1/2 cups kidney beans
- 1 can tomato sauce
- 1 can diced tomatoes
- 2 teaspoons chili powder
- Cook the beef in a large skillet over a medium heat. Add in the onion and cook until translucent.
- Stir in the kidney beans, tomato sauce, diced tomatoes and chili powder. Season with salt and pepper if desired, (you can also add shredded cheese here if you want). Bring to a simmer.
- Cover the pan, lower the heat and simmer for a further 20 minutes.
- Once cooked, you can place the whole batch in the freezer or divide into separate containers. At camp, reheat in a Dutch oven or pan and serve with a sprinkle of cheese, sour cream and cilantro.
Use-by: Chili should last 3-4 days when taken from freezer and stored in cooler.
Top tip: You can easily make a vegetarian alternative – try this lentil chili by Today's Parent using sweet potato and beans instead.
25. Make Ahead Foil Packed Dinners
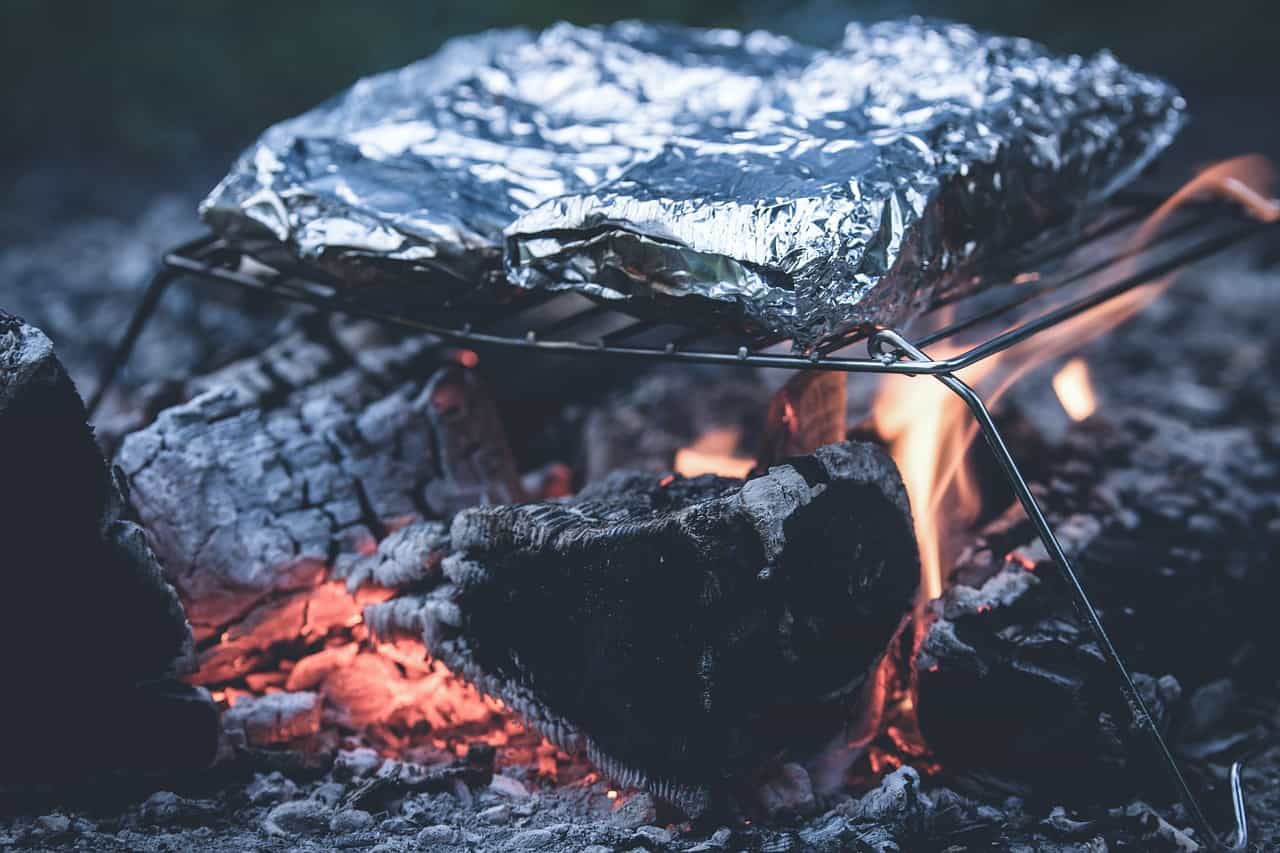 The main ingredient for these dinners is a trusty roll of king-sized tinfoil – the ultimate necessity for make ahead camping meals. There are so many foil recipes available, not to mention variations you can make yourself. Here’s a quick veggie one by Today's Parent to get you started:
Great for: Healthy eaters who want a veggie dish to accompany their main meal.
Make-ahead prep time: 15 minutes.
Serves: 4
- 1 onion, cut into wedges
- 1 zucchini, sliced
- 1 red pepper, cut into strips
- 1 cup sugar snap peas
- 2 tablespoons olive oil
- 1/2 teaspoon garlic powder
- Pinch of salt
- Cut 4 square pieces of foil, around 12 inches.
- Prepare the vegetables and divide between foil squares. Drizzle oil over and add the garlic powder and a sprinkle of salt. Close the foil and crimp loosely over vegetables to create a packet.
- Store in the cooler until ready to cook.
- Throw the packets on the grill or barbecue set at a medium-high heat. Turn over after a couple of minutes and remove from heat when vegetables are tender (5-7 minutes). Allow to stand for 2 minutes before opening.
Use-by: Store in the cooler and eat within 2-3 days. Other foil packets may vary depending on the ingredients used.
Top tip: These veggie packets would go great with enchiladas, mac n cheese or burgers.
26. Shepherd’s Pie
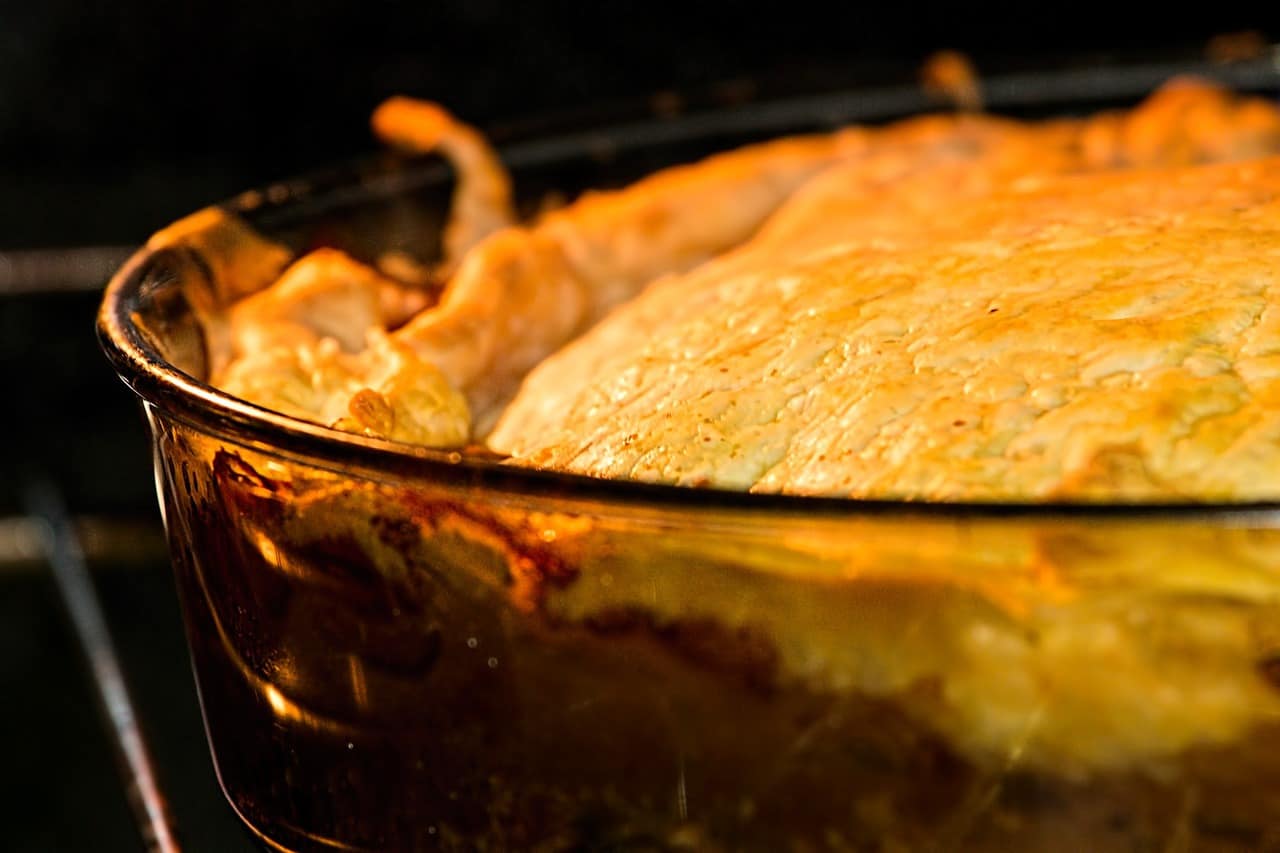 If you are searching for some make ahead comfort food, look no further than this Shepherd’s Pie recipe. Packed full of flavor, this family favorite will go down a treat at camp. Thanks to Iowa Girl Eats for this easy recipe.
Great for: Families – a true classic that can be enjoyed by the whole family.
Couples – easy to divide between 2 with plenty of leftovers for the next night.
Make-ahead prep time: 45 minutes.
Serves: 5-6
Ingredients:
- 4 cups prepared mashed potatoes
- 1lb ground beef
- 2 garlic cloves, minced
- 1/3 cup onion, chopped
- 3 tablespoons all-purpose flour
- 1 can chicken broth
- 1 tablespoon Worcestershire sauce
- 1 tablespoon soy sauce
- 1 tablespoon tomato paste
- 2 cups frozen vegetables
- Grated cheese (optional)
- Preheat the oven to 400°F (200°C).
- In a large skillet, brown the beef with the garlic and onions over a medium-high heat. Once cooked, add the flour and sauté for 1-2 minutes.
- Stir in the chicken broth, Worcestershire sauce, soy sauce and tomato paste, simmering until sauce has thickened (5-6 minutes). Remove from heat and add the frozen vegetables, seasoning with salt and pepper.
- Pour the mixture into a large casserole dish, topping with the mashed potatoes. You can sprinkle grated cheese on top if you wish.
- Bake for 20-30 minutes or until the top turns golden brown.
- Transfer to a foil baking pan and cover tightly with foil. Place in the freezer or fridge until ready to take camping.
- When it comes to reheating on the campfire, pop it on the grate for about 20 minutes or until piping hot.
Use-by: You can freeze Shepherd’s Pie for up to 6 months. Allow to thaw in the cooler and it will keep for 2-3 days. Alternatively, freshly baked Shepherd’s Pie will last in the cooler for 3-5 days.
27. Mac n Cheese
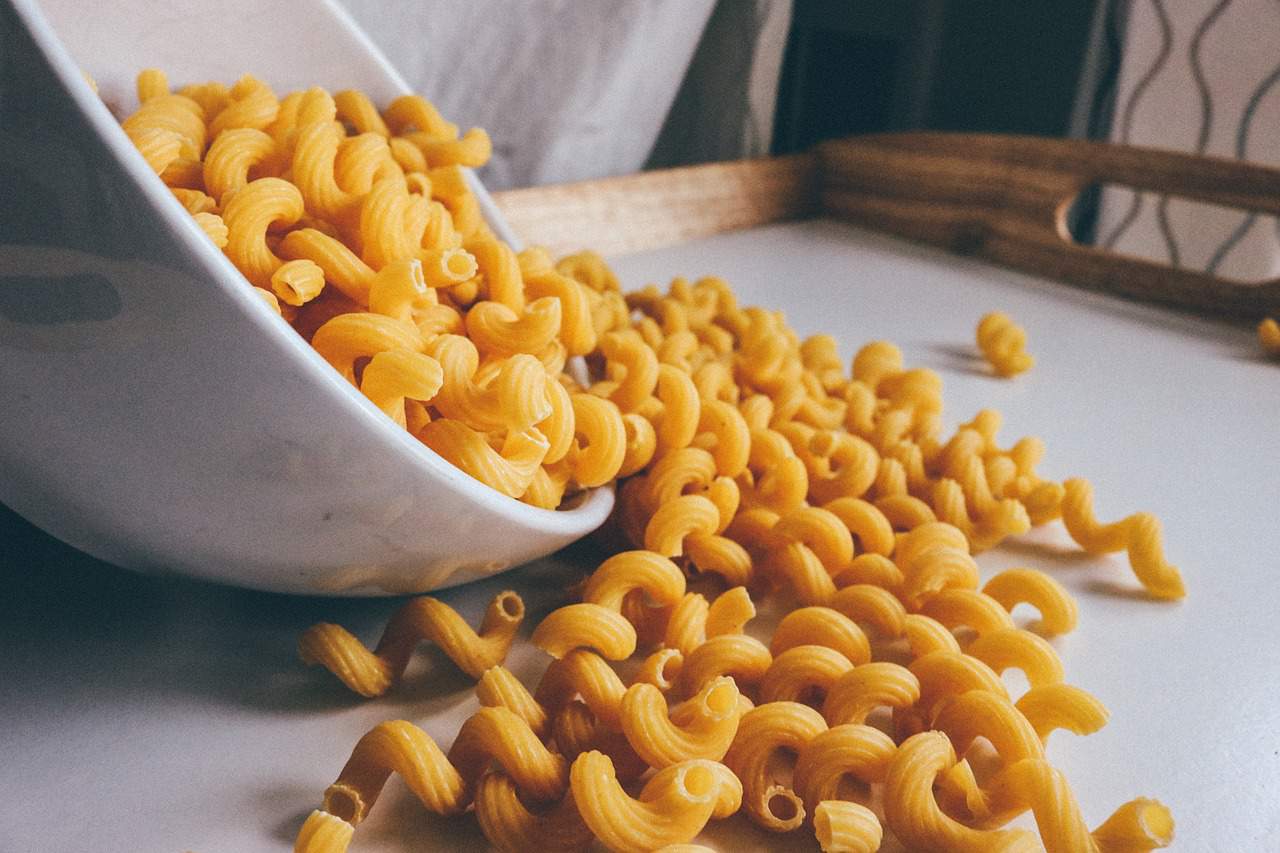 You might not immediately think mac n cheese when you think of camping dinners, but this is a great make ahead recipe that you can easily take with you on your camping trip. Try this recipe from Lauren's Latest.
Great for: Families – it’s a real hit with the kids.
Hikers – after a long day of walking, this carb-loaded meal will boost your energy levels ready for the next day.
Make-ahead prep time: 25 minutes.
Serves: 4
- 1 1/2 cups macaroni
- 8oz prepared alfredo sauce (just over 1/2 a jar)
- 1/4-1/2 cup milk (either half and half or whole milk)
- 1/2 cup Parmesan cheese, grated
- 1/2 cup cheddar cheese, grated
- 1/4 cup mozzarella cheese
- Cook pasta according to packet directions. Once cooked, drain and rinse with cold water.
- Add the alfredo sauce to the cooked pasta, stirring in the milk and the three cheeses. Add salt and pepper to taste.
- Divide pasta between four small aluminum pie tins, sprayed with non-stick cooking spray. You can add another layer of cheese here if you wish. Cover with foil (the inside also sprayed with non-stick cooking spray) and seal tightly. Store in the cooler.
- When ready to cook, place each foil dish on a grill over the campfire and cook for 8-10 minutes until hot.
Use-by: If stored in the cooler, consume within 3-5 days.
28. Make Ahead Chicken Enchiladas
Enchiladas are a Mexican staple that are incredibly easy to make ahead of time and devour around the campsite. You can adapt the recipe depending on your taste, adding more spices for a full Mexican flavor or chilis for a spicy kick.
Great for: Groups – easy to prepare beforehand and a good sharing dinner.
Families – children (and adults!) will love the cheesy chicken goodness oozing from these enchiladas.
Make-ahead prep time: 25-30 minutes.
Serves: 6 (assuming 2 enchiladas per person).
- 3 chicken breasts, sliced
- 1 onion, diced
- 1 can black beans, rinsed and drained
- 1 packet enchilada spice mix
- 1 can enchilada sauce (any)
- 12 flour tortillas
- 2 cups cheese, grated
- 1 cup sour cream
- Diced green chilis or jalapenos (optional)
- Cook the chicken in a pan with a splash of oil. Add the onion and cook until browned. Follow with the black beans, spice mix and 3/4 of the enchilada sauce. Simmer for 8-10 minutes.
- Place a small amount of filling down the middle of each tortilla, followed by a sprinkle of cheese. Roll up the tortilla and place in a foil baking tray.
- Once all the tortillas are filled and rolled, spread the remaining sauce over the tops plus the cheese, sour cream and any optional toppings. Cover with foil and put in the freezer.
- Transfer to the cooler still frozen and when ready to eat, place the foil pan over the campfire and cook until the sauce is bubbling and the cheese has melted.
Use-by: Enchiladas can be frozen for up to 3 months. Once thawed consume within 2-3 days.
Top tip: Don’t overfill the enchiladas or they can burst. To mix it up, try using different ingredients with tacos, fajitas and burritos.
29. Paella
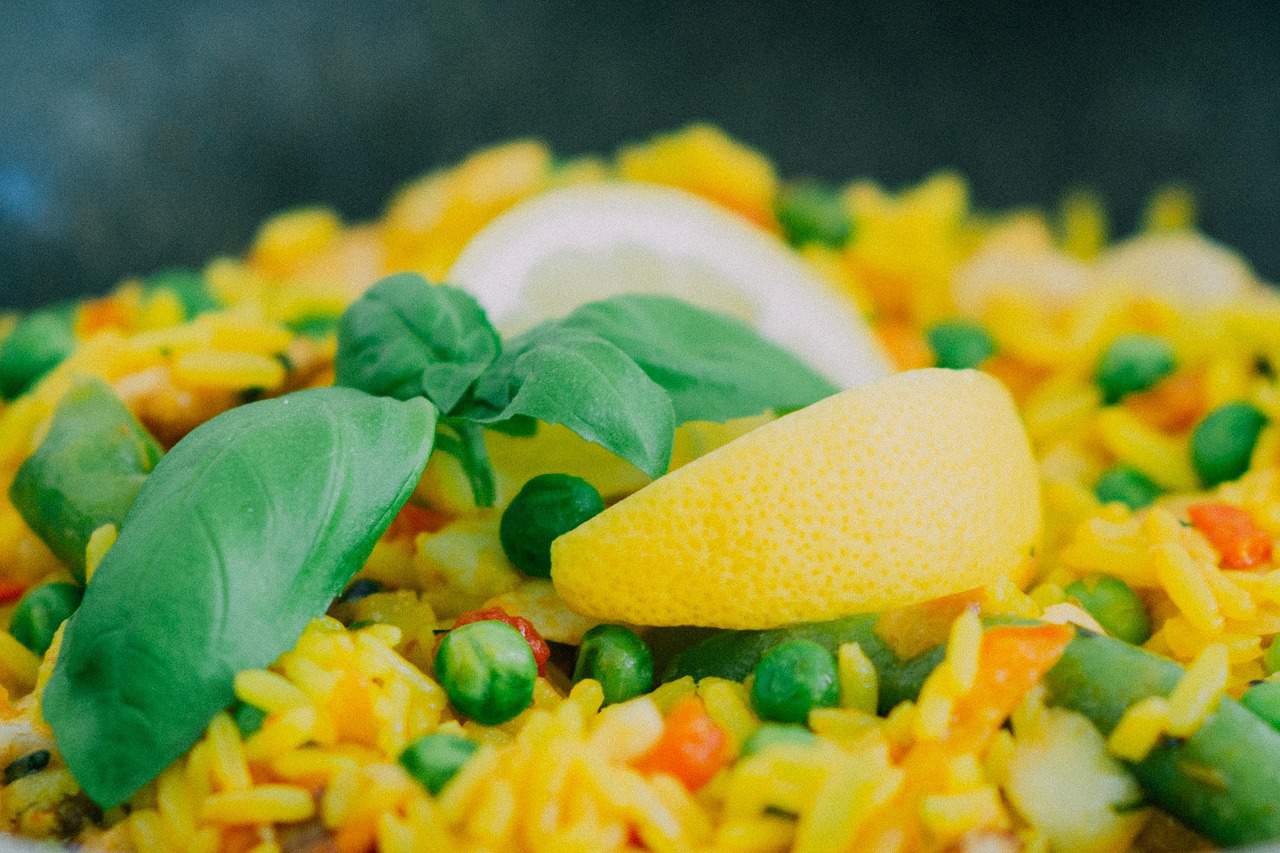
A tasty favorite perfect for camping, this paella dish is filled with nutritious ingredients that you can prepare ahead of time before cooking over the campfire. Try this foil packaged paella by Zestuous.
Great for: Large groups – lay all the ingredients out and allow people to help themselves, buffet style.
Make-ahead prep time: 10-15 minutes.
Serves: Unspecified (this recipe doesn’t include amounts so just make enough for your group numbers).
- Roasted chicken (pre-cooked), shredded
- Chorizo (uncooked), cut into small chunks
- Pepper, chopped
- Cherry tomatoes, whole
- Onion, chopped
- Garlic, minced
- Equal parts uncooked short-grain rice
- Equal parts white wine, chicken broth or water
- Prepare the chorizo, chicken and vegetables ahead of time. Store in separate air-tight containers and place in the cooler.
- At the campsite, use double layers of tinfoil and shape into deep bowls.
- Layer up your ingredients in the make-shift bowls before adding your rice and liquid. Give it a stir to soak into the veg and meat.
- Close up the pouch and place on the campfire, away from the direct flame.
- Rotate every 10-15 minutes and cook for around 1 hour once the rice is fluffy and chorizo cooked through.
Use-by: Rotisserie chicken should be eaten within 3-4 days, sliced chorizo should be eaten within a week and prepped veg varies, but will usually last between 3 and 5 days.
30. Creamy Mashed Potato
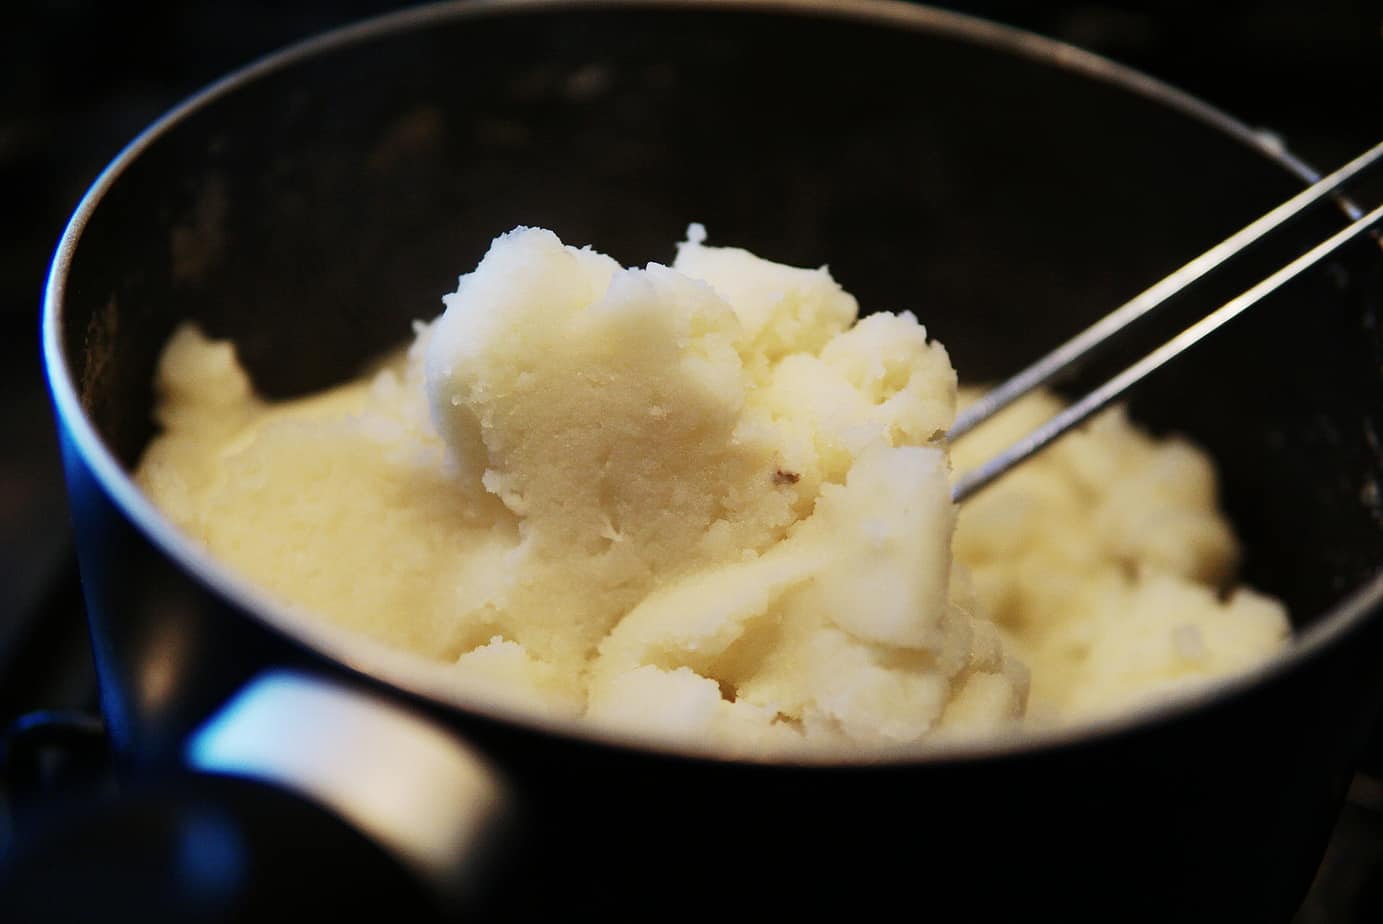
A great side dish to accompany one of your camp dinners, this make ahead mash is creamy, filling and full of deliciousness. Not to mention the tasty toppings you can add!
Great for: Large groups – this big bowl of mash can be easily shared between big numbers.
Couples – divide the recipe between 2 small foil trays and store in the cooler before heating over the campfire.
Make-ahead prep time: 30 minutes.
Serves: 12-15
For the mash:
- 5lbs russet potatoes, peeled and cubed
- 1/4 cup whole milk
- 1/2 cup salted butter, melted
- 1 8oz pack cream cheese, warmed to soften
- 1 tablespoon dried minced onion
- 4 cloves garlic, minced
- 1 large egg, lightly beaten
- Salt and pepper
- 5 slices bacon, cooked and diced
- 2 green onion stalks, thinly sliced
- 1 cup cheddar cheese, grated
- Bring a large pan of water to boil, seasoned with salt. Add potatoes and cook until tender (about 15 minutes). Drain and set aside to cool.
- Mash potatoes in a large bowl with milk and melted butter. Add cream cheese, onion, garlic and egg and beat to combine. Season with salt and pepper. Transfer potatoes to a foil baking dish, cover with more foil and refrigerate. If you are adding toppings, prepare and store in separate zip-lock bags in the fridge.
- When ready to bake, remove outer foil and heat over the campfire until puffy and hot (about an hour). Add the toppings and bake for another 5 minutes until cheese melts.
Use-by: When stored in the cooler, eat within 3 days.
Top tip: You can pair this side with mains such as camping skewers or a foil packed dinner.
31. Make Ahead Sausage and Potato Foil Dinner
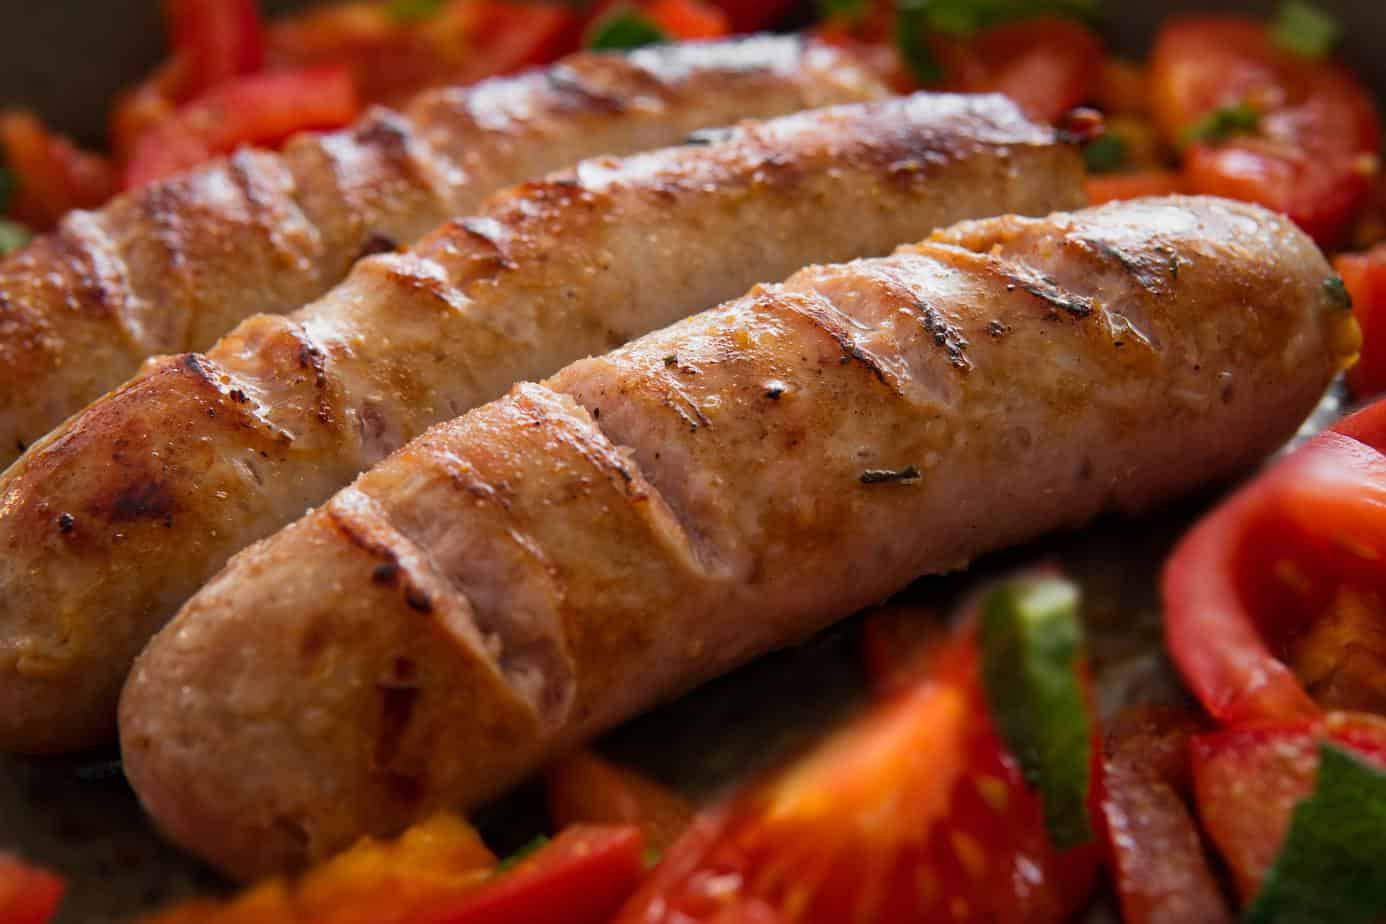
This easy make ahead tinfoil dinner just requires a bit of prepping at home before cooking over the coals at camp. Credit to One Sweet Appetite for bringing this one to our attention!
Great for: Solo campers – easy to make a single portion and foil it up.
Couples – separate portions make this an easy meal for 2 people.
Make-ahead prep time: 15 minutes.
Serves: 4
- 6 sausages
- 8 red potatoes
- 1 cup green beans
- Olive oil
- Salt and pepper
- Dice the potatoes into small chunks.
- You can leave the uncooked sausages whole or cut into chunks too.
- Cut 4 rectangles of tinfoil, folding up the sides so you have a 1-inch rim.
- Spray the foil with cooking spray and distribute the potato and sausages evenly. Add the beans and seasoning, then drizzle with oil. Fold up the sides to create your foil packet.
- At camp, place packets onto hot coals and cook for about 30 minutes, turning every so often.
Use-by: Once prepped and stored in the cooler, consume within 1-2 days.
Top tip: You can enjoy these packets with foiled veggies.
32. Pulled Pork
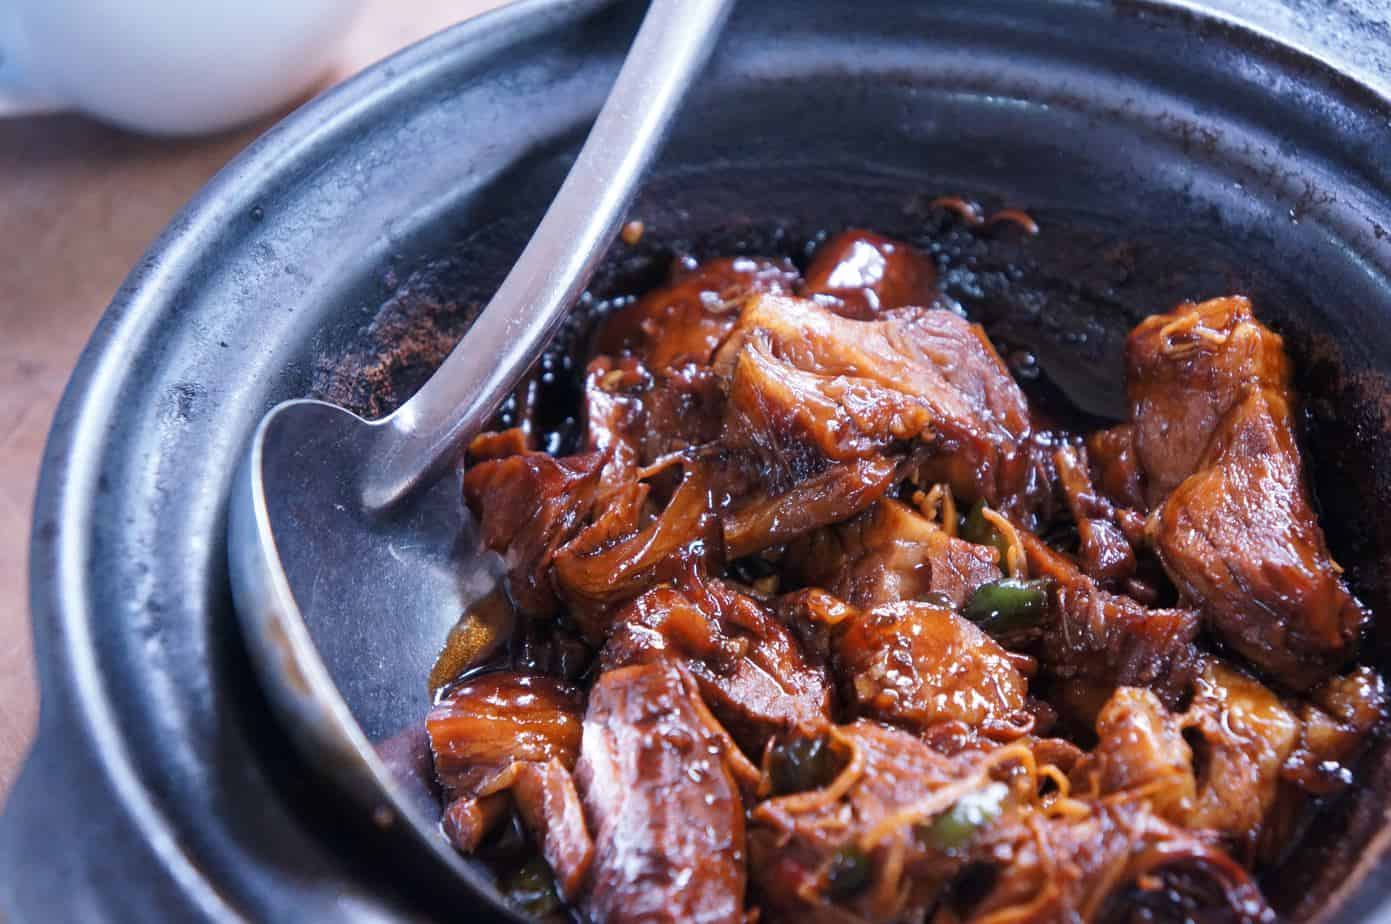
Pop your pork in the slow cooker at home and you can add it to lots of different camp meals – tacos, enchiladas, mashed potato, mac n cheese, bread buns etc. Try this recipe by Food Network for best slow-cooked results.`
Great for: Adding to other campfire meals.
Small groups and couples – a shoulder of pork divides well between 2-4 people.
Make-ahead prep time: 15 minutes (plus 8 hours in the slow cooker).
Serves: 4
- 3 tablespoons light brown sugar
- 1 teaspoon mustard powder
- 1/2 teaspoon ground cumin
- 2 teaspoons paprika
- Salt and pepper
- 1 boneless pork shoulder (3-4lb)
- 2 teaspoons vegetable oil
- 3 tablespoons tomato paste
- 1/2 cup apple cider vinegar
- Mix 1 tablespoon of brown sugar with mustard powder, cumin, paprika and a sprinkle of salt and pepper in a bowl. Rub over the pork to marinate.
- Heat the oil in a large skillet and brown the pork for about 5 minutes until browned. Set aside.
- Whisk 3/4 cup water into the liquid left in the skillet, then transfer this to the slow cooker.
- Add the tomato paste, vinegar, remaining 2 tablespoons brown sugar and 2 cups water to the slow cooker and whisk together. Add the pork, cover and cook on low for 8 hours.
- Remove pork and place on a chopping board. Strain the liquid in the slow cooker into a pan and bring to a boil, cooking for about 10 minutes until liquid is reduced by half. Sprinkle with salt. Pull the pork in a bowl and pour over 1 cup of the reduced liquid, plus salt and vinegar to taste.
- Wrap the pork tightly in tinfoil and refrigerate.
Use-by: Stored in the cooler, pulled pork should last for 3-4 days.
Top tip: You can eat cold or re-heat over the campfire wrapped in tinfoil.
33. Make Ahead Campfire Pizza Log
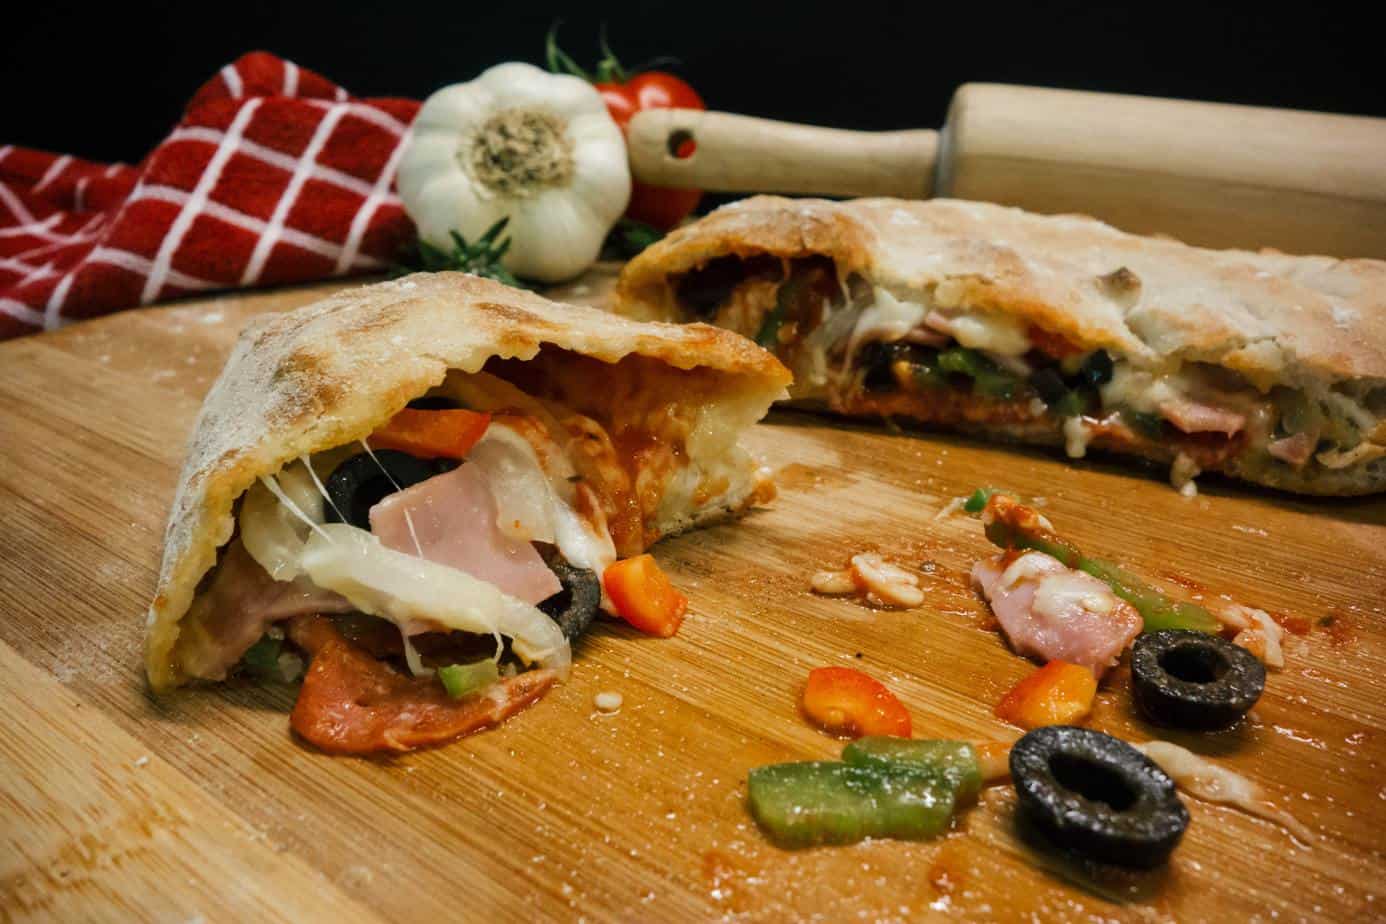
Who would have thought you could enjoy pre-made pizza around the campfire? Unlike a typical pizza, this one is rolled into a log, but we assure you it tastes just as good and is the ultimate comfort food after a busy day of activities. Give this recipe by Shock Munch a go to find out for yourself!
Great for: Hikers after a long day of walking.
Pizza-loving campers.
Make-ahead prep time: 25 minutes.
Serves: 1-2 people (makes 1 pizza log)
- 1 can pizza dough, store bought
- 1/2-1 cup pizza sauce
- 8oz shredded mozzarella
- Toppings of your choice (e.g. veggies, pepperoni, cooked chicken etc.)
- 2 tablespoons butter, melted
- Pinch of salt, garlic powder and oregano
- Roll out the pizza dough and spread sauce around, leaving about 1/2 inch around the edges.
- Sprinkle the mozzarella cheese and then add your toppings, being careful not to add too many.
- Carefully roll the dough into a log and pinch the ends so the dough sticks together.
- Use a fork to poke some holes in the top.
- Melt butter in a pan and spread on top of the dough followed by the salt, garlic powder and oregano. Wrap in tinfoil and place in the freezer.
- At camp, place the foiled pizza log onto hot coals, cooking for about 30 minutes and turning occasionally.
Use-by: Thawed pizza dough will last in the cooler for about 3 days. If for example you use cooked chicken as a topping, this will last 3-4 days in the cooler.
34. Homemade Burgers
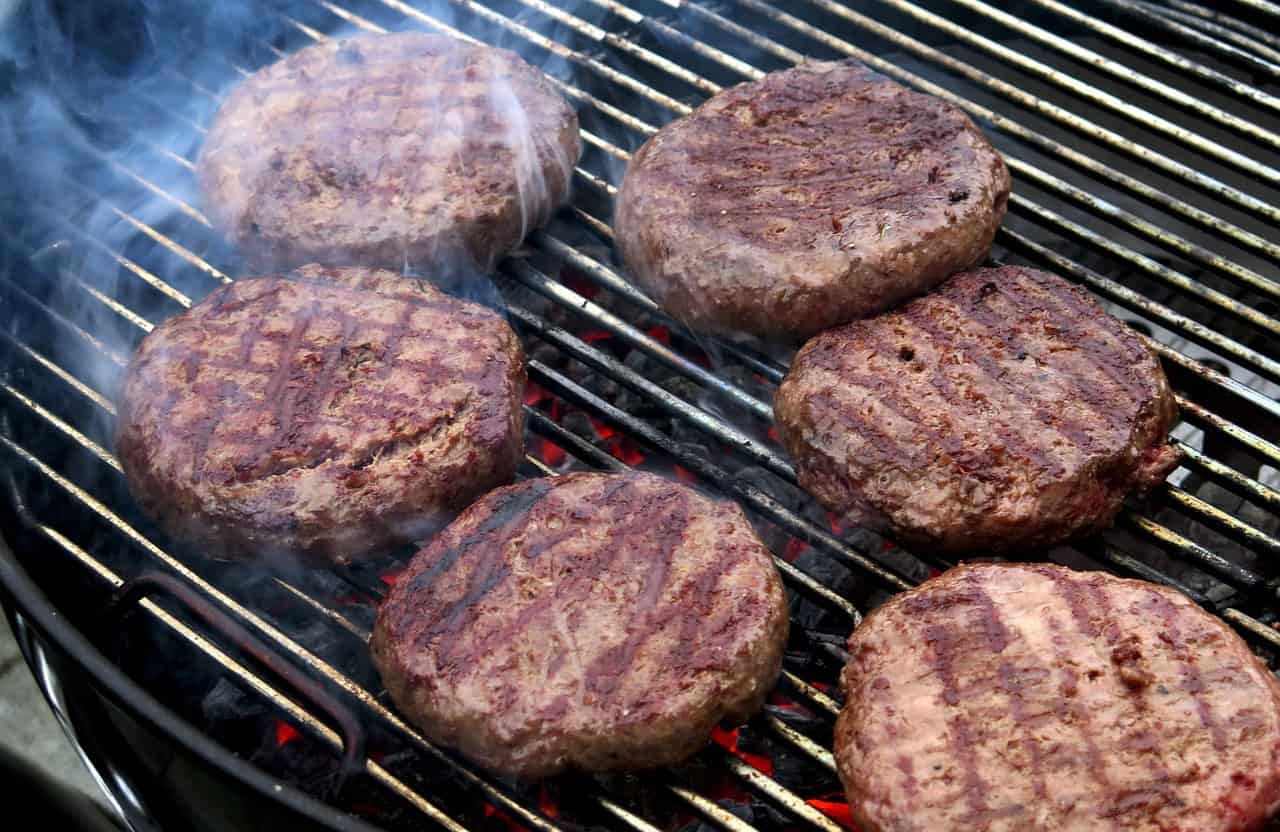
There’s nothing quite like a burger when you’re camping, especially if you have the barbecue handy! Instead of buying pre-made burgers from the store, have a go at these homemade patties by Red and Honey. They are simple, full of flavor and devoured by all who eat them. You have been warned!
Great for: Reheating on the barbecue.
People in groups who can add their own burger toppings.
Make-ahead prep time: 20 minutes.
Serves: Makes 12-15 patties.
- 5-6lb ground beef
- 4 eggs
- 4 tablespoons coconut flour
- 2 teaspoons oregano
- 2 teaspoons basil
- 2 teaspoons chili powder
- 3 teaspoons garlic powder
- 1 teaspoon dried minced onion
- 1/2 teaspoon red pepper flakes
- 2 teaspoons sea salt
- 1/2 teaspoon black pepper
- 1/2 teaspoon coriander
- Mix all ingredients together with hands/a spoon/mixer.
- Shape into patties and place on parchment paper on a baking tray.
- Transfer to freezer then place frozen patties in a zip-lock bag or plastic container.
- Reheat on the barbecue or over the campfire.
Use-by: Thawed burgers should be eaten within 1-2 days.
Top tip: You can alternatively use this recipe for meatballs, shaping into small balls rather than patties and pairing with pre-cooked pasta and tomato sauce.
35. Make Ahead Slow Cooked Beef Stew
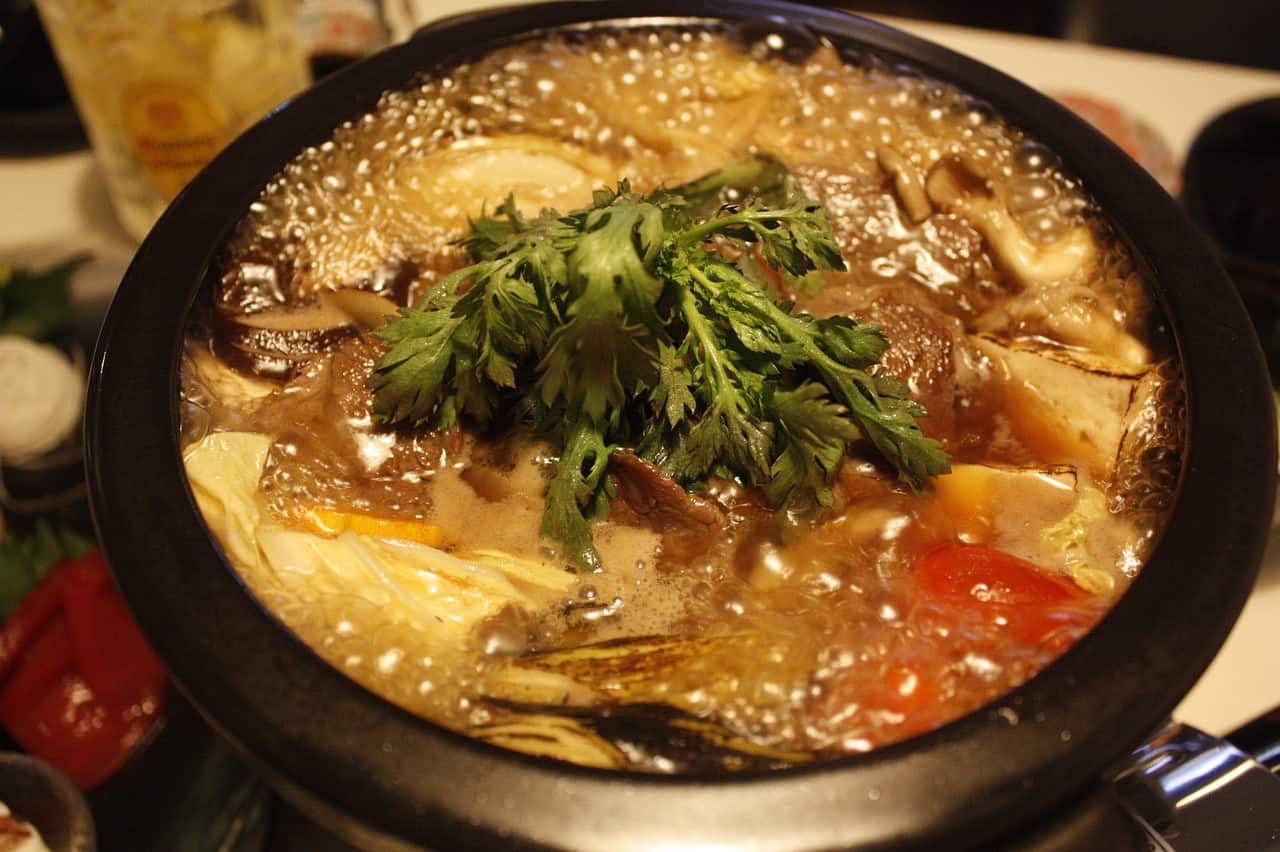
This beef stew is a hearty, nourishing dinner that can be frozen ahead of time and reheated at camp. Give it a try using this recipe by Six Sisters’ Stuff.
Great for: Families looking for a hot, filling dinner option.
Campers in colder conditions.
Make-ahead prep time: 10 minutes (plus 8 hours in the slow cooker).
Serves: 6
- 1 pound beef stew cubes
- 4 carrots, sliced
- 4-6 red potatoes, cubed
- 1 bay leaf
- 1 can tomato sauce
- 2 cans cream of mushroom soup
- 1 package frozen peas
- 1 package onion soup mix
- Add beef cubes to the slow cooker crock pot. Layer with carrots, followed by potatoes and topping with the bay leaf.
- In a different bowl, combine remaining ingredients and pour mixture over the beef and veg.
- Cover and cook on low for around 8 hours.
- To freeze, either separate the stew into separate containers or place the whole thing in a large zip-lock bag. You can then reheat in a pan at camp.
Use-by: Allow stew to thaw for 24 hours and then consume within 3-4 days.
36. Salmon and Veggies
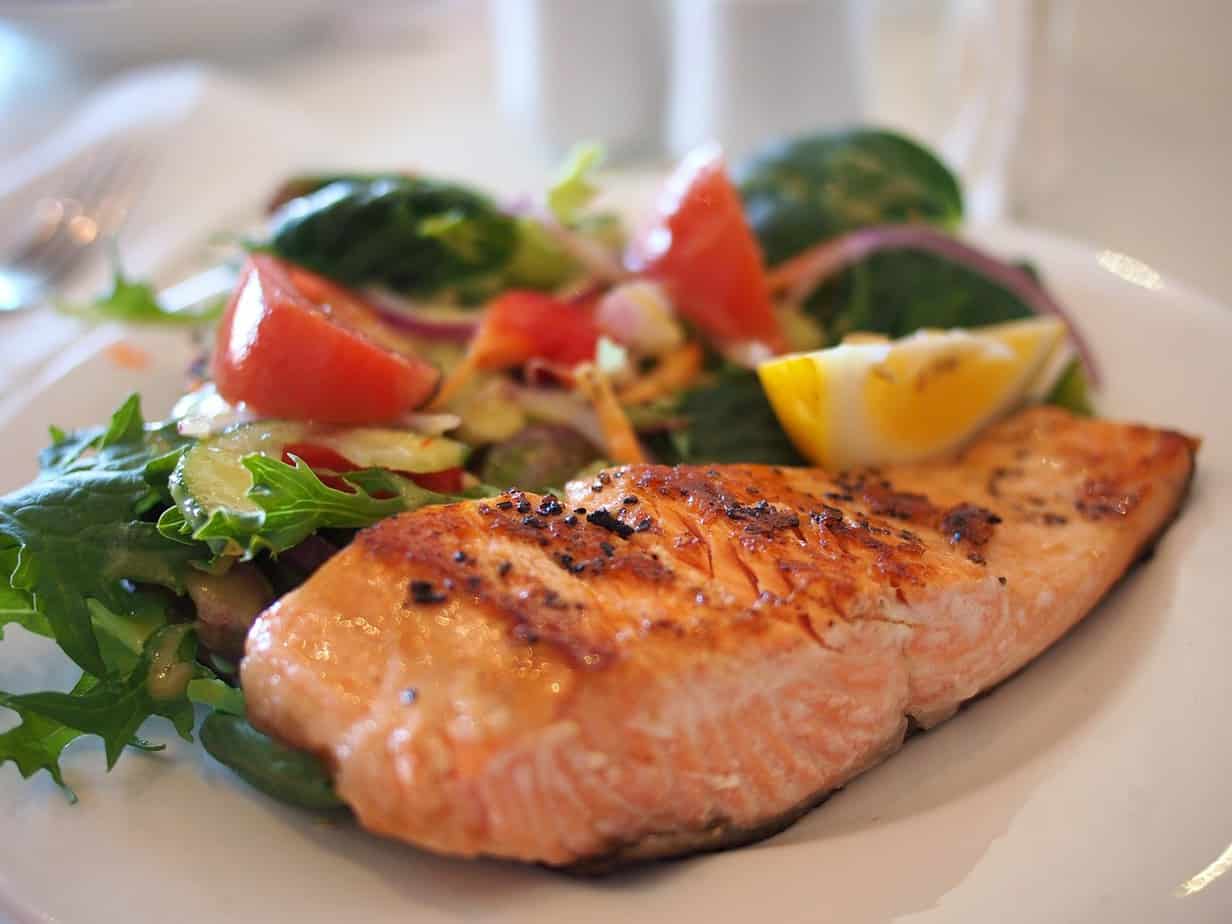
This flaky salmon with lime butter and vegetables is a winner when it comes to preparing ahead of time. Courtesy of The Recipe Critic, this gourmet camping meal is easy to prepare and tastes delicious – let us know if you agree!
Great for: Family camping.
Solo campers/couples – individual foil wraps make these an easy dinner option for 1 or 2 people.
Make-ahead prep time: 10 minutes.
Serves: 4
- 4 salmon fillets
- 2 zucchini, sliced
- 2 yellow squash
- 1 pound asparagus
- 1 red pepper, sliced
- 1 red onion, cut into chunks
- 6 tablespoons butter, melted
- 1 tablespoon lime juice
- Zest of one lime
- 1 lime, quartered
- Salt and pepper
- Cut 4 sheets of tinfoil and place a fillet of salmon down the center of each. Divide the veggies among the packets.
- Mix the melted butter, lime juice and lime zest in a small bowl. Pour into each foil packet and add a lime wedge before sealing. Place in the cooler until ready to cook.
- At camp, place foil packets on hot coals and cook for 13-15 minutes or until salmon is piping hot.
Use-by: Fresh salmon usually lasts 1-2 days if stored in the cooler.
Dessert
37. No-Bake ‘Smores Bars
It wouldn’t be a camping holiday if there weren’t any ‘smores! These yummy make-ahead bars courtesy of Turnip the Oven are enough to get those mouths watering.
Great for: Campers with a sweet tooth.
Sharing around the campfire.
Make-ahead prep time: 20 minutes.
Serves: 32
- 1 stick (8 tablespoons) unsalted butter
- 1 cup light brown sugar
- 1 teaspoon vanilla extract
- 1 cup all-purpose flour
- 2 cups graham cracker crumbs
- 1 teaspoon sea salt
- 1 can (14oz) sweetened condensed milk
- 1 1/2 cups mini marshmallows
- 1 1/2 cups chocolate chips
- Line a 13×9 inch baking tray with parchment and lightly apply non-stick spray.
- Beat the butter, sugar and vanilla with a stand/hand mixer until light and fluffy. Beat in the flour, graham cracker crumbs and salt, followed by the condensed milk. Add 1 cup of marshmallows and 1 cup of chocolate chips, stirring to combine.
- Transfer to tin and flatten out evenly. Sprinkle over the remaining marshmallows and chocolate chips. Cover with plastic wrap and chill in the fridge.
- Once firm, cut into small squares and store in an airtight container.
Use-by: These bars can be stored in the cooler for up to 5 days.
Top tip: Cut these bars up into bite-sized chunks as they are very rich. This will also make them last longer (or not)!
38. Mason Jar Strawberry Shortcakes
This make ahead mason jar dessert is a delicious treat that can be grabbed straight from the cooler and is perfect for those summer nights around the campfire. Thanks to Food Network for this tasty recipe.
Great for: An after-dinner summer dessert.
Small groups – individual mason jars make them easy to distribute.
Make-ahead prep time: 30 minutes.
Serves: 12-14
- 6 cups fresh strawberries, sliced
- 2/3 cup + 6 tablespoons granulated sugar
- 6 tablespoons butter/margarine, melted
- 1 cup whole milk
- 4 and 2/3 cups baking mix (such as Bisquick)
- Whipped cream for garnish
- Preheat the oven to 425°F (220°C).
- Mix the strawberries with 2/3 cup of sugar. Set aside.
- In a large bowl, add the melted butter, milk, baking mix and remaining sugar, combining until a soft dough is formed. Mold into biscuits and place onto a cookie sheet.
- Bake for 9-10 minutes until golden brown.
- Once cooled, place one shortcake biscuit in each mason jar and top with strawberries. Place in the cooler along with your whipped cream that you can add before you eat.
Use-by: Store in the cooler and eat after a few days otherwise shortcake may become mushy.
39. Tortilla Roll-ups
Tortillas crop up often in this guide and for good reason! This tortilla inspired dessert by Echoes of Laughter is a great DIY campfire treat for all the family. You can assemble your tortillas at home adding all your favorite sweet treats, wrap in tinfoil and throw them on the fire at camp. Here are some ingredients you could add:
- Marshmallows
- Nutella
- Caramel
- Chocolate chips
- Nuts
- Strawberries
Great for: Anyone with a sweet tooth (kids and adults alike)!
Make-ahead prep time: 10 minutes.
Serves: One tortilla per person.
Use-by: There is no specific use-by date for tortillas but once opened they should be consumed within a week. As these tortillas are pre-filled, we recommend eating within 2 days.
Top tip: Pack any perishable items separately and add to your tortilla at camp, such as bananas or whipped cream. You can also swap tortillas for crepes if you prefer.
40. Cinnamon Roll Monkey Bread
This classic campfire dessert is one to make those taste-buds tingle. Prepare your ingredients at home and then cook at camp – it will taste all the better coming straight off the campfire. Try this adapted recipe by Say Not Sweet Anne and don’t be surprised if you attract other campers with the delicious smells wafting from your fire!
Great for: Sharing around the campfire.
Make-ahead prep time: 5 minutes.
Serves: 4-6
- 1 tube biscuit dough (refrigerated)
- 1/2 cup pre-mixed cinnamon sugar (using the ratio 2 tablespoons of cinnamon to every half cup of sugar)
- Butter
- Measure out your ingredients and store in separate zip-lock bags. Keep your biscuit dough and butter in the cooler. Line an old cake pan with tinfoil in preparation.
- At camp, use your hands to roughly cut the biscuits into quarters.
- Add a few biscuit chunks at a time to your bag of cinnamon sugar and shake. Once coated, add to the pan and repeat.
- Spread a small amount of butter over the biscuits and wrap the pan in a layer of foil to seal everything in.
- Bake over a medium heat for 20-30 minutes, allow to cool then tuck in!
Use-by: We doubt you’ll have any of these leftover but just in case, store in an air-tight container at room temperature (or as close to) and consume within 2 days.
41. Cookies
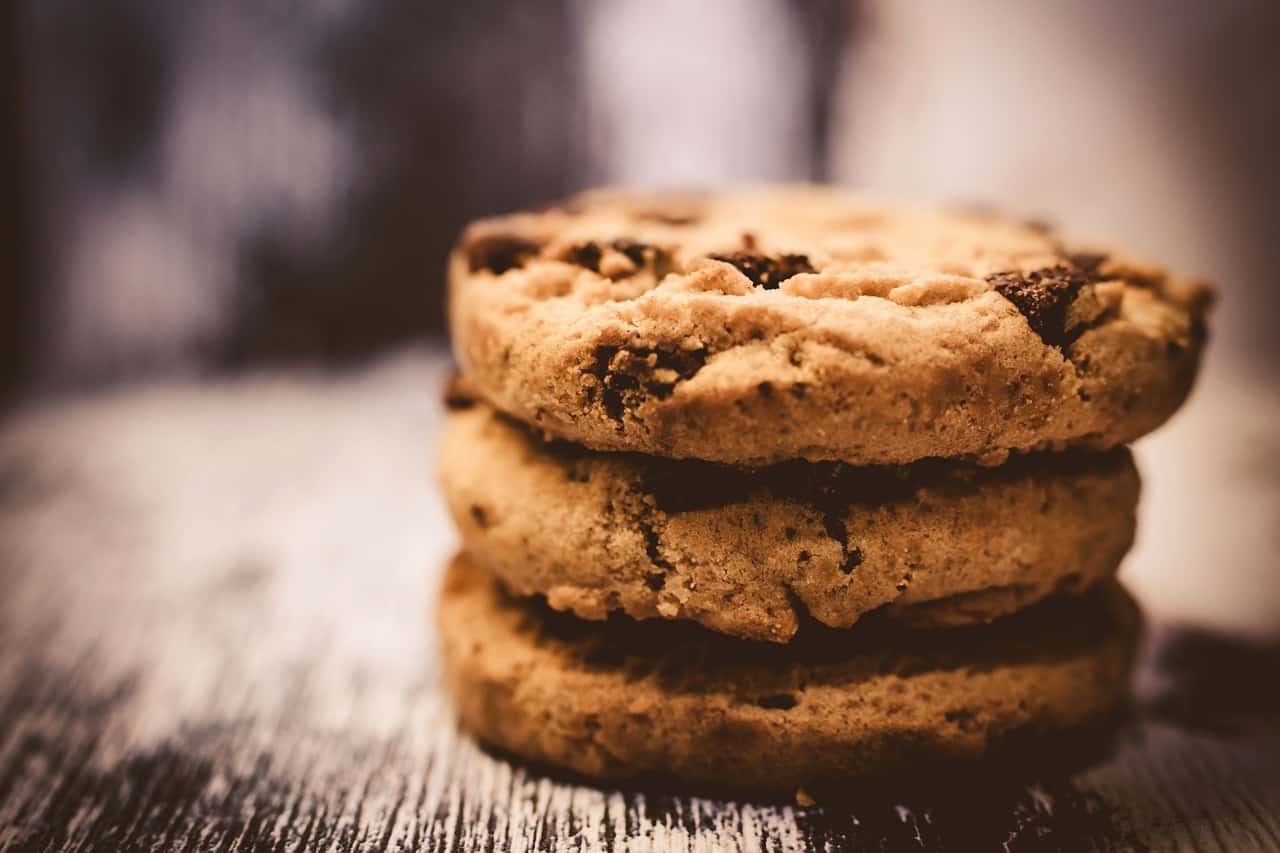
Cookies are the perfect make ahead treat to take with you on your camping adventure. You might want to cook up a big batch as they have a tendency to disappear before your very eyes! To continue with camping traditions, here’s a ‘smores cookie recipe courtesy of Sweet Paul.
Great for: Everyone.
Make-ahead prep time: 35 minutes.
Serves: Makes 16 cookies.
- 1 1/2 cups all-purpose flour
- 1 1/2 cups graham crackers, crushed
- 1/4 teaspoon salt
- 1/4 teaspoon baking powder
- 3/4 cup white sugar
- 3/4 cup brown sugar
- 1/2 lb butter
- 2 eggs
- 1 teaspoon vanilla extract
- 1 cup chocolate chips
- Mini marshmallows
- Chocolate (of choice), chunked
- Preheat the oven to 350°F (175°C).
- Combine the flour, crackers, salt and baking powder in a bowl and set aside.
- In another bowl, mix the sugars and butter until well combined. Beat in the eggs and vanilla extract then add the flour mixture. Add the chocolate chips and stir to combine.
- Scoop the mixture into small balls and place on a baking sheet. Bake for 8-10 minutes.
- Whilst baking, get your marshmallows and chocolate chunks together. Remove cookies from oven and quickly press 3 chocolate chunks and 4 marshmallows into each cookie.
- Bake for another 2 minutes or until marshmallows go brown.
- Allow to cool and store in an airtight container.
Use-by: Cookies can last 2-3 weeks at room temperature (but are usually gobbled up way before that)!
For some other make ahead cookie recipes, have a go at these:
S'mores Oatmeal Cookies by The Whole Bite
Raisin Pecan Oatmeal Cookies by Food Network
Chocolate Toffee No-Bake Cookies by Mom on Timeout
42. Make Ahead Grilled Apple Crisp
These foil-packed apple crisps are a great after-dinner treat for the whole family. Try this easy make ahead recipe by What Should I Make For... and see for yourself!
Great for: Families – a traditional dessert brought straight to your campsite.
Couples – individual foil packages mean you can each have another the following night.
Make-ahead prep time: 15 minutes.
Serves: 4
- 2 apples, peeled, cored and diced
- 2 teaspoons lemon juice
- 3 tablespoons sugar
- 1/3 cup all-purpose flour
- 2oz unsalted butter
- 1/2 cup rolled oats
- 1/3 cup light brown sugar
- 1 teaspoon vanilla extract
- 1 1/2 teaspoon cinnamon
- 1/2 teaspoon ground nutmeg
- 1/2 teaspoon salt
- Cut 4×11-inch pieces of tinfoil and spray with non-stick cooking spray. Set aside.
- Toss diced apples with lemon juice and sugar and set aside.
- Mix all remaining ingredients in a bowl until fully combined.
- Set your grill to medium-low heat.
- Divide the apples between the 4 pieces of foil, followed by the topping. Do this down one half of the foil so you can then easily fold over and crimp the edges. Store in the cooler.
- At camp, place foiled pouches on the grill and cook for 20 minutes.
Use-by: The apple in this recipe will last 3-4 days in the cooler so consume within that time.
Top tip: Double wrap the apple crisp in extra foil before storing/cooking to prevent leakages.
43. Campfire Cones

Although you don’t need ice cream for this one, we can assure you, you’re still in for a tasty treat. You can prep your cones either at home or camp, depending on how much storage space you have. Get the kids involved with this recipe from Genius Kitchen.
Great for: Kids – they can help assemble the cones and won’t even realize there’s no ice cream involved!
A ‘smores alternative.
Make-ahead prep time: 10 minutes.
Serves: 1
- 1 ice cream cone
- Fillings of your choice (marshmallows, chocolate chips, chopped nuts, coconut, peanut butter, Nutella etc.)
- Assemble your cone at home and wrap tightly in tinfoil.
- At camp, use long tongs to roast in an open flame until fillings melt (about 5 minutes). Once cooled, pull away foil and dig in!
- Alternatively, prepare the fillings at home and store in containers. You can then assemble at camp instead.
Use-by: If making ahead, consume within 2 days. If assembling at camp, just follow the use-by dates on the ingredients but they should have pretty long shelf lives.
44. ‘Smores Bark
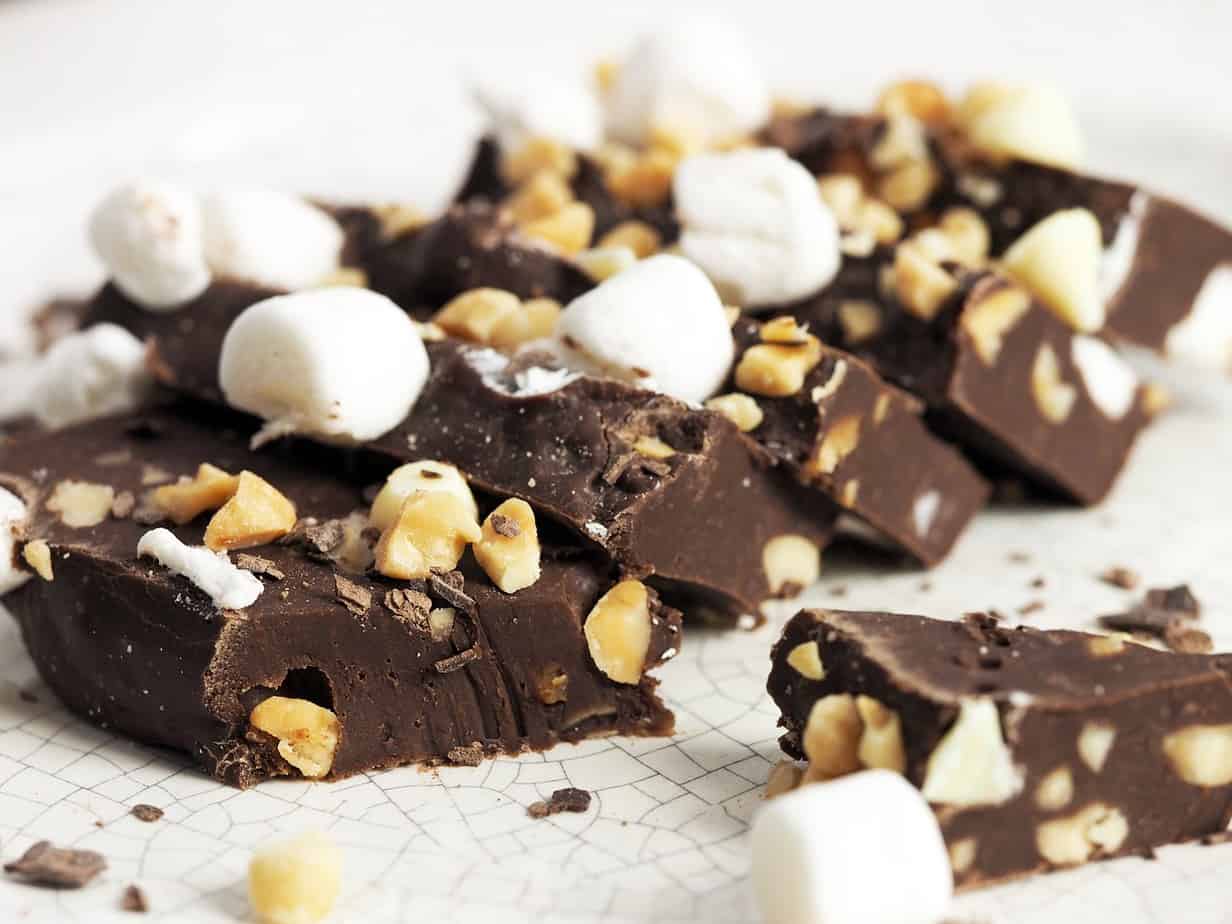
Another insanely delicious must-have dessert around the campfire. ‘Smores bark by Cook Craft Love has all the ingredients for a tasty treat and is so easy to make at home and transport to camp.
Great for: Munching on around the fire.
Sharing with your fellow campers.
Make-ahead prep time: 1 hour.
Serves: 8-10
- 24oz chocolate chips
- 8oz marshmallow fluff
- 2 sheets of graham crackers, crushed
- Nuts (optional)
- Melt the chocolate chips in the microwave until smooth. Remove and spread half the chocolate over a lined baking tray or silicone baking mat and place in the fridge. Allow to set for 15 minutes.
- Microwave the marshmallow fluff for 15-30 seconds. Remove chocolate from fridge and spread the fluff on top leaving about 1/2 an inch around the perimeter. Place in the fridge for 15 more minutes.
- Remove from fridge and pour over the remaining melted chocolate, topping with the crushed graham crackers. Put back in the fridge for 1 hour until it sets before breaking it into pieces.
- Store in an airtight container in the cooler.
Use-by: We’re sure you’ll have no problems eating this up but so that the crackers don’t dry out, consume within 2-3 days.
Top tip: You don’t have to store these in the cooler but make sure they are kept out of direct sunlight to prevent a sticky chocolate mess.
45. Make Ahead Plum and Bourbon Crumble
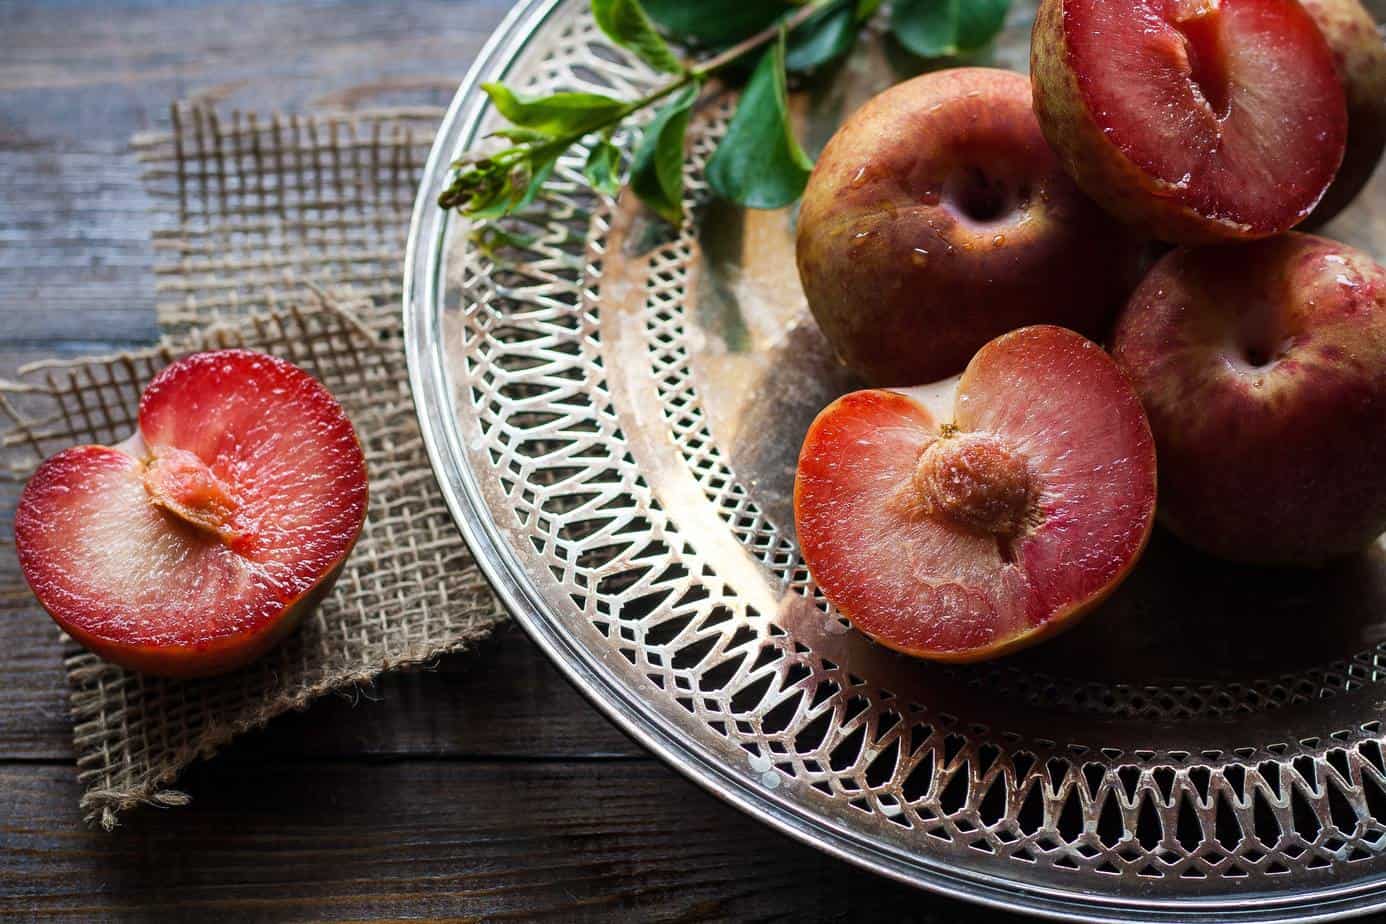
This mason jar dessert from Food Network is easy to make at home and is the perfect summer dessert for adults to enjoy around the campfire whilst the kids tuck into their cones or cookies.
Great for: Adults – the bourbon adds a nice kick to this warm dessert.
Make-ahead prep time: 40 minutes.
Serves: 4
- 2 plums, halved and pitted
- 2 tablespoons unsalted butter
- 6 tablespoons light brown sugar
- 1/2 cup all-purpose flour
- 1 teaspoon cinnamon
- 1 1/2 teaspoons grated lemon zest
- 4 teaspoons bourbon
- Preheat the oven to 350°F (175°C).
- Spray a grill pan and place over a medium-high heat. Add the plums cut-side down and cook until just charred, about 1-2 minutes. Set aside.
- In a bowl, combine the butter, 4 tablespoons of sugar, flour, cinnamon and lemon zest. Use your hands to create small clumps of crumble which you can then add to your mason jars.
- Next, score the tops of the plums and place one (grill-side up) in each jar. Add one teaspoon of bourbon to each plum and evenly sprinkle the remaining 2 tablespoons of sugar over the plums. Divide the remaining crumble between the 4 jars then place them in an 8×8 inch baking dish. Fill the dish with 1/4 cup water to make a water bath.
- Bake for 20-25 minutes until crumble is golden and plums are soft.
- You can re-heat at camp as long as the mason jars are standing in a water bath. If not, they can also be eaten cold, served with whipped cream from the cooler.
Use-by: Store in the cooler and consume within 2 days.
46. Pineapple Upside Down Cake
Another easy foil recipe that you can prepare at home, bundle in foil and throw on the fire. Dessert has never been so simple! Try this one on your next camping trip, courtesy of Echoes of Laughter.
Great for: Campers craving a warm, satisfying dessert.
Make-ahead prep time: 10 minutes.
Serves: As many foils as you require.
- Pineapple chunks (fresh/canned)
- Pound cake, cubed
- Brown Sugar
- Butter
- Prepare your tinfoil and spray with cooking spray.
- Add a handful of pineapple chunks to each foil packet.
- Top with pound cake cubes, followed by a good spoonful of butter and brown sugar.
- Fold the packets and store in the cooler.
- At camp, place on a grill over the fire for 15-20 minutes, once the butter has melted with the sugar, forming a sauce.
- For added toppings, sprinkle over some cinnamon or nutmeg or add a dollop of whipped cream from the cooler.
Use-by: To prevent the pound cake becoming soggy, consume within 2 days.
47. ‘Smores Rice Krispies
You can never have too many ‘smores desserts and this one by Cook Like a Champion can be made ahead and requires no re-heating at camp. Simply grab and go!
Great for: Sharing – these convenient bars are great for passing around the campfire.
Make-ahead prep time: 30 minutes.
Serves: Makes 24 bars.
- 8-9 graham crackers
- 8 tablespoons butter
- 1/4 cup sugar
- 8oz bittersweet chocolate, split into squares, set 1/2 cup aside
- 1 bag (10oz) mini marshmallows, set 1 cup aside
- 6 cups rice cereal
- Pre-heat the oven to 375°F (190°C). Line a 13×9 inch baking dish with tinfoil, spraying lightly with cooking spray. Lay graham crackers along the base of the dish to cover.
- Set a large saucepan over a medium heat and add 6 tablespoons of butter followed by the sugar. Once melted and bubbling, pour and evenly spread over the crackers. Bake for 7-10 minutes, remove from oven and place chocolate squares on top. Bake for a further 2 minutes until chocolate melts and spread evenly over the crackers.
- Melt remaining 2 tablespoons of butter over a medium-high heat. Continuously stir in the marshmallows until melted, followed by the rice cereal until covered. Scoop the mixture onto the chocolate covered crackers and use your hands/spatula to press into the dish. Scatter over the remaining chocolate (chopped) and marshmallows and place in the refrigerator to set.
- Cut into bars and store in an airtight container.
Use-by: Store at room temperature conditions for 5 days to make sure these bars stay chewy and crispy.
Snacks
48. Popcorn
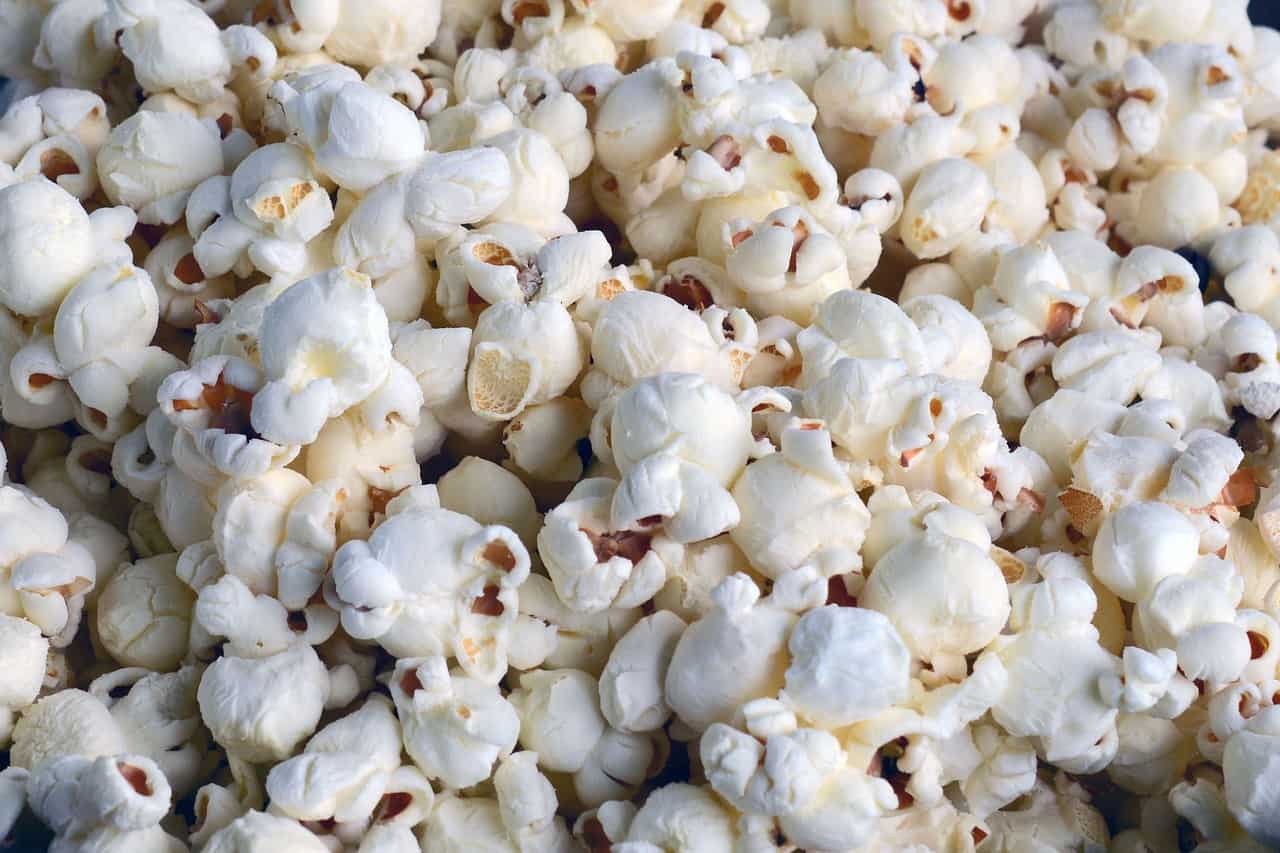
Forget buying ready-made popcorn from the store – now you can do all your prep at home, wrap in foil and ‘pop’ over the fire! Indulge in the smoky flavors from the campfire with this recipe from The Cookful.
Great for: Individual campers – popcorn is wrapped in separate pieces of tinfoil so everyone can enjoy their own bag.
Make-ahead prep time: 5 minutes.
Serves: 1
- 2 tablespoons popcorn kernels
- 2 tablespoons oil (neutral flavor such as vegetable/grapeseed)
- 2 pinches of salt
- Cut an 18 inch piece of foil and add the popcorn kernels to one side of the foil, in the middle. Drizzle with oil and add salt.
- Fold over the foil and crimp the edges, leaving room for the popcorn to expand. Make sure the top edge of the foil has plenty of layers that will withstand your campfire fork once poked through.
- Store in a zip-lock bag/container ready to heat at camp.
- When ready to make, poke the fork through the foil and hold it above the flames of the campfire. Once the popping is over (5-7 minutes later) remove from heat and enjoy.
Use-by: Store any leftover popcorn in an airtight container which will last 2-3 weeks.
49. Granola Bars
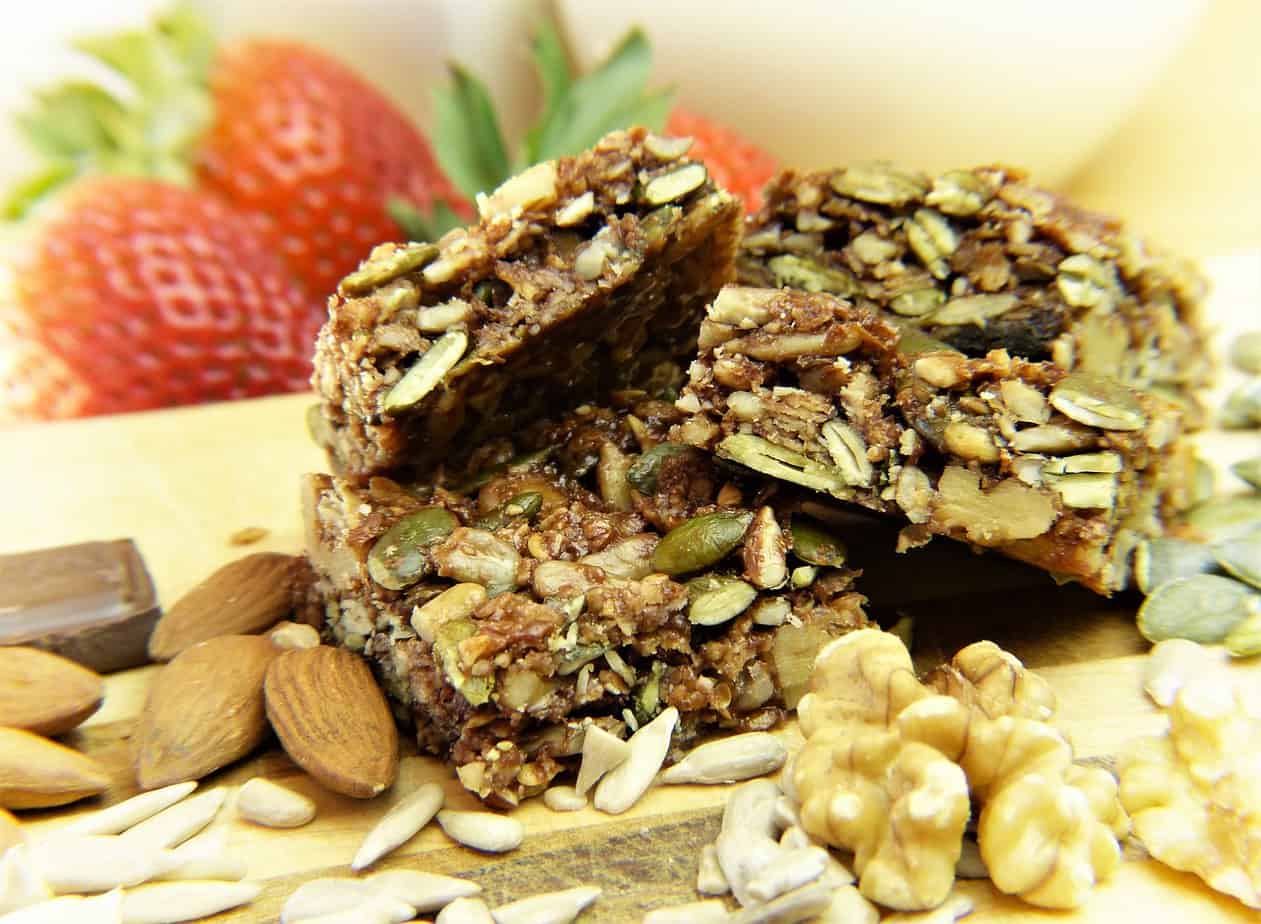
Home-made granola bars make great snacks whether you are camping or hiking. By cutting out the processed ingredients often found in store-bought bars, you can create much healthier versions, such as these easy no-bake bars by Red and Honey.
Great for: Hikers looking for an energy-boosting snack.
Campers who want to snack on something healthy.
Make-ahead prep time: 15 minutes.
Serves: Makes around 16 bars.
- 2/3 cup coconut oil
- 2/3 cup peanut butter (or almond butter)
- 2/3 cup honey
- 2 cups oats
- 2 cups total of additional ingredients (such as dark chocolate chips, nuts, raisins, dried fruit etc.)
- In a heat-proof bowl, combine the coconut oil, peanut butter and honey and warm until everything melts. Stir the mixture, adding the oats followed by your additional ingredients.
- Press mixture into a 9×13 inch pan and refrigerate. Once firm, cut into bars and store in the fridge/cooler.
Use-by: Store these bars in an airtight container in the cooler and they should last for weeks.
Top tip: If adding chocolate, allow the mixture to cool completely before adding to make sure the chocolate doesn’t melt.
50. Trail Mix
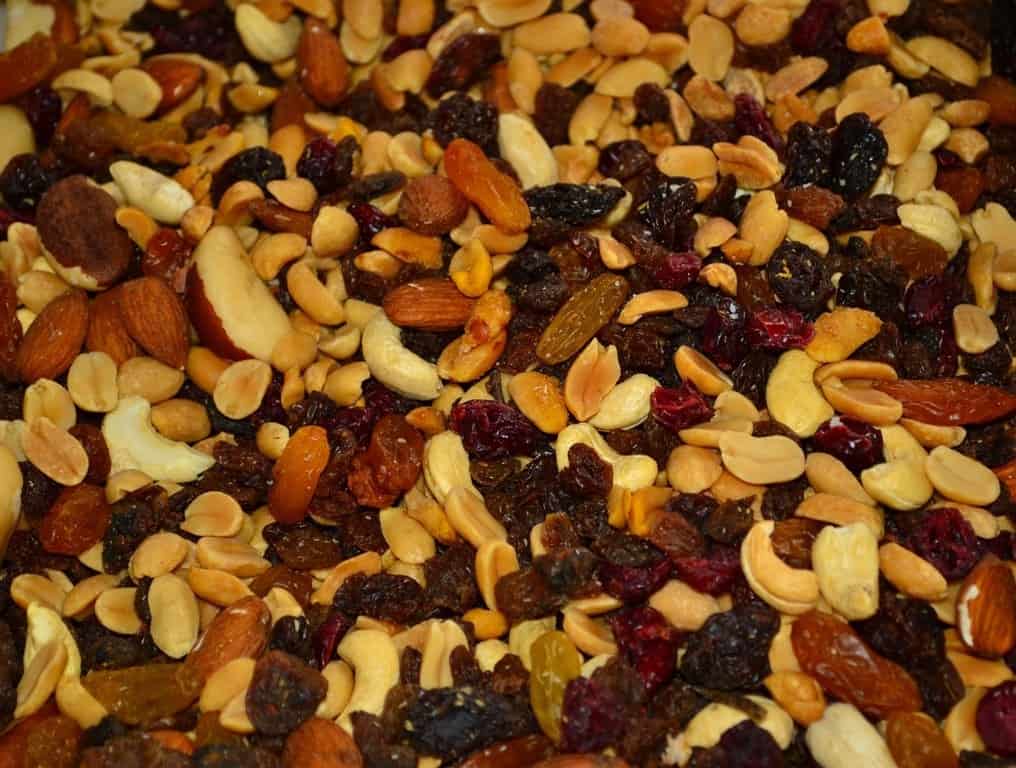
Ideal for hikers and energetic campers, home-made trail mix can be pre-made using all your favorite ingredients. Packed full of protein and fiber, it is a great energy boosting snack that can replenish lots of burned calories.
There are so many combinations of trail mix that you make ahead for your camping trip. Examples include:
- Raisins, peanuts and M&M’s.
- Nuts (almonds/pecans/walnuts), seeds (pumpkin/sunflower), chili powder, ground cumin, sea salt, cayenne pepper and garlic powder.
- Dark chocolate, coconut flakes, peanuts, raisins, banana chips and sea salt.
See the full list of 21 trail mix combos by Greatist for more inspiration.
Great for: Hikers – a great snack when walking to boost energy levels.
Families and groups – you can make a big batch and store in a place where people can help themselves during the day.
Campers wanting nutritional snacks.
Use-by: Store trail mix in an airtight container and it should last for 1 month.
51. Fruit Leather
Instead of buying fruity sweet snacks from the store, try making this fruit leather at home for a healthy alternative. It’s so easy to make ahead and is a guilt-free treat to snack on at camp. Try this raspberry and peach one from Food Network and see what you think.
Great for: Kids and adults – a healthy substitute for sugary sweets.
Using up leftover fruit and turning it into a nutritious snack.
Make-ahead prep time: 15 minutes (plus 4-5 hours bake time).
Serves: 12
- 7oz frozen raspberries
- 7oz frozen peaches
- 1 teaspoon orange zest, grated
- Place the fruit in a strainer over a bowl to thaw.
- Preheat the oven to 175°F (80°C). Line a large baking tray with Silpat (silicone mat) or unbleached parchment paper. Add the thawed fruit and orange zest to a blender and puree until smooth. Spread the mixture over the Silpat evenly and bake for 4-5 hours until dried but still flexible. Allow to cool before pealing off the Silpat and cutting into strips.
Use-by: Store in an airtight container and it will last for 2 weeks. You can also freeze for up to 1 year.
Top tip: Frozen fruit tends to work best overall but you can also use fresh or canned.
You can be as creative as you like with fruit leather, adding all your favorite fruit combinations and extras like nuts and seeds. Here are some more recipes for you to try courtesy of Mom With a Prep.
52. Energy Balls
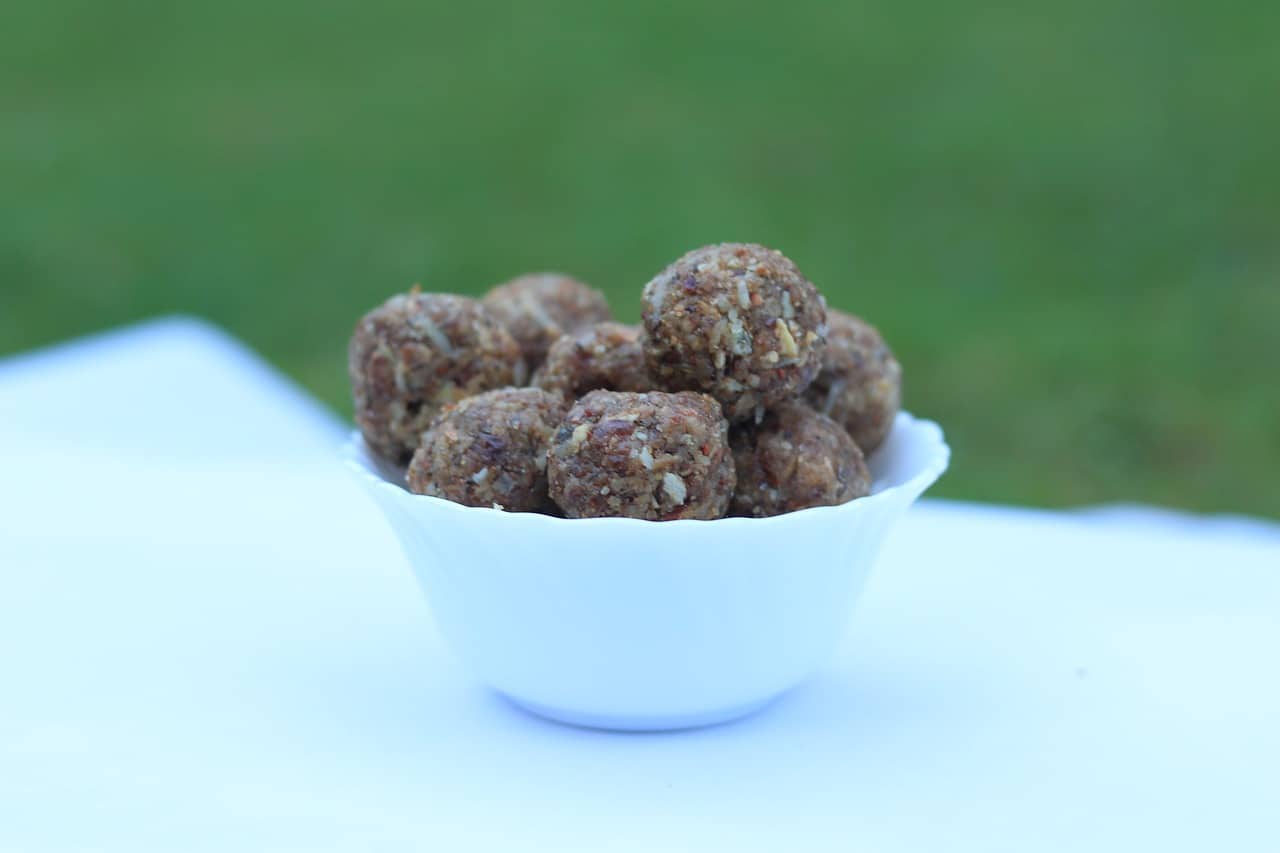
For a great grab ‘n’ go snack, these little bite-sized balls can be made using a variety of healthy ingredients to give you a burst of energy when you need it most. Try this blueberry and almond no-bake recipe by Sweet Peas and Saffron and make sure you pack plenty for your next trip.
Great for: Kids – a quick snack that is also nutritious and a good source of protein.
Hikers – a great energy booster.
Campers craving a healthy snack.
Make-ahead prep time: 20 minutes.
Serves: 16-18
- 1 tablespoon coconut oil
- 1/4 cup maple syrup (or honey)
- 1/3 cup almond butter
- 1/2 cup oats
- 2 tablespoons chia seeds
- 1/4 cup sliced almonds
- 1/4 cup dried blueberries
- 1/4 cup ground flaxseed
- Add coconut oil to a large bowl and stir to melt (at room temperature).
- Mix in the maple syrup (or honey) and almond butter, stirring to combine. Next add all the remaining ingredients and mix together.
- Roll in small balls using a tablespoon and refrigerate.
Use-by: Store in the cooler and consume within 1 week. You can also freeze these balls for up to 3 months if you prefer.
For more recipe ideas, check out this Good Housekeeping article with 44 energy ball variations.
53. Chocolate Trail Mix Bites
If you find yourself having the munchies at camp, these simple make ahead bites are a healthy snack, rich in antioxidants and only 39 calories each! Thanks to Simply Taralynn for this one.
Great for: Hikers needing a little energy boost.
Campers looking for a healthy snack whilst still getting their chocolate fix.
Make-ahead prep time: 5 minutes.
Serves: 8-10
- 1/4 cup trail mix (the choice is yours)
- 3 tablespoons dark chocolate chips
- Melt the chocolate in the microwave for about 20 seconds or until smooth.
- Use a tablespoon to drizzle the chocolate onto a piece of wax paper in circles, about the size of a quarter.
- Take pieces of trail mix and lightly press down into the chocolate. Refrigerate to set.
Use-by: Store in a zip-locked bag or container and keep in the cooler so they don’t melt. These bites will last weeks if not months depending on the sell-by date of ingredients.
54. Make Ahead Spinach Dip
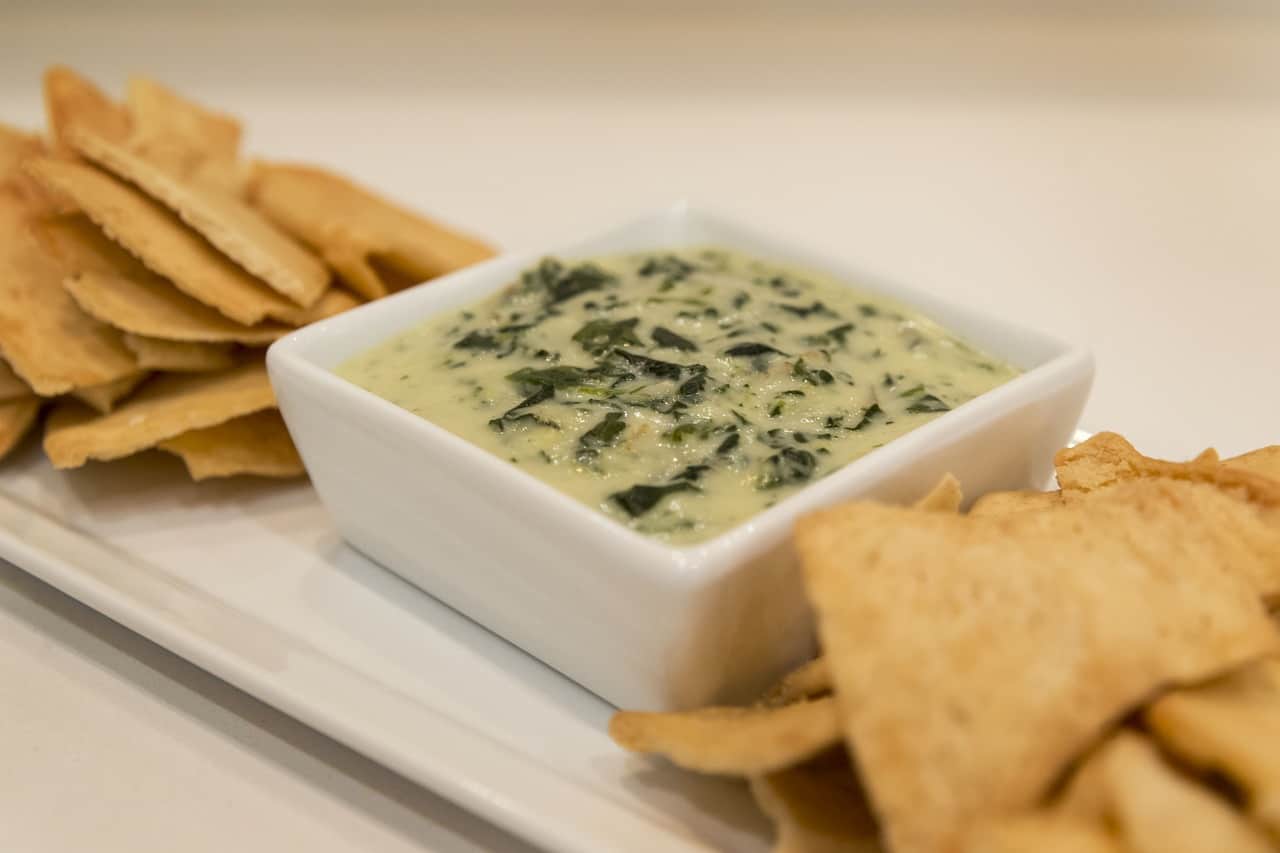
This versatile dip can be enjoyed as a snack with chips/bread or an appetizer before dinner. Either way, it's so easy to make ahead and can be transported to camp in foil packets. Credit to Outdoor Connection for this tasty recipe.
Great for: Snacking on before dinner.
Sharing with a small group.
Make-ahead prep time: 10 minutes (plus 4-5 hours refrigerator time).
Serves: 6
- 3/4 cup frozen spinach, drained and chopped
- 1 cup sour cream
- 250g cream cheese
- 3/4 cup Parmesan, shredded
- Additional items (optional) – bacon, green onions, garlic, mozzarella etc.
- Mix all the ingredients together and store in the fridge for 4-6 hours so ingredients can combine.
- Prepare your tinfoil and layer the spinach dip down the middle. Fold over to create a packet and add more layers of foil to prevent burning. Store in the cooler.
- At camp, place the foils near the hot coals for 20-25 minutes until bubbly.
Use-by: Thawed spinach lasts about 4 days so it is recommended to eat this dip within that time.
55. Cheesy Garlic Bread
This delicious pull-apart cheesy garlic bread by Today's Parent will go down a treat with your campers. Simply make ahead and wrap tightly in foil, ready to throw straight on the fire. Simple!
Great for: Sharing as an appetizer before dinner.
Make-ahead prep time: 10 minutes.
Serves: 8
- 1 500g large round loaf
- 2 cups grated cheese
- 1/4 cup garlic butter, melted
- Cut the loaf into 1 inch slices, leaving an inch or so at the bottom to keep the loaf intact. Turn the loaf and slice the other way to make squares.
- Stuff with cheese and drizzle 3 tablespoons of garlic butter into the loaf. Use the remainder to brush over the top.
- Wrap in tinfoil and store in the cooler.
- At camp, pop the loaf on a barbecue or grill on a medium-low heat for about 25 minutes. Flip halfway through and remove once cheese has melted.
Use-by: Bread tends to dry out in the fridge so consume within a few days whilst its still fresh.
56. Make Ahead Jalapeno Cornbread
The jalapenos in this recipe by Food Network give your standard cornbread that extra kick. Eat as a pre-dinner snack or pair as a side with campfire chili for a delicious and satisfying meal.
Great for: Sharing around the campfire with friends or family.
Make-ahead prep time: 35 minutes.
Serves: 6-8
- 4 tablespoons unsalted butter
- 1 1/2 cups frozen corn, thawed
- 2 large eggs
- 1 cup all-purpose flour
- 1 cup yellow cornmeal
- 1 cup sour cream
- 1 teaspoon sugar
- 1/2 teaspoon salt
- 1/2 teaspoon baking powder
- 1 jalapeno pepper, chopped
- Preheat the oven to 450°F (230°C). Place a 10-inch skillet in the oven for 5 minutes to heat up. Remove and add butter. Once melted, set aside.
- Add the corn and eggs to a food processor and blend until corn is slightly smooth. Add in the flour, cornmeal, sour cream, sugar, salt and baking powder and blend until smooth. Scoop mixture into a bowl and mix in the jalapeno and melted butter.
- Pour the mixture into the skilled and bake for about 20 minutes until golden brown. Insert a tester to make sure center is cooked.
- Once cooled, remove from skillet and wrap in tinfoil. You can either store in the freezer, fridge or pantry before taking it to camp. You can reheat at camp over a grill or barbecue.
Use-by: Stored at room temperature, cornbread will last 1-2 days. To maximize shelf life, store in the cooler and consume within 1 week.
57. Cheesy Dip
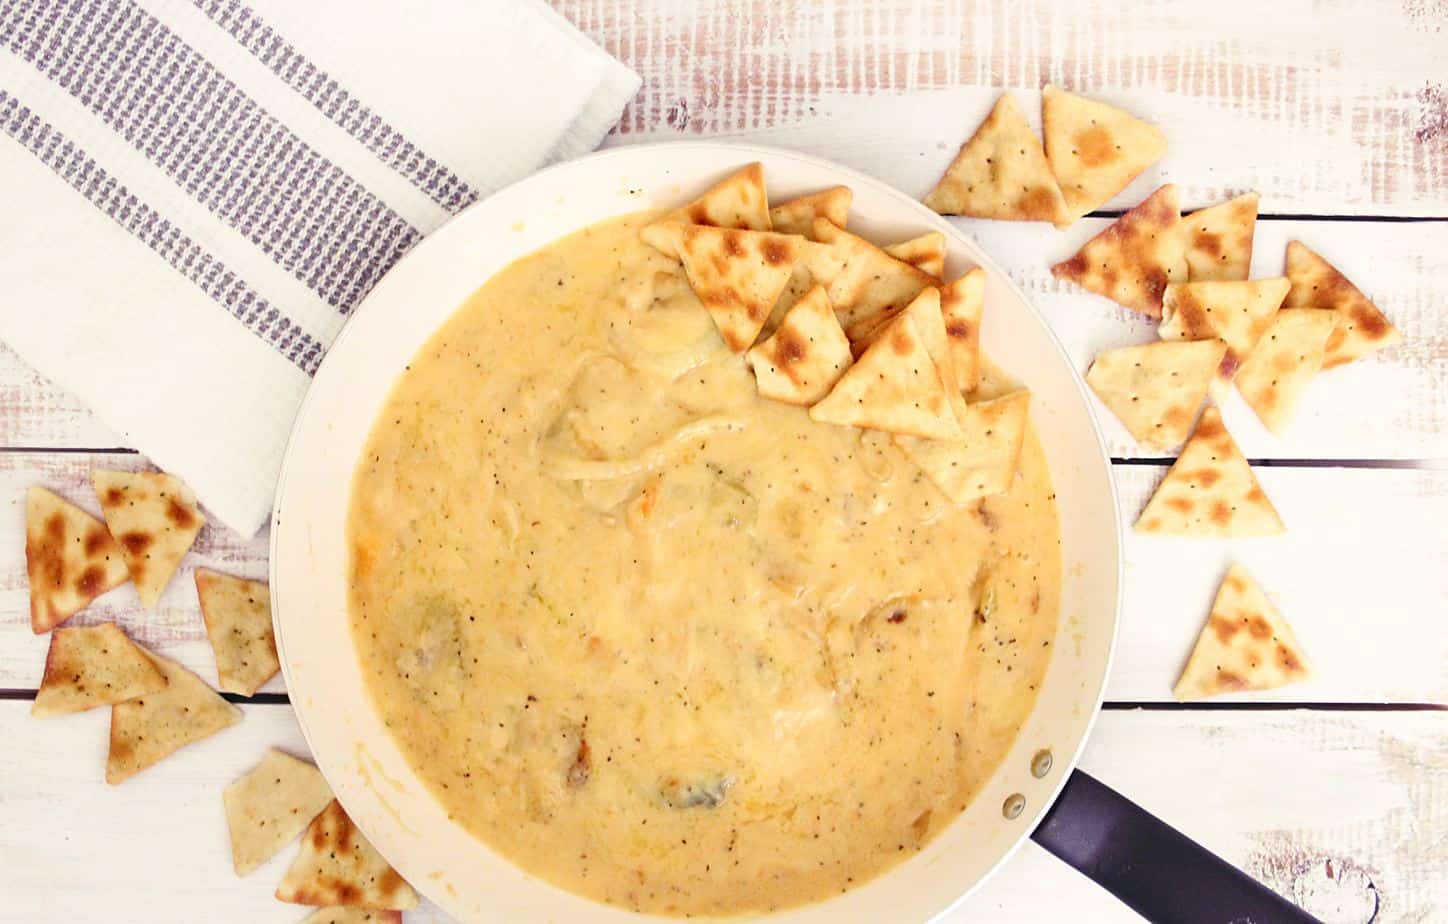
If you love cheese, chili and beans try this satisfying Mexican dip from Beyond the Tent and make sure it accompanies you on your next camping trip. Indulge around the campfire with a big bag of tortilla chips and scoop up the cheesy goodness.
Great for: Sharing around the campfire.
A mid-afternoon indulgent snack.
Make-ahead prep time:
Serves: 10-12
- 1 pack cream cheese
- 1 can black beans
- 2 cans no bean chili
- 1 bag (8oz) shredded Mexican cheese blend
- Layer a 9×13 inch foil pan with half of the cream cheese, about 1/2 an inch thick.
- Spread one can of the chili and half the can of black beans over the cream cheese.
- Add the remaining cream cheese, spreading over the beans, followed by the second can of chili. You can also add a layer of jalapenos if you wish.
- Finish by adding the shredded cheese and wrap the pan in tinfoil.
- Store in the cooler and then pop on the grate over the fire for 20 minutes, until bubbling.
Use-by: This dip will keep in the cooler for 3-4 days. Once heated, eat immediately.
58. Make Ahead Campfire Beans
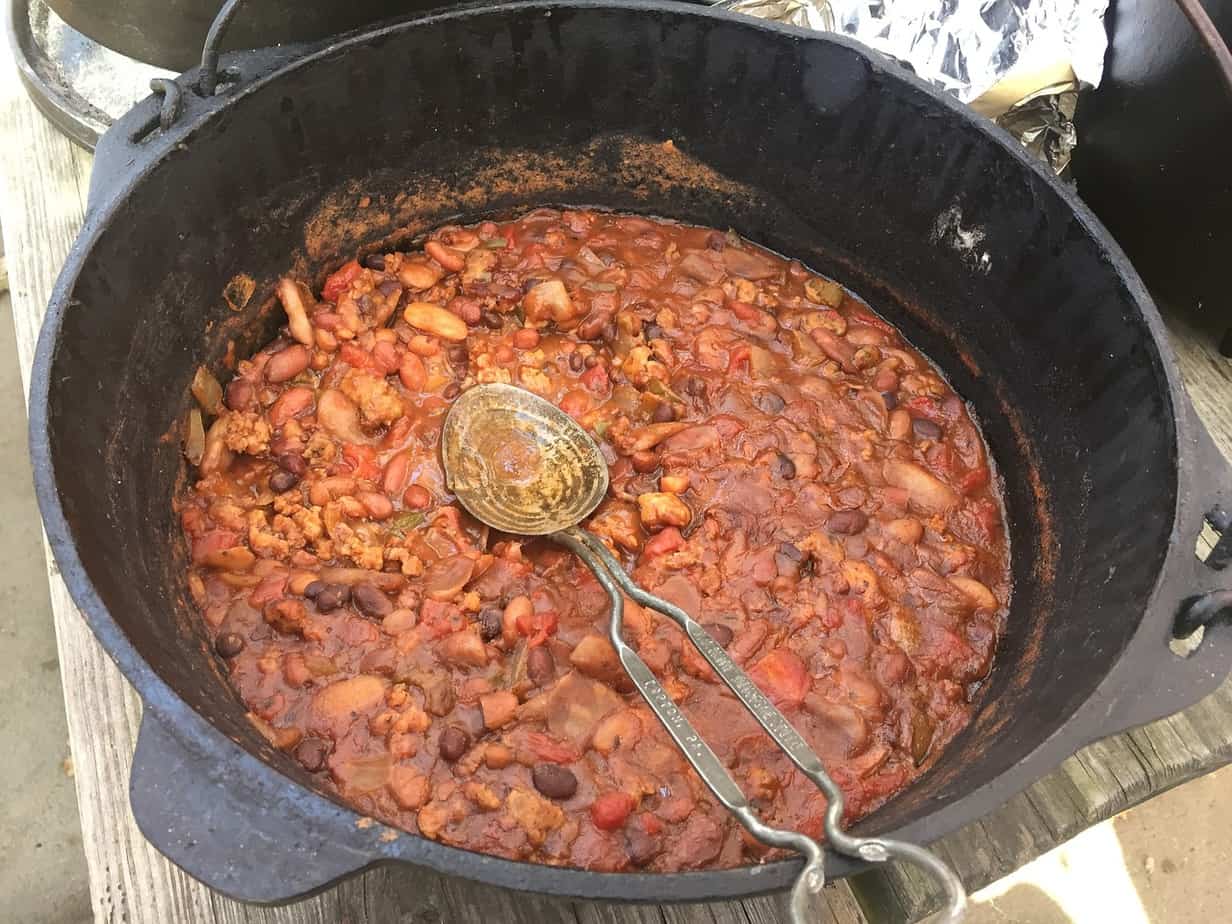
These smoky campfire beans by Today’s Parent are great as a snack with cornbread or as a side dish to a main meal. Simply make ahead and reheat over the fire.
Great for: Vegetarians.
Sharing around as a mid-afternoon snack.
A barbecue dinner, letting people help themselves.
Make-ahead prep time: 40 minutes.
Serves: 6
- 1 teaspoon canola oil
- 1 onion, finely chopped
- 2 tablespoons tomato paste
- 2 tablespoons Dijon mustard
- 1/4 cup maple syrup
- 1/4 cup molasses
- 1/4 teaspoon smoked paprika
- 1/2 teaspoon salt
- 2 cans (540ml) navy beans, drained and rinsed
- 1/2 cup water
- Add oil to a saucepan over a medium heat, followed by onion. Cook for about 4 minutes, until soft.
- Stir in tomato paste, mustard, maple syrup, molasses, paprika and salt. Pour in the beans, then the water and bring to the boil. Reduce heat to medium-low and cover the pan, simmering for 25 minutes until sauce thickens.
- Once cooler, store in a foil container in the cooler read to re-heat on your campfire.
Use-by: Cooked beans will last 3-5 days in the cooler.
59. Make Ahead Hummus
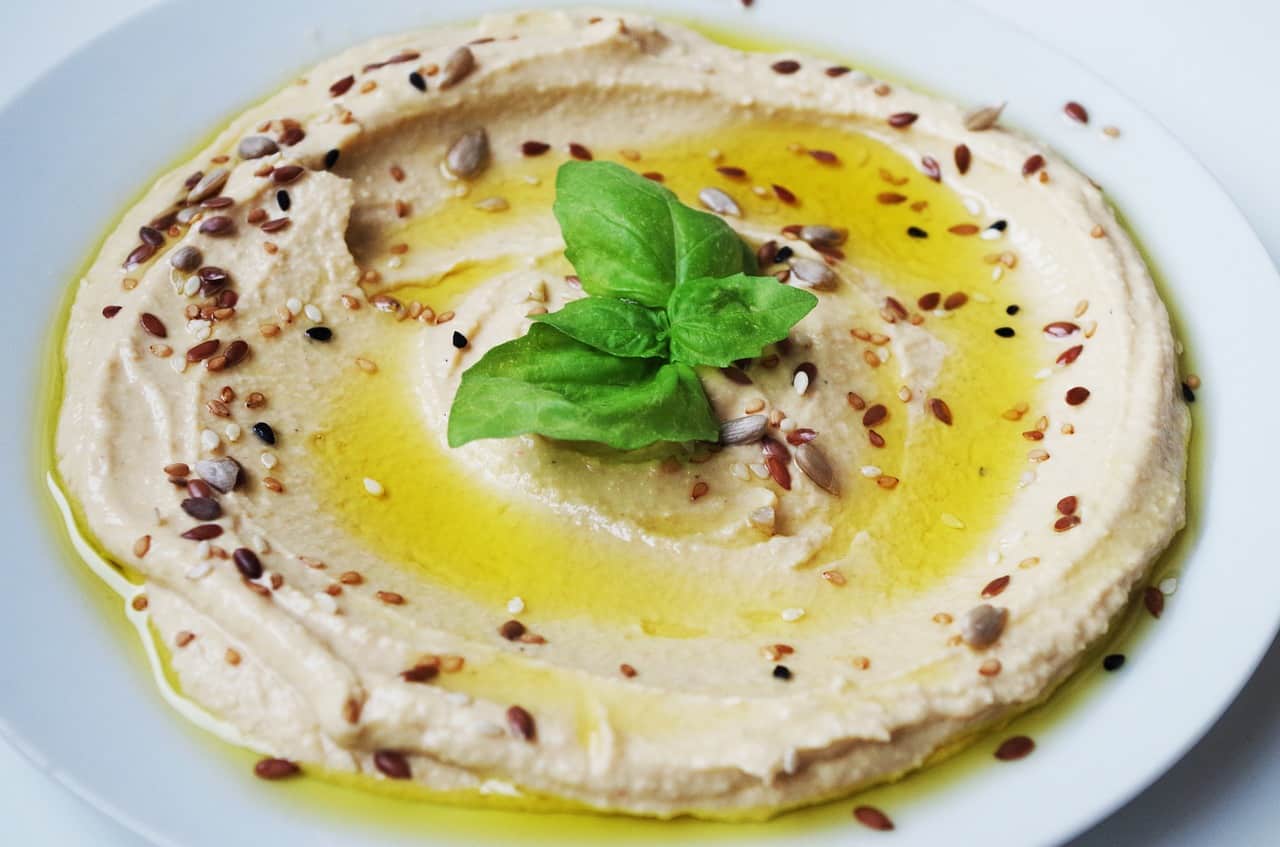
You can never have too many dips when it comes to snacking! Whether you pair this one with carrots and corn chips, or spread on some warmed French bread, your taste buds will not be disappointed. Try it now using this recipe by Grateful Grazer.
Great for: Sharing with fellow campers.
Pairing with salads, cooked meats, sandwiches and more.
Solo campers and couples – make as much as you need and store in a small container.
Make-ahead prep time: 5 minutes.
Serves: 4-6
- 1 can (15oz) chickpeas, drained and rinsed
- 2 tablespoons tahini
- 2 tablespoons olive oil
- 1/2 lemon zest and juice
- 2-3 cloves garlic
- Pinch of salt and paprika
- Add all ingredients to a food processor and blend until smooth. Add extra oil if necessary to reach preferred consistency.
- Scoop into an airtight container and refrigerate.
Use-by: Keep in the cooler and use within 1 week.
Conclusion
We’re hopeful you’ll find plenty of make ahead meals on this list to take with you on your next camping trip. Before you head out on your next outdoor adventure, here are a few final tips:
- Most items on this list can be substituted depending on dietary requirements to suit your group of campers.
- Items in the freezer can be transferred straight to the cooler which also keeps the rest of your food cold. Always keep the cooler temperature between 0 and 5 degrees.
- Store raw meat separately to prevent cross contamination. Store in air-tight containers to prevent leakages.
- Eat meals in logical order depending on shelf life (i.e. eat perishable items first).
- Use heavy duty tinfoil when food is going to be placed over the campfire to prevent splitting and burning.
Let us know in the comments if you take any of these make ahead meals on your next trip, or if have any others you recommend. Happy camping!