
How To Navigate In The Woods – The Traditional Way
Once upon a time, a camping trip started out as a gathering of supplies: Tent. Stakes. Rope. A Swiss Army Knife, for sure. Perhaps a grate that could be set over a roaring campfire plus the usual provisions that range from toilet tissue and matches to sleeping bags and provisions.
That was then. This is now: Going into the wild can mean schlepping a generator, traveling blender, GPS system and so many gadgets, tools, and aids, it’s like dragging half of your house along and wondering why the experience doesn’t feel much like “roughing it.”
But for the true camper—the man or woman who loves the rich experience of traditional camping–forget all of the space age stuff and let your inner pioneer loose with just the basics to see how it feels to live off the grid.
Sound like fun? It is. But you need some basic orienteering skills and the proper attitude to strike out settler-style so you return to civilization with awesome tales in addition to a new appreciation for the things you currently take for granted.
The Right Tool For The Right (Navigation) Job
Preparing to take a walk on the wild side doesn’t mean you’ll be asked to set off with a roll of toilet tissue and a compass, though both are immeasurably important to your adventure if you intend to control your environment and get back to where you started.
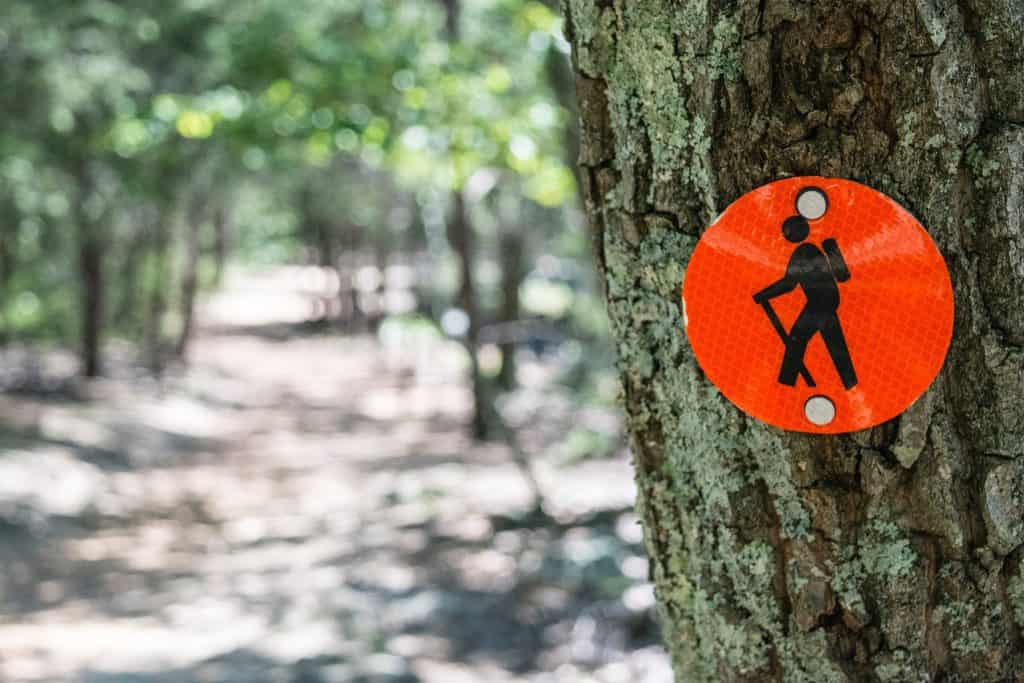
Basics include a topological map and a compass, but if you’re all about creativity, follow National Wildlife Federation suggestions for trail marking, because they’re too clever to ignore. Sticks and stones won’t break your bones because you’ll be too busy using them to point you in the right direction.
Additionally, colorful bands or ribbons tied around tree trunks will mark your trail or invest in trail markers that can be retrieved and used repeatedly so you can refer to these helpful aids once you’re ready to return to civilization.
Love You To The Moon And Back
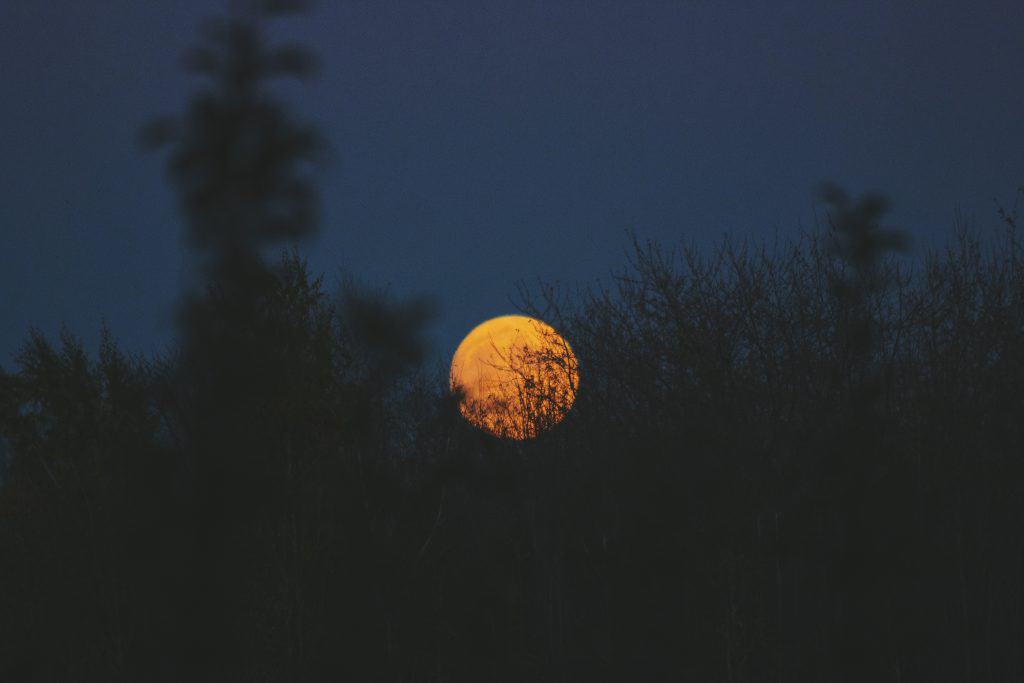
You wish on it. Marvel at it. We won’t go into romance or zombies howling at the moon because navigation is our focus. If you recall your science teacher informing you that the moon is a reflective body incapable of emitting light, you already know that you must take the sun into account to determine your direction if you hope to use the moon as your navigational tool.
Did the moon rise before the sun set in the west? The moon is illuminated from the west, so you’ve got a clue about your location. On the other hand, if the moon doesn’t rise until after the witching hour (midnight), it’s being illuminated from the east. If you’re stuck with no aids and need to get your bearings at night, memorize this lunar directional “formula” and you won’t feel clueless about finding your way back.
Starry, Starry Night

Wish you hadn’t been lulled to sleep last time you visited a planetarium? No worries. Consider this section your Cliff’s Notes on figuring out how to use the stars to set you off on the right path.
The good news is that neither Ursa Major or Cassiopeia constellations never set. They’re permanently affixed to the sky and always visible on clear nights, so unless magnetic forces disrupt Earth’s orbit, these navigational bodies can point you home.
Your job is to memorize how those constellations appear in the Northern Hemisphere. Need visual aids? We recommend this WikiHow resource because the graphics will help with your learning curve by teaching you a method to identify the North Star and differentiate between the Little and Big Dippers.
Plant this factoid in your brain: The Big Dipper and Cassiopeia (consisting of 5 stars shaped into the letter W) are always opposites. Think of them as warring relatives who refuse to sit down together at the Thanksgiving table and you’re on your way to being a celestial navigator extraordinaire.
Here Comes The Sun…
… And not soon enough, you may conclude if you’re lost in the woods. But, wait! You’ve learned how to figure out where you are using the sun and shadows, so pat yourself on the back, pioneer navigator.
What? You didn’t learn this skill as a Scout? We won’t tell if you don’t. The fact is, the sun always rises in the East and sets in the West but there are variables that kick in courtesy of seasonal change so don’t bet the farm on the sun popping up exactly due East and West.
But just because the sun doesn’t set an exacting course, you can still put the shadows generated by the sun to work by using a straight stick and some rocks to figure out your next directional move. Here’s your tutorial:
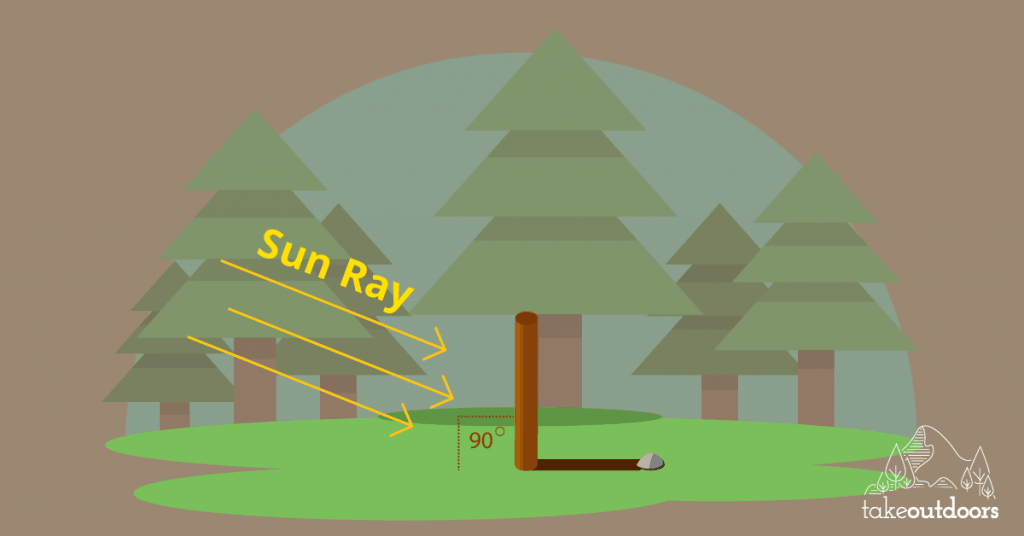
- Find a spot on the ground with full access to the sun. Stick one end of a stick trimmed of leaves into the ground. Observe the shadow and mark it with a stone or twig. That’s west–no matter where on earth you’re camping.
- Wait a short while and take a second reading. Mark the shadow with another rock.
- Draw a straight line through both points to create an East/West line.
- Stand with the West marker to your left and the second rock to your right and you’ll be facing north. Sound too simple to be true? You can place bets on the accuracy of this rudimentary navigation method.
Rather learn this by watching a video with popcorn in your hands? Here’s a video by Howcast on this technique:
Time And Trees
Bring an analog watch along on your adventure and use it as a directional tool. Hold up the watch and point the hour hand at the sun. The half-way point between the hour hand and 12 o’clock mark gives you a true north-south line. The sun hangs out in the east before noon and in the west after noon.
Camping at a site that’s on Daylight Savings Time? Adjust your calculations by an hour, so instead of using 12 as your benchmark, make it 1:00.
Want more of a challenge? Enlist the trees in your quest for direction if other methods don’t satisfy you or if you crave experimentation. Every tree facing south in the Northern Hemisphere features more lush and green growth on the south side, so try using growth patterns as a navigational tool, too.

Want to show your camping buddies how smart you are? Locate felled trees and study the interiors of stumps. Tree rings that appear more widely spaced point toward the equator while rings in close proximity to each other face the poles. Tree rings were used by Native Americans long before the rest of us interlopers arrived on the continent to figure out what direction to take when they were hopelessly lost.
Thanks To John Wesley Powell… The U.S. Was Properly Mapped
Do you expect to experience withdrawal pains because your commitment to camping old school means leaving your GPS tools out of the equation? Relax. You already know how to use the sun, moon, and stars for clues about your navigational needs but why not bring a tool used by travelers for 125 years to more precisely pinpoint your route and destination?
According to the U.S. Geological Survey, nobody was interested in the creation of topological maps until John Wesley Powell appealed to the U.S. Congress for permission to begin the nation’s first official topological mapping initiative on December 4, 1884. Reluctance may have something to do with money, but what’s important is that Powell was relentless in his quest to accomplish this major task.
Since that date, techniques have evolved from the early use of field surveys and photogrammetry to today’s satellite-assisted images. It’s hard to believe that early topographers used tapes and compasses to produce representations of terrain contours, point positions, elevations and vertical angles, but these precursors to satellites did an amazingly accurate job.
Three colors were used in the lithographic process to define map differences from the get-go. Public works were rendered in black. Blue was used to represent water and everything else was brown. When computers and software cane along in the 1960’s, cartographers were amazed to see how accurate those early topo maps were.
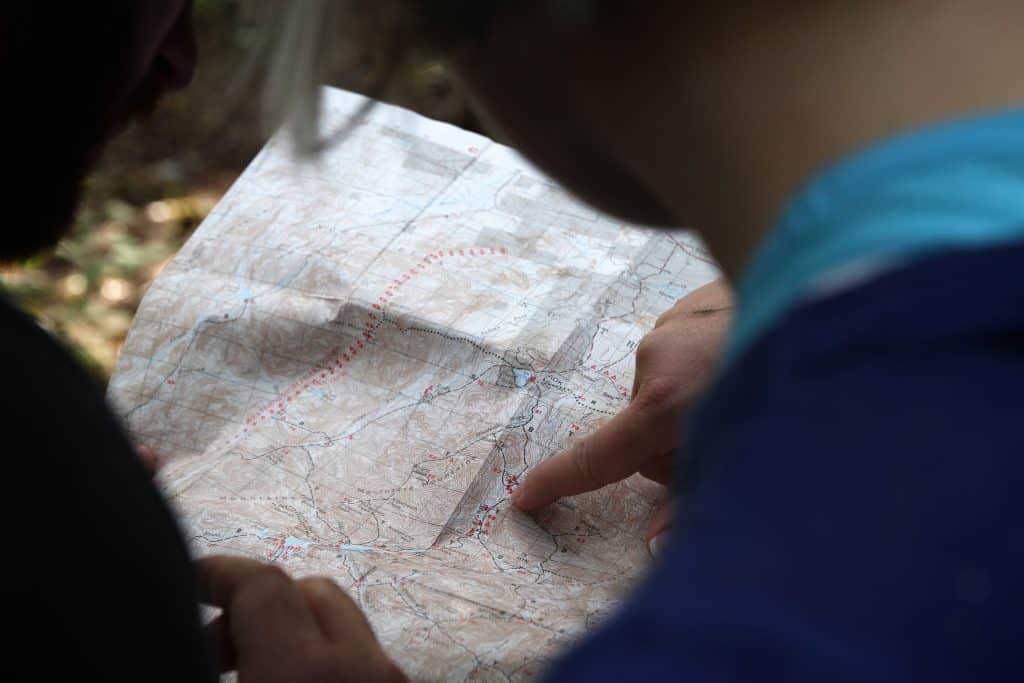
What You Need To Know About Topo Maps
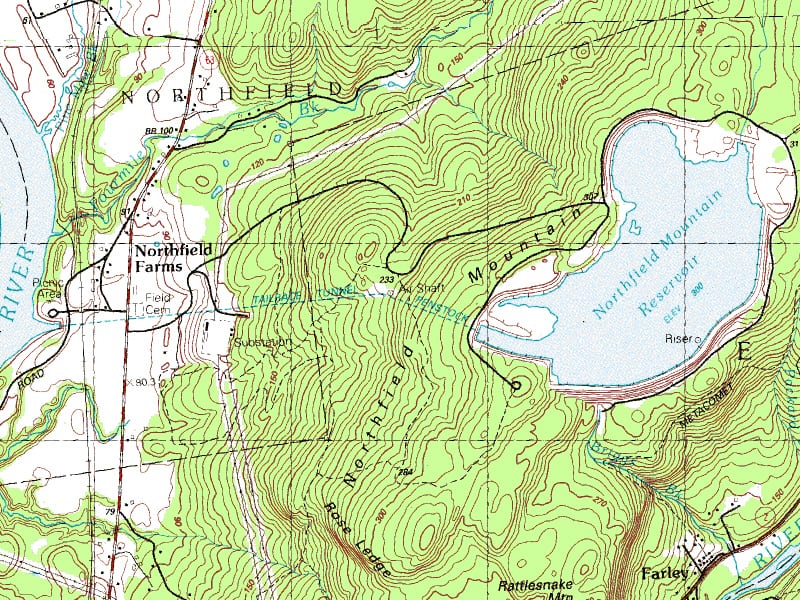
By United States Geological Survey, US Department of the Interior. [Public domain], via Wikimedia Commons
Can you rough it and navigate deep woods without a topo map? You can. But why not use this navigational tool to guide your journey? Topo maps have become popular items. You can download them. Buy them. Get them free. Like all camping gear on the market, your choices can be dizzying.
Feeling patriotic? Order from the US Geological Society, download one from the same resource, opt for an alternative to standard versions or do it the old fashioned way by visiting a map store in your geographic area.
Laminating or devising some sort of plastic covering will keep your valuable map pristine even if you confront lousy weather as you wander around. Orient yourself to reading these fascinating maps before you leave home by noting differences between shading, colors, and contours. Here’s what you need to know:
- Contour lines don’t stand for real topological differences. They’re representations of paths and segments at equal elevations in relief so you have a good idea of the differing terrain levels you are about to confront.
- Some contour lines are thin; some are fat. The fat ones (indexed) show elevations and are numbered. The skinny ones are intermediates and elevations aren’t marked. The ratio of fat and skinny contour lines are 1:4.
- Cartographers needed a way to represent flat terrain, so supplementary contour lines show up on topo maps as dashed lines. These indicate “half elevations” and generally appear in places where the land is relatively even.
- A few things have changed since colors were first used for topo maps. Blue still indicates water, but now green denotes forested areas and brown is employed for contour lines. Black still represents man-made objects while red signifies roads. Seasoned topo map readers say color isn’t as important as shadings because they indicate degrees of risk; like swamp (light blue) surrounding a deep reservoir (dark blue).
- Everything’s to scale. If you’re looking for a standard, adopt the USGS scale ratio of 1: 24,000 (also referred to as 7.5 minute quadrangles). Didn’t do well in math class? Here’s your translation: every inch on a topo map represents 24,000 inches on the ground. Remember: Early cartographers used tapes to measure distances!
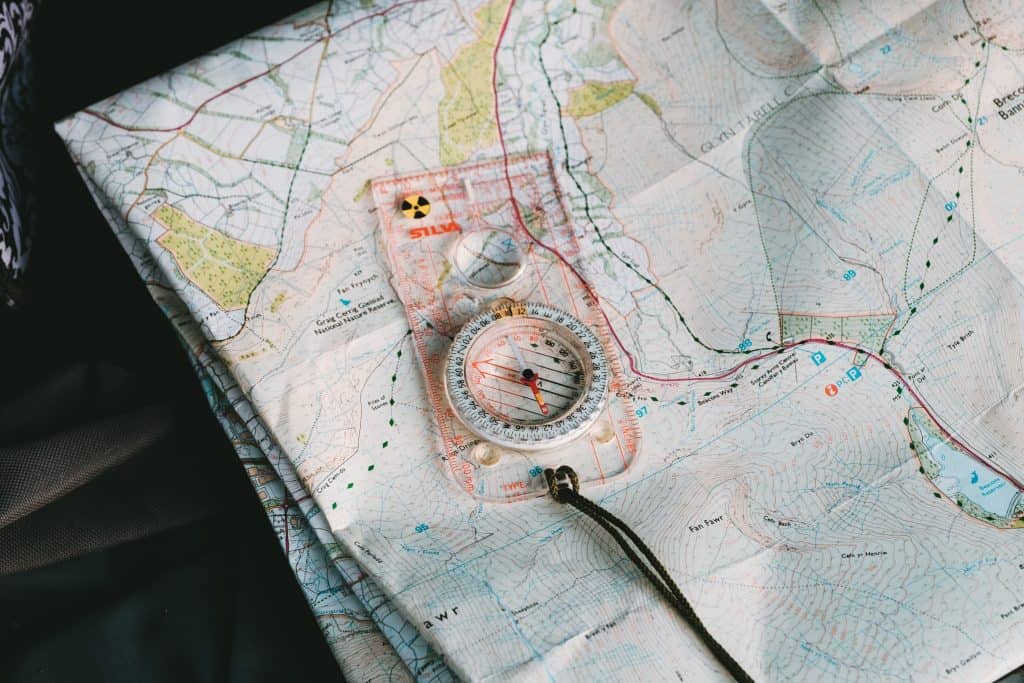
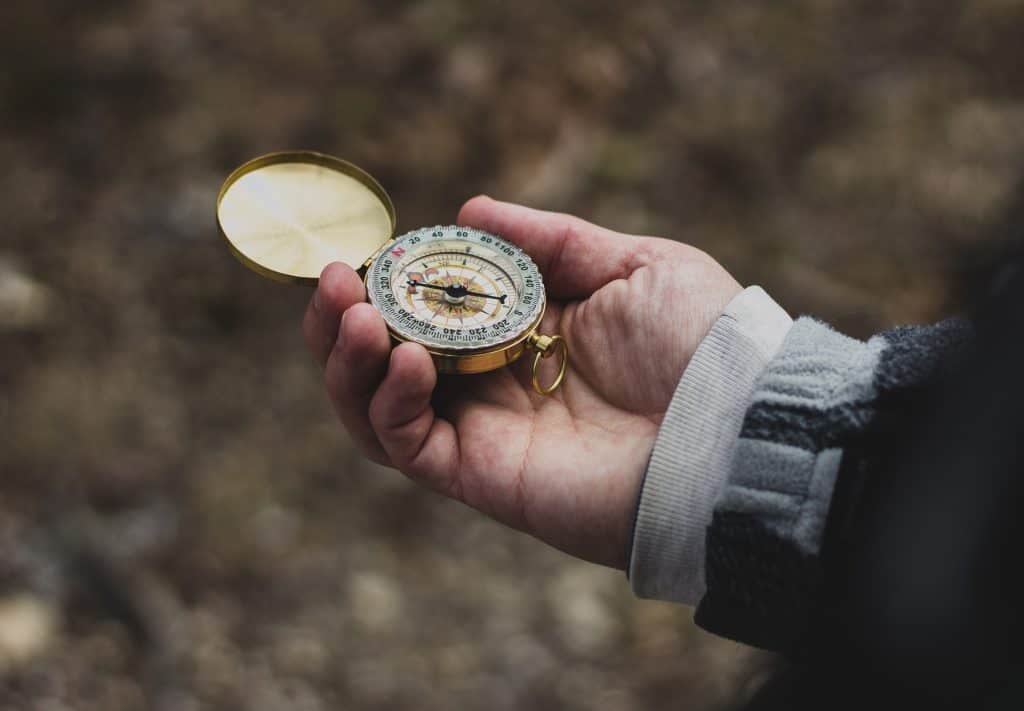
My Kingdom For A Compass

If you’re a fan of the History Channel, you may have seen episodes of “Vikings” that depicted Norsemen coming up with their version of the compass and using it to navigate seas as they plundered the British Isles and beyond.
You can still build your own version of a compass if love a challenge because all you need is a piece of lodestone mounted on a section of wood, cork or reed plus a bowl of water that can be used to “float” these materials.
We double dare you to try making your own compass using these instructions to get a feel for how these amazing tools work. No Vikings required unless you happen to have a few hanging out in your neighborhood.
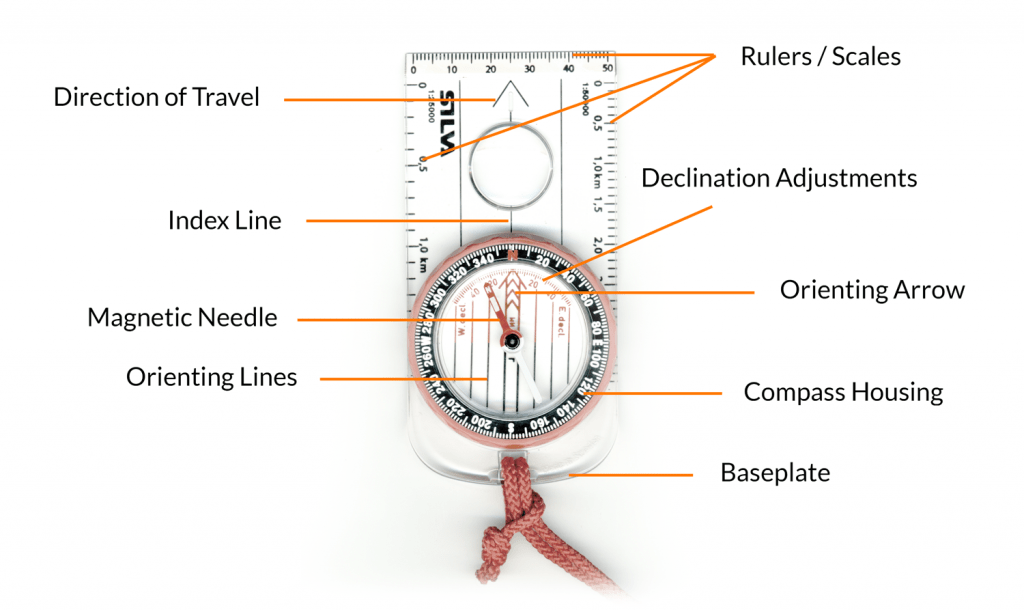
Compass Glossary
-
- Base plate: The transparent plate that houses the inner workings that features a direction-of-travel arrow.
- Compass housing: An outer ring showing 360-degrees of direction and cardinal points within a casing that rotates and accommodates the magnetic needle and orienting arrow.
- Declination adjustment: Just because the magnetic needle always points north, it’s not necessarily “true north.” There’s a differential by a few degrees that must be factored into calculations to establish the magnetic north. This is called declination.
- Direction-of-travel arrow: Found on the base plate, you use it to ascertain travel direction once the magnetic needle aligns with the orienting arrow. You interpret it by degree once the line meets the compass ring.
- Magnetic needle: The magnetic feature within the housing that always points north.
- Orienting arrow: Look beneath the magnetic needle to find it; rotate the arrow to align it with the needle so you begin the process of establishing your bearings.
The Care And Feeding Of Your Compass
Like all serious relationships, take your compass for granted and expect payback in the form of malfunctions that can leave you high, dry and lost when you can least afford to wander. So a little TLC and respect, please.
-
-
- Always hold your compass level and wait a few seconds for the needle to settle before taking a reading, or your numbers could be off by as much as 20-to-30 degrees.
- Expert orienteers suggest users practice running while keeping the compass hand level and still. It should properly set itself by the time you stop and look down.
- Don’t store your compass next to anything that’s super magnetic. Cell phones have literally realigned a compass magnet via the function that turns the device screen off.
- Don’t take your dome for granted. If it cracks, it will contaminate the interior fluid and mess up your readings.
- Compasses last longer if stored in environments with consistent temperature readings. Subject your compass to temperature extremes and fluid could expand and contract, possibly cracking the dome or causing a bubble.
- If you notice a color change in the compass fluid—it’s milky or rusty looking—casings may be compromised indicating deterioration of rubber or plastic parts. Get thee to a compass doctor.
- During World War II, steel helmets caused major navigation snafus, so leave your WWII memorabilia home.
-
4 Steps To Master Map And Compass Orientation
When pioneers used rudimentary maps and compasses to navigate new territory, most had little education, so keep that in mind if you approach this job with trepidation. The process of map and compass orientation is straightforward and simple. As long as you remember that the compass needle is the red and black one, you’re half way there.
-
-
- Place your compass on your topo map with the travel arrow pointed at the map top after you’ve made your declination adjustment.
- Align the bezel with the travel arrow so both point north.
- With the travel arrow pointing toward the top of the map, slide the baseplate until one straight edge aligns with either the right or left map edge.
- Rotate the compass body (hold map and compass steady) until the point of the magnetic needle appears within the outline of the orienting arrow. Done and done.
-
7 Steps To Get Your Bearings In The Woods
If you wondered where the phrase “get your bearings” originated (because you frequently use it to explain your state-of-mind), wonder no more. Being able to figure out which direction to take when you’re on the move is greatly aided by using landmarks in concert with your compass so the process becomes second nature:
-
-
- Use your best Sherlock Holmes skills to find an easy-to-identify landmark on your topo map.
- Place the compass on the map; travel arrow facing in the direction of the landmark and away from you.
- Rotate the bezel to position the needle inside the orienting arrow. You’ve just identified your bearings on the map’s index line.
- Align one corner of the landmark’s straight edge with the compass.
- Rotate the baseplate with the travel arrow pointed at the landmark until orienting lines run north and south.
- Use the straight edge of your compass to draw a line on the map. Your intended location will be found at the point the landmark line intersects with your trail.
- If you’re unsuccessful, triangulation may help. Start with the aforementioned steps but use second and third landmarks – each separated by 60 degrees–to create a small triangle that pinpoints your destination.
-
Still have the popcorn in your hands? Here’s another video by REI:
https://youtu.be/0cF0ovA3FtY
Despite Your Best Efforts, You Get Lost!
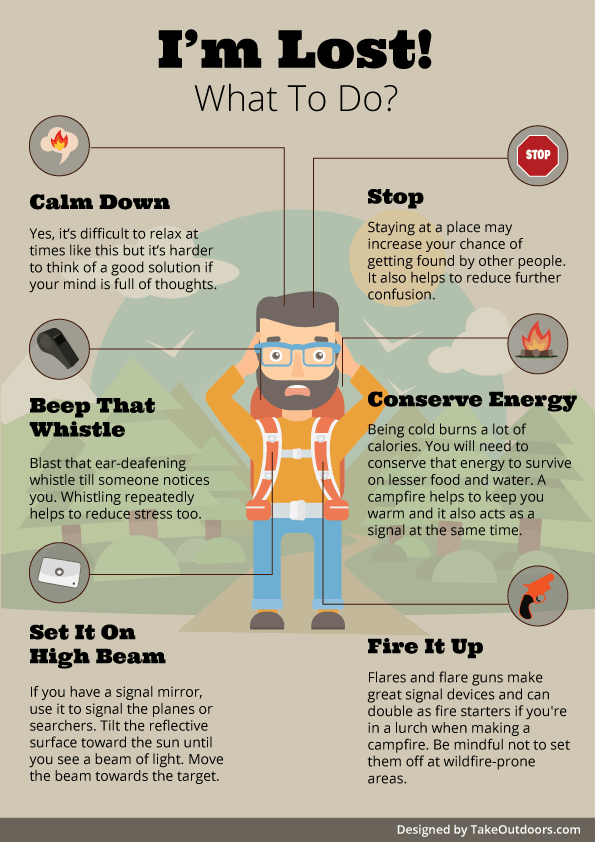
It’s a parent’s worst nightmare: You take the family out into the woods after doing a yeoman job of studying up on topographic maps, compass use and other orienteering practices, but you find yourself irretrievably lost despite your best preparations.
You have reaction choices: A dramatic meltdown. A pity party. Laugh to reassure your kids that you’re in control (you don’t have to be – you do have to look like you are).
Calm down and put into practice some tips you learned in this article, using the moon, stars, sun and shadows to intuit a logical direction to follow.
Why skip the meltdown part? Because you’ve been thoughtful enough to take precautions before leaving home by advising friends or relatives of your exact destination so if push came to shove and you needed to be rescued, search parties wouldn’t have to waste time and resources figuring out your location.
Stop walking further because you will get even more confused when you realised you are back to the same place, or a place that feels very unfamiliar. Conserve your energy by building a campfire to keep yourself warm and you will be able to survive on lesser food and water.
Next, you did pack one or more signal tools to increase your chances of being found, right? It’s never a good idea to walk confidently into deep woods assuming that your cell phone can save you. There’s no guarantee you’ll get a signal, though you could try texting because there’s a higher likelihood of connecting despite a week signal.
Come Prepared For Worst Case Scenarios
Carry an ear-blasting whistle. It weighs next to nothing and the very act of blowing into a whistle repeatedly can reduce stress. A signal mirror is capable of transmitting a beam of light for up to 10 miles, but if you don’t know how to use reflective light to send signals, better stick with that whistle.
Flares and flare guns make great signal devices and can double as fire starters if you’re in a lurch when making a campfire. They don’t cost much and won’t weigh you down, but be mindful of setting them off in areas that are windy, dry or predisposed to wildfires. Ditto setting campfires to signal your location if conditions aren’t right.
If you still need extra insurance, you can consider getting a personal locator beacon.
End Of The Trail
By acknowledging the fact that you could get lost even before you pack your compass, maps and gear, you prepare for your experience with more wisdom. Even if you only plan to orienteer for the day, bring along essential items as insurance in case your stay lasts longer than planned: a solar blanket, energy bars and matches.
Once you determine that you’re hopelessly lost despite trying everything in your repertoire, your natural inclination may be to try and walk your way out of your dilemma. But a little discipline, please. Instead, hunker down and wait to be found – especially if night is falling. Why wait? Because you stand to make things worse if you aimlessly wander and squander your energy.
A study by the Max Planck Institute for Biological Cybernetics in Germany proves that when people get lost in the woods, they literally walk in circles. It’s human nature, say scientists reaching this surprising conclusion back in 2009 and reported by myriad media outlets.
Getting lost sets off all sorts of physiological bells and whistles in the brain. Don’t add to your stress levels by forcing it to sort through sensory stimuli that’s going to take you where you don’t want to go–even if you have to fight the urge to explore. Instead, breathe deeply, eat an energy bar and remember that panic can stop you from thinking clearly and doing what’s necessary to stay safe and sane until you’re found.
You did bring a book and a flashlight in your backpack, didn’t you?
Paul Turner is one of the original writers behind TakeOutdoors, known for his clear, practical guides on camping, hiking, and outdoor gear. Since starting TakeOutdoors, his articles have helped readers choose reliable equipment, understand key outdoor skills, and feel more confident on the trail. Paul’s hands-on approach comes through in every piece he writes, focusing on real experience, simple explanations, and advice that works in the field. His goal has always been to make getting outside easier for anyone who wants to explore.


